After launching Qubo Dashcam Pro (review) and Qubo Smart Tyre Inflators (review), Qubo has entered the content creators’ accessories market with the launch of the Qubo Handheld Gimbal in India. It’s an entry-level gimbal that comes with competitive pricing, a Foldable design, Multiple recording modes, One-click portrait/landscape transition, Table mount support, Up to 5 hours of battery life, Face & object tracking, and many more. I have been using the Qubo Gimbal for the past fifteen days, and check out my detailed review below.

Qubo Gimbal Full Specifications
- Tilt angle: 100°
- Roll angle: 325°
- Pan angle: 340°
- Max load: 280 grams
- Controllable tilt angle: +30°/-30°
- Controllable roll angle: +90°/-90°
- Controllable pan angle: +240°/-240°
- Battery: 2000mAh
- Charging: 5V/2A, Support fast charging
- Charging time: 1 hour 20 minutes
- Battery life: 5 hours
- Connectivity: Bluetooth with QuboPro app
- Compatibility: Phones with 180mm (D), 55-90mm (W), 9.5mm (T)
- Gimbal dimension (Unfolded): 250 x 130 mm
- Gimbal dimension (Folded): 152 x 110 x 46.6 mm
- Net weight: 355g
- Warranty: Gimbal (1 year), Battery (6 months), USB Cable (3 months)
- In the box: Gimbal, Case, Mini tripod mount, USB-C cable, Wrist strap, Manual
In the Box
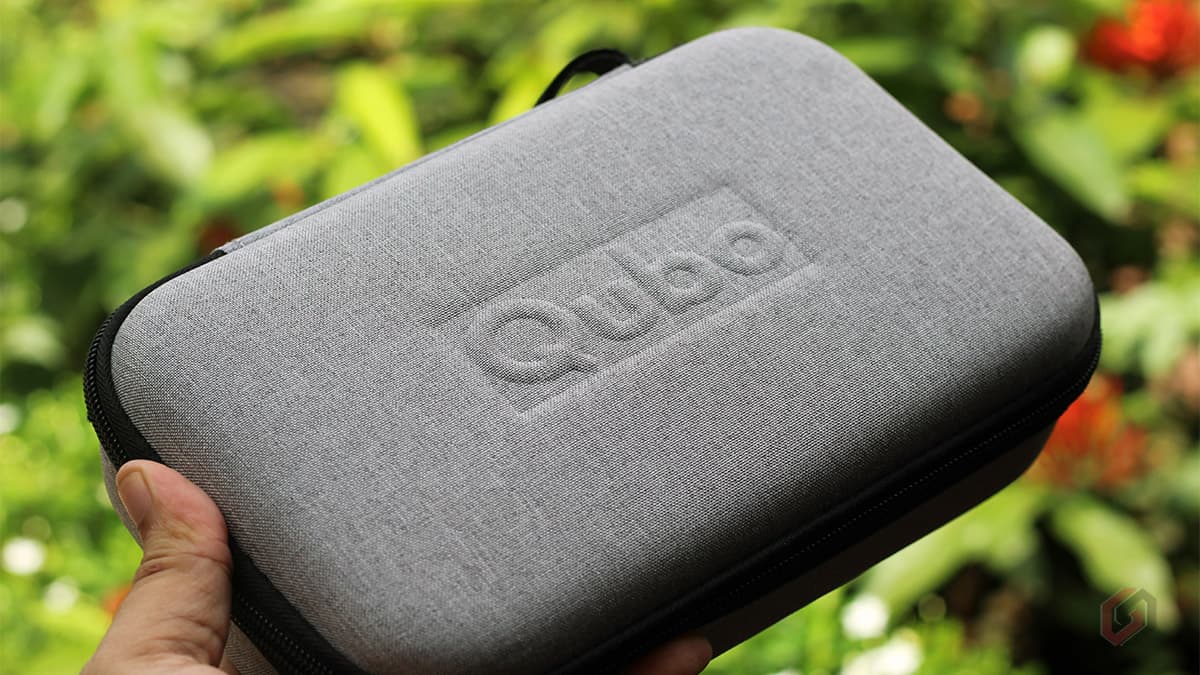
The Qubo Gimbal has a slightly bigger package to accommodate the Gimbal, carry case, and tripod mount. Qubo has supplied a high-quality carry case that has plenty of space. It includes a dedicated space to keep the Gimbal and Tripod mount. It also includes a mesh pocket to keep the cable, power bank, or even your phone. Qubo hasn’t provided a user manual inside the box, but there is a leaflet with a QR code that helps you download the Qubo Gimbal manual and register the device to avail of the warranty.

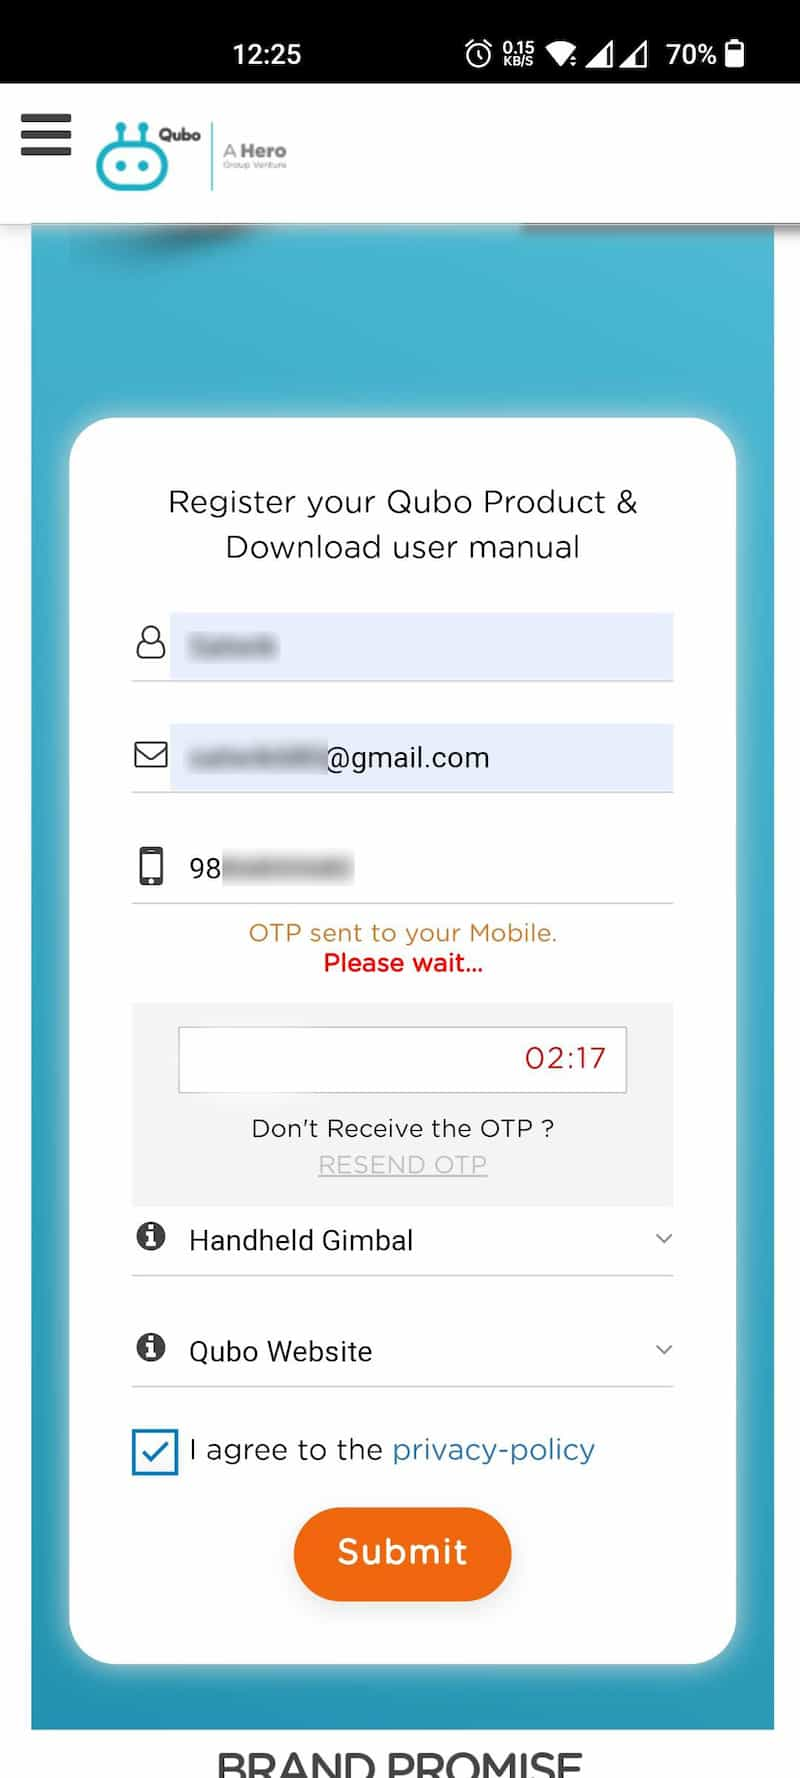
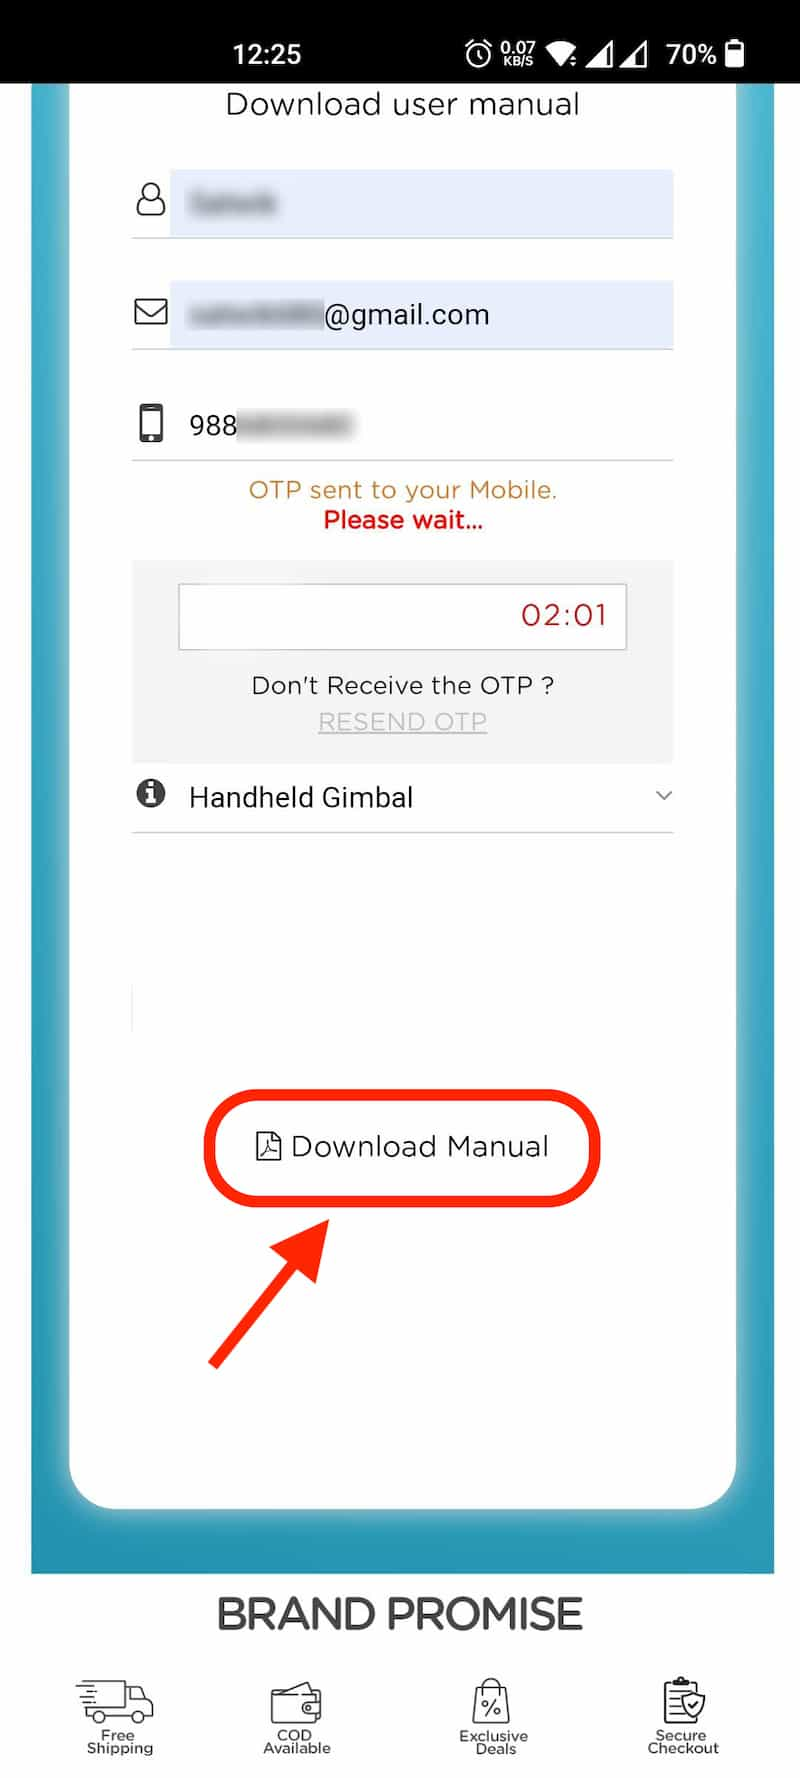
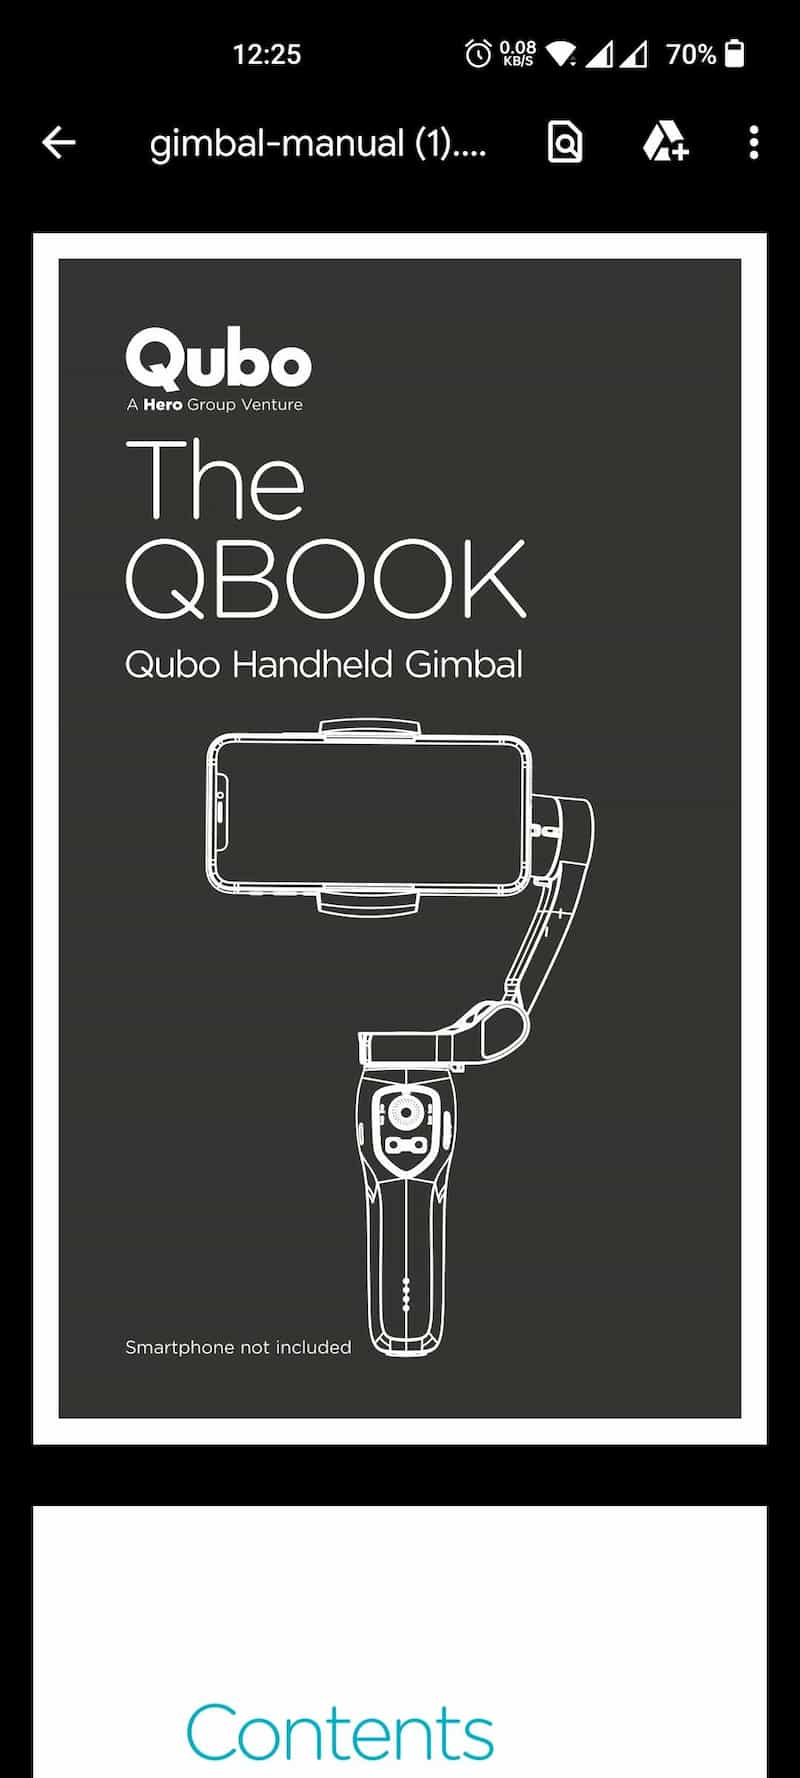
Once you scan the QR code, it will redirect you to the Qubo website, and you’ll be asked to register the product by entering your Name, Email, and Mobile number. Next, you need to select the device model and where you purchased the device. After entering the mobile number, you’ll receive an OTP on your phone. Your device will register in the Qubo servers once you enter the OTP. Post verification, you’ll get the option to download the Qubo Gimbal manual. Registration is quick, and you hardly need a minute or two.

Qubo Gimbal Overview
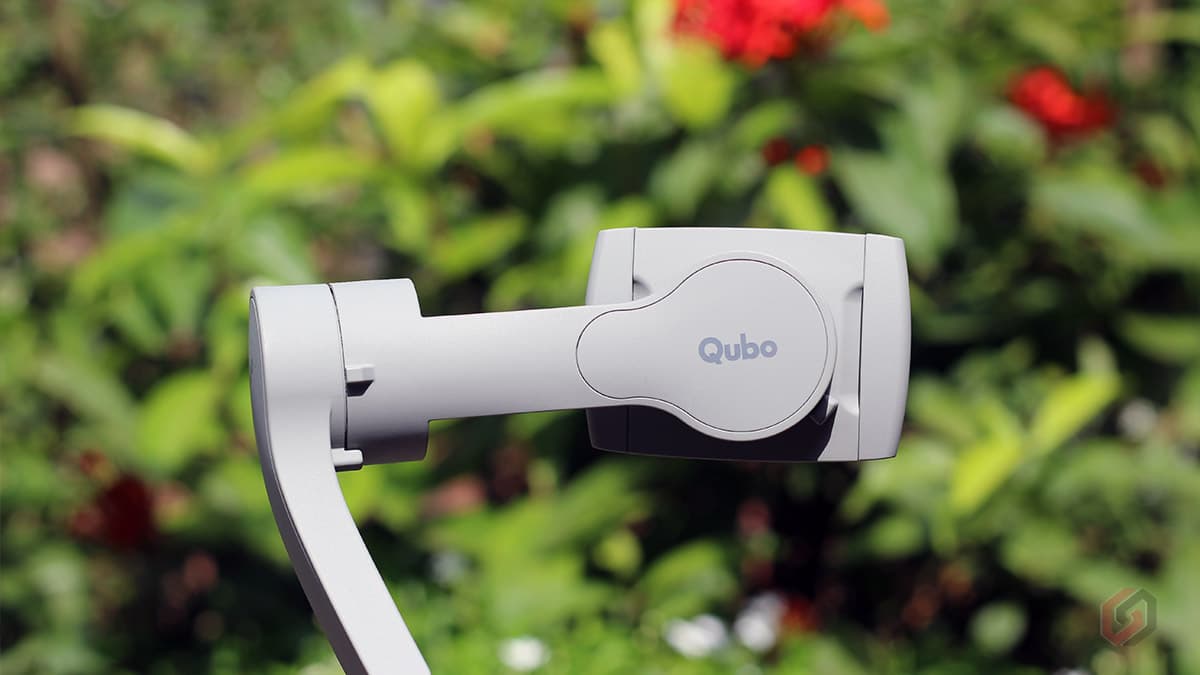
The Qubo Gimbal is completely made of premium plastic, and you’ll get a rubberized handgrip on the rear side of the handlebar for better gripping. It has a simple yet minimalistic design that includes just a Qubo logo on the Roll axis. Overall, the design feels very premium, and the materials’ quality is impressive.
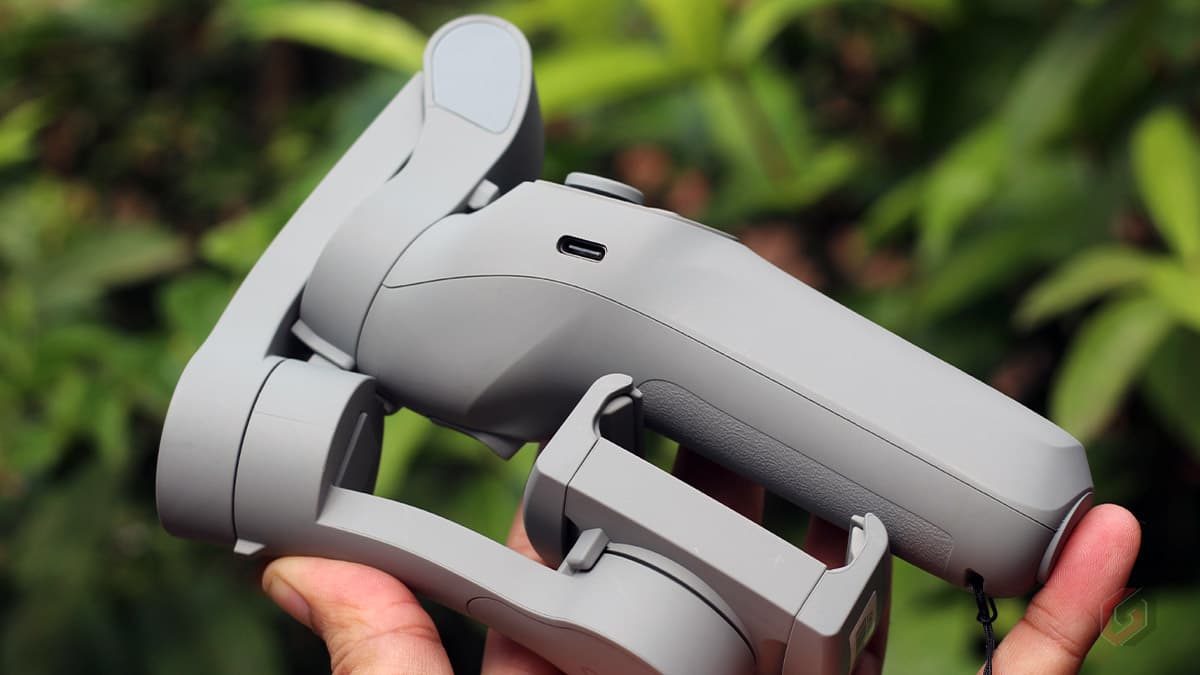
The Qubo Gimbal features a foldable design that helps you keep the Gimbal easily in your pockets. Qubo has also provided a lock that keeps the device in its position when folded. Once folded, you can easily carry the Gimbal while on the go.
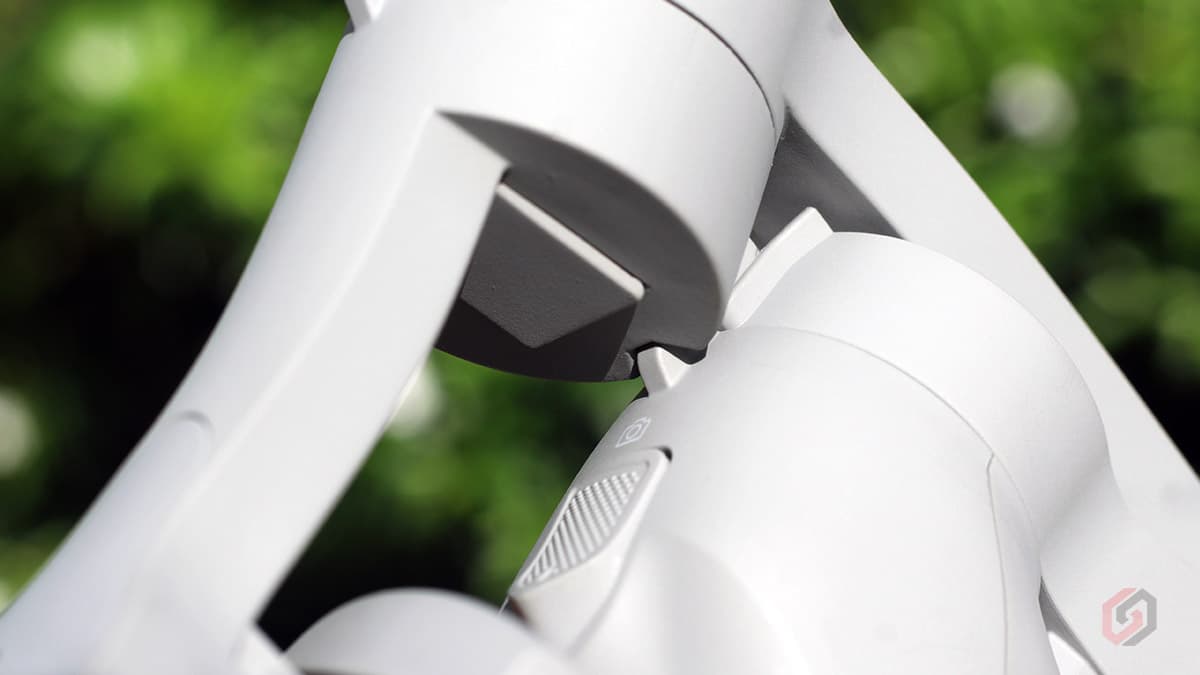
The Gimbal has a lightweight design and weighs about 355 grams. According to Qubo, the Gimbal supports a payload of 280 grams. This means you can connect any smartphone to the Gimbal that weighs a maximum of 280 grams. Nowadays, most smartphones weigh less than 250 grams, and you need not worry about the payload.
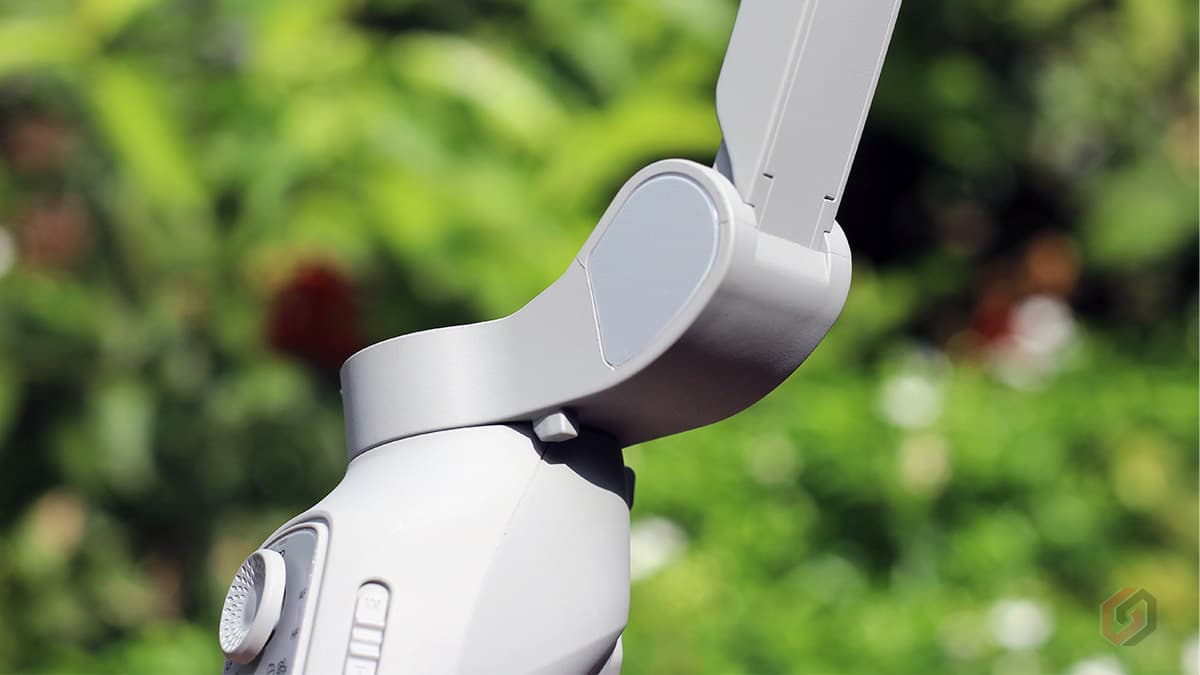
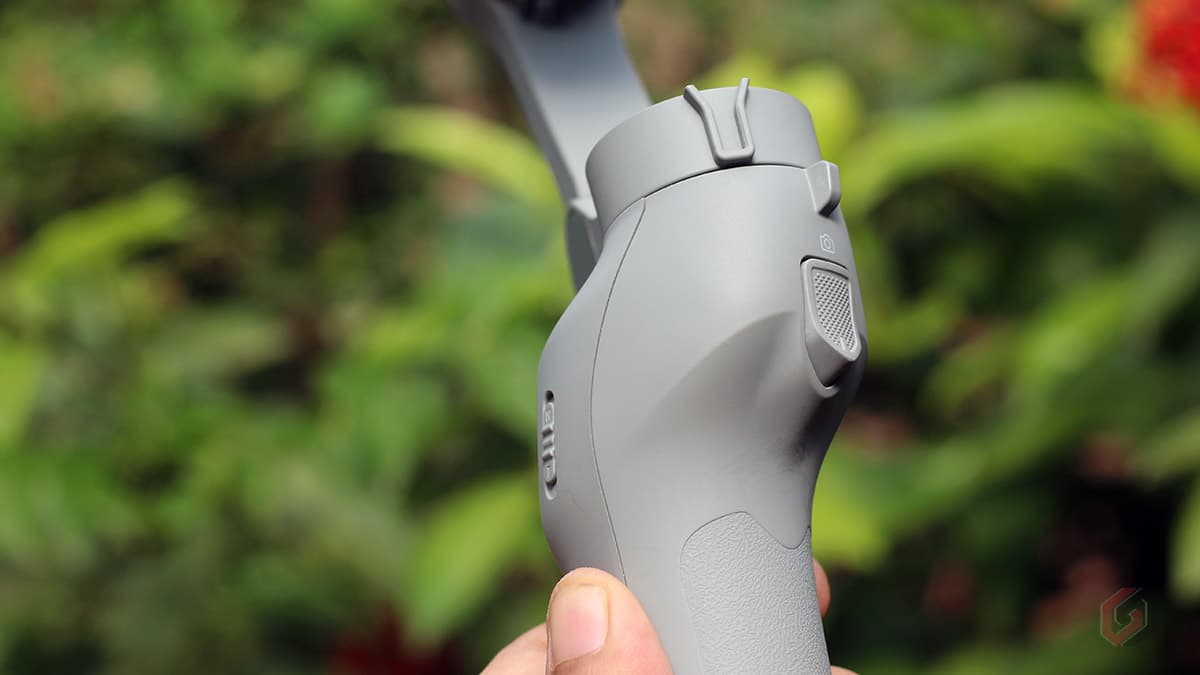
It includes a fixed phone holder, and it is not removable. Even though the phone holder is made out of plastic, feels solid and securely holds the device in its position. Another important thing I observed is the phone holder design. The jaws of the phone holder are curved on the front, preventing accidental button clicks. If the jaws are flat, sometimes accidental button push might interrupt the recordings. So you’ll not experience such issues in the Qubo Gimbal.
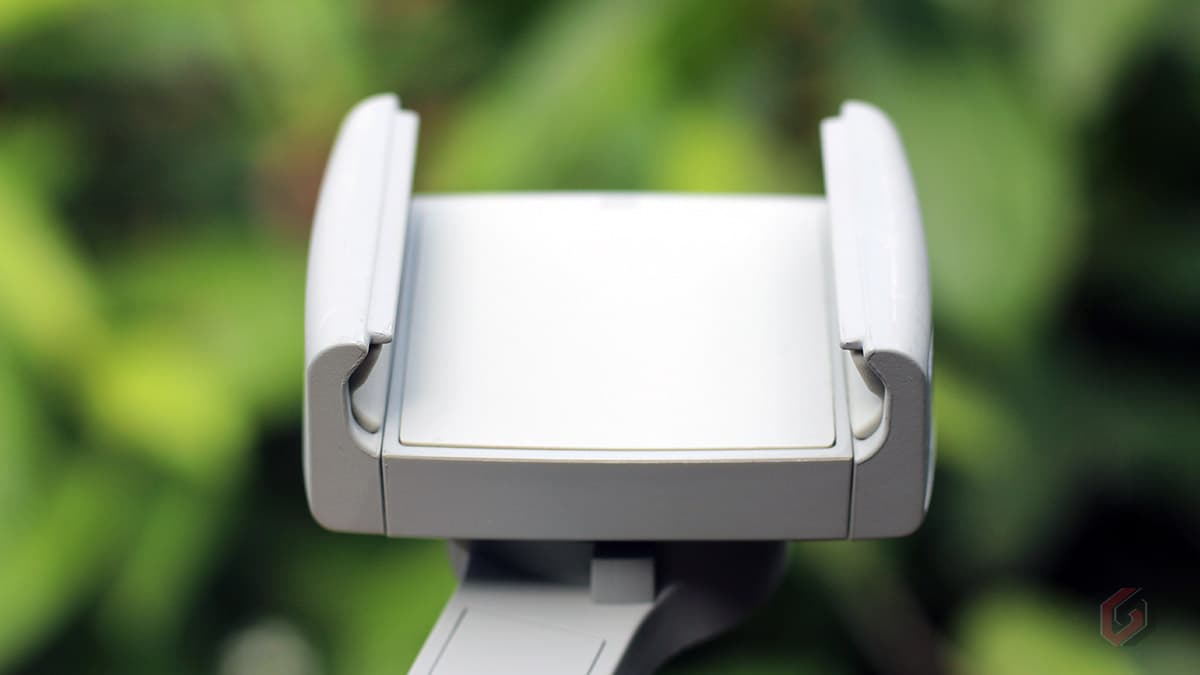
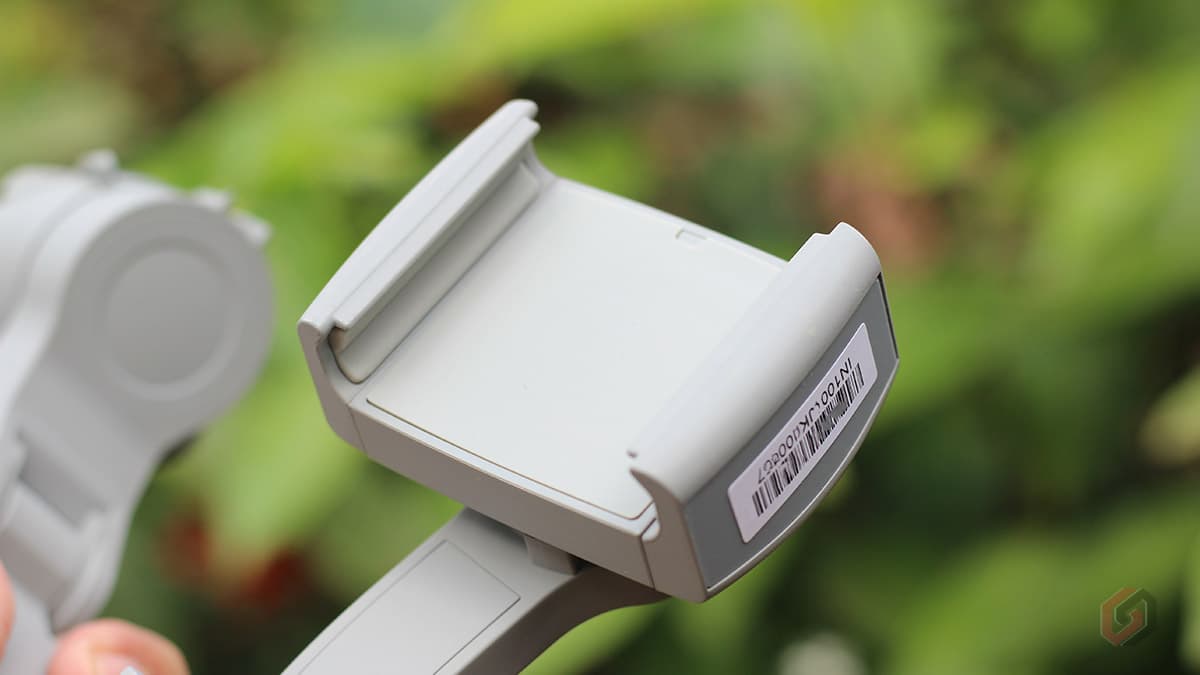
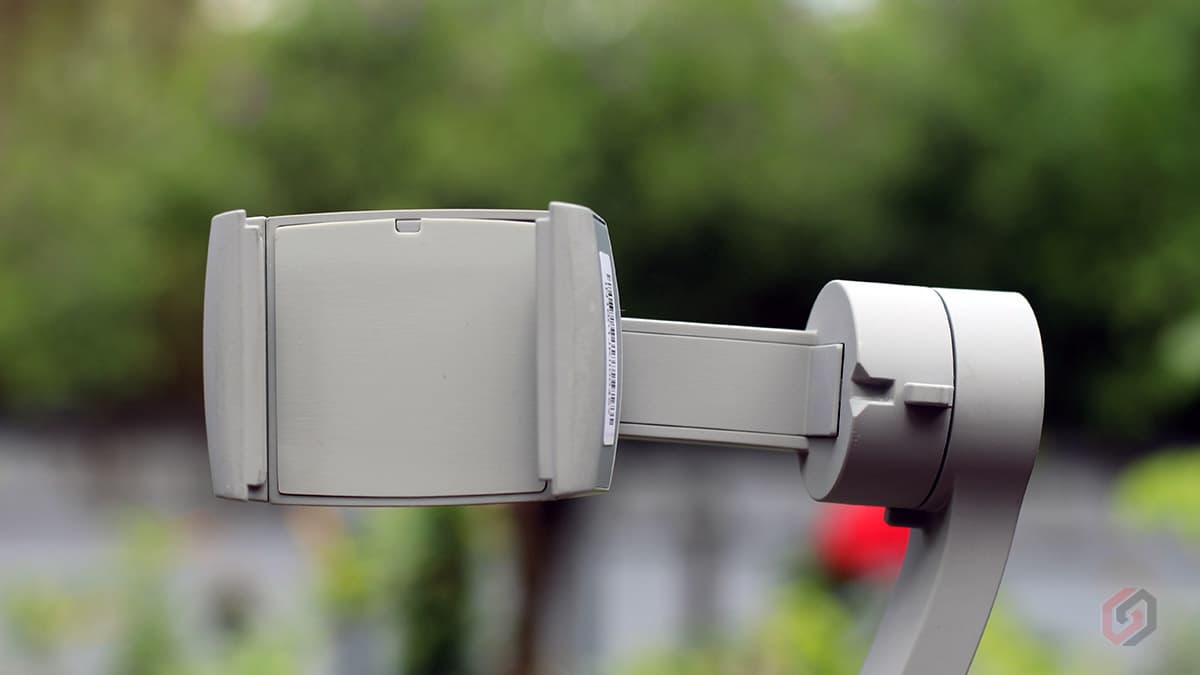
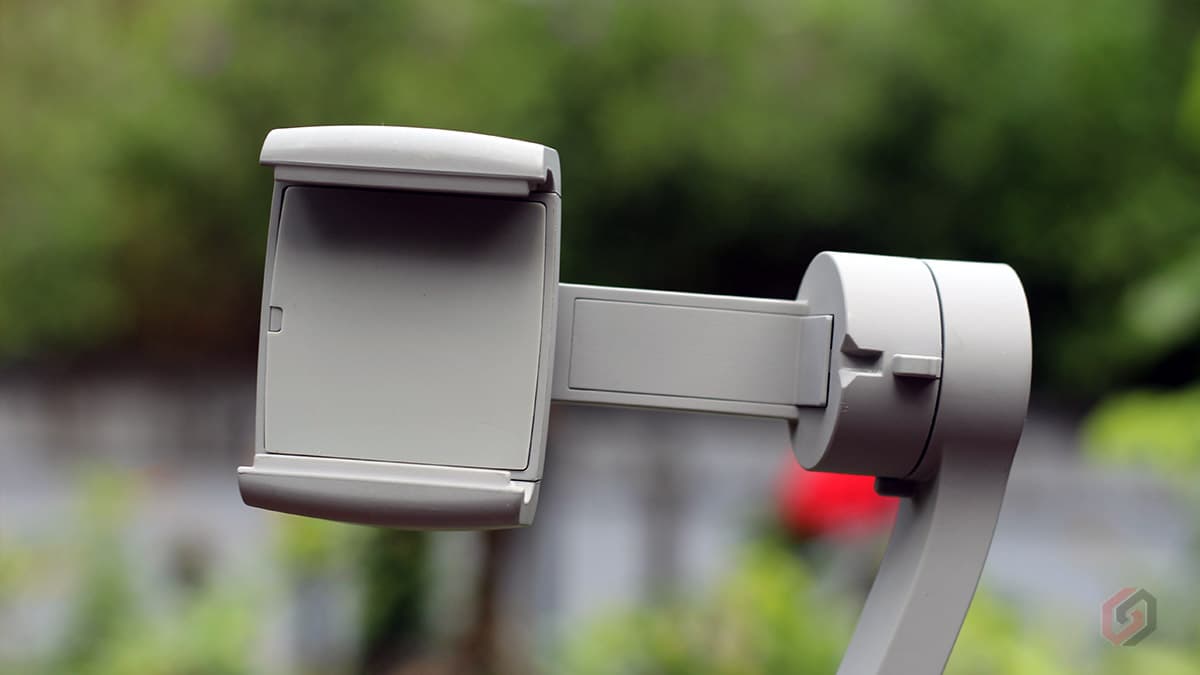
On the right of the Gimbal, you’ll find a USB-C port for charging, and on the left, there is a Zoom slider that allows you to zoom in and zoom out while recording a video. On the front, you’ll find a 4-way joystick that allows you to move the phone holder (Roll axis) in four directions. There are two buttons – a Mode selector and a Multi-function power button. The mode selector helps switch the modes, and the power button helps your turn the Gimbal ON/Off, change the holder orientation, etc.
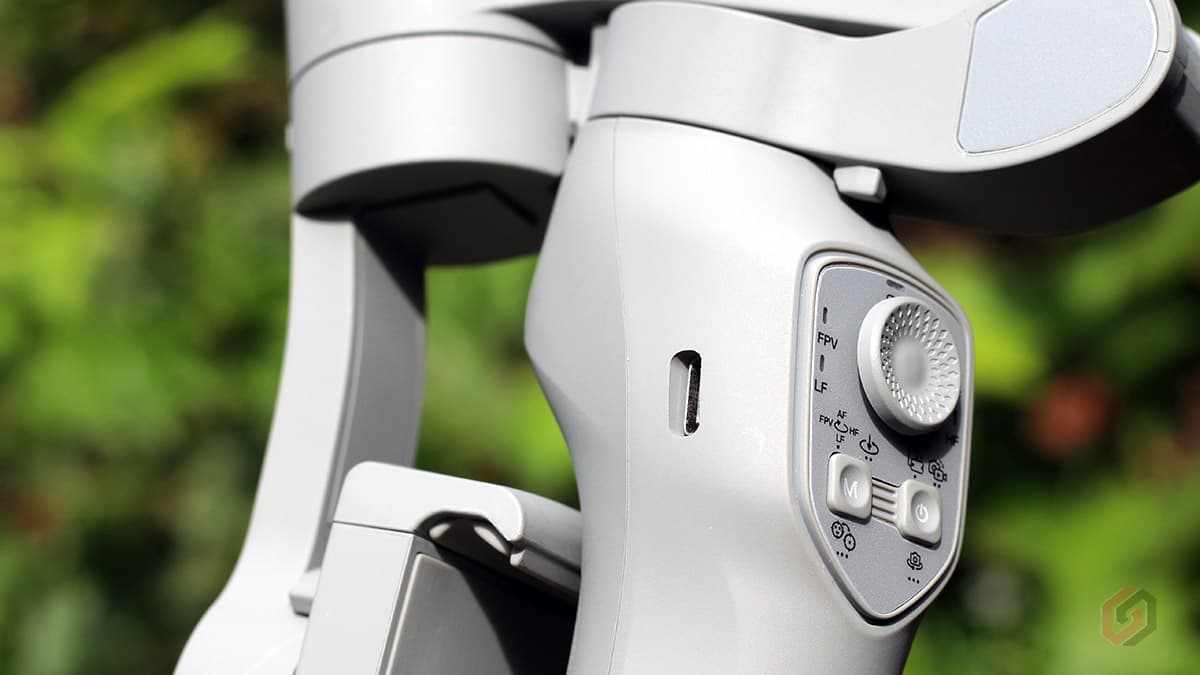
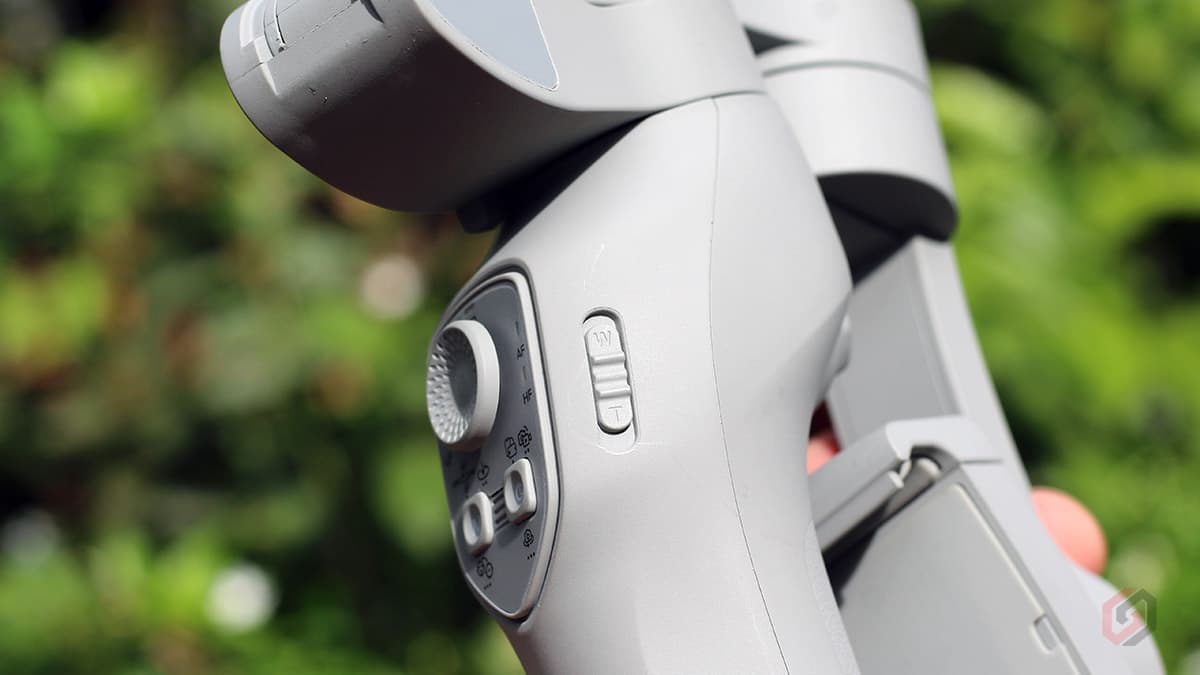
All the buttons, including the power button and shutter buttons, are placed in the right position and easily accessible without any effort. Even the zoom button is placed ergonomically, and you can easily operate it using your thumb.
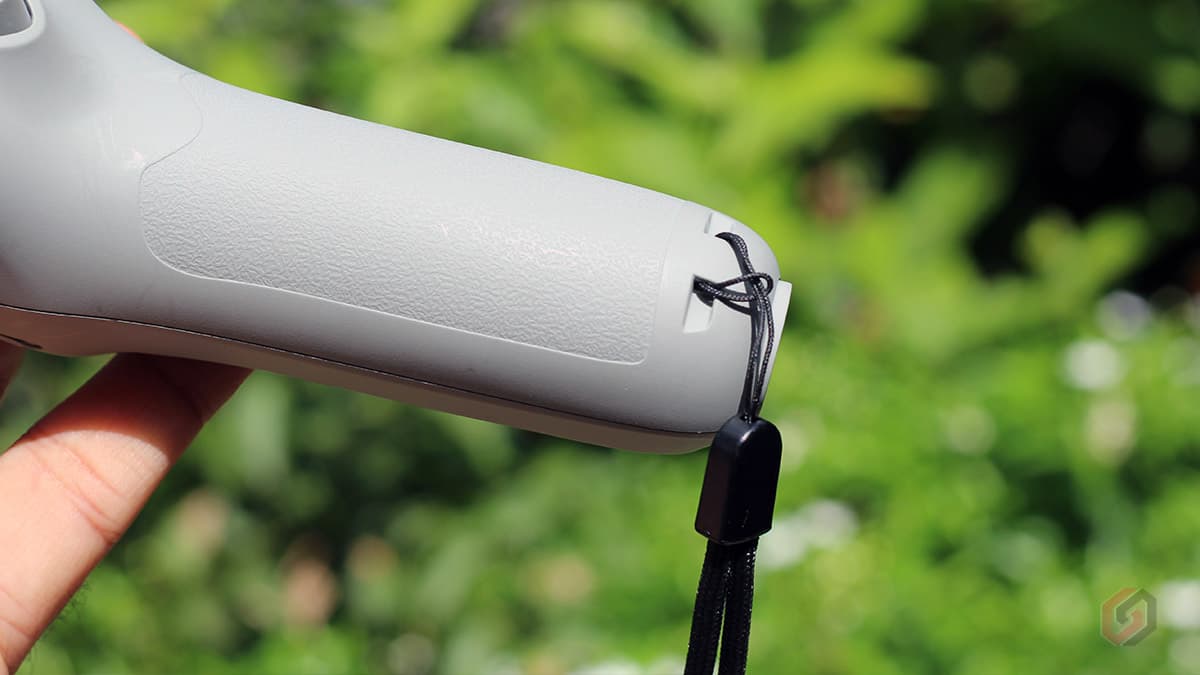
Qubo has provided a lanyard hole on the rear bottom of the handlebar. So you can attach a Wrist Strap or Loop to secure the Gimbal while shooting. In addition, Qubo has provided a good-quality Wrist Strap inside the box.
Qubo Gimbal Modes and Buttons
The Gimbal is divided into four parts – Tilt Axis, Roll Axis, Pan Axis, and Handlebar. The Gimbal supports four axis modes – All Follow (AF), Half Follow (HF), Lock Full (LF), and First-Person View (FPV).
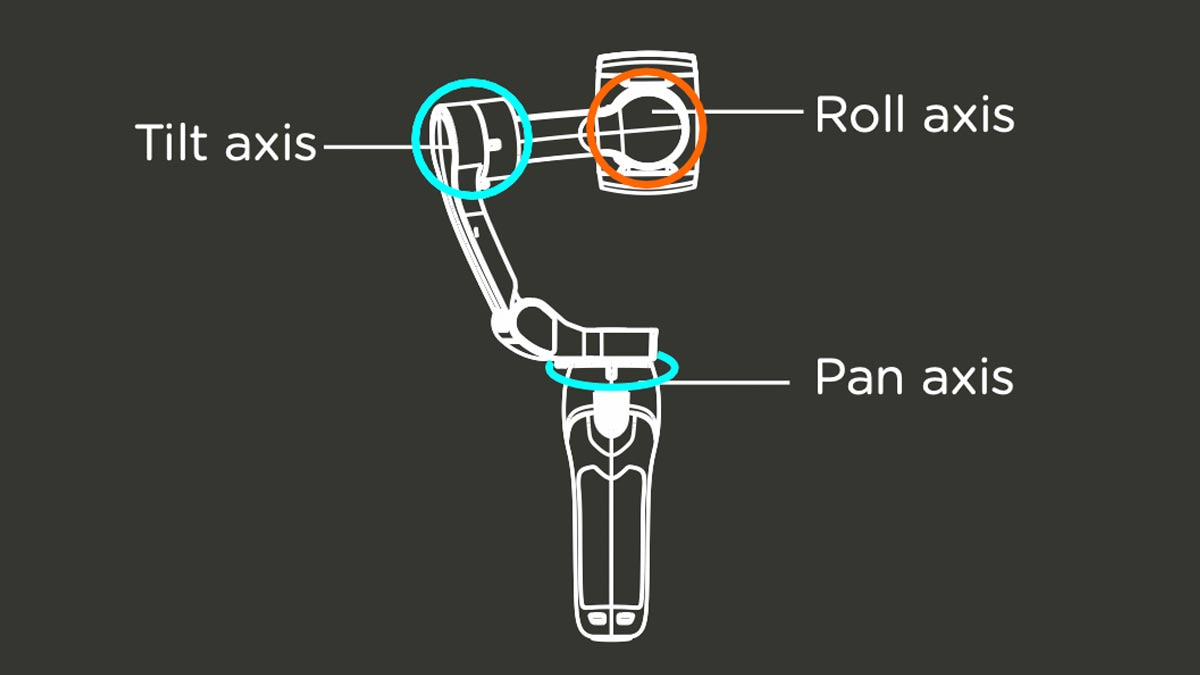
- All Follow (AF): Only the Roll axis is locked, and the pan (left/right) and tilt (up/down) will follow the movement of the handle.
- Half Follow (HF): Only the Tilt & Roll axis are locked. The Pan axis rotates (left/right) smoothly with the handle.
- Lock Full (LF): Pan, Tilt, and Roll axis are all locked. The camera remains still and stable. This means the camera cannot follow the movement of the handle.
- First-Person View (FPV): Pan, Tilt, and Roll axis follow the movement of the handle.
The four modes mentioned above can be selected from the Gimbal or the Qubo Camera app. Apart from these four modes, the Qubo Gimbal also supports two more modes: Sports and Walking. These two modes can be selected only in the Qubo camera app. Check out the functionality of these buttons in detail below.

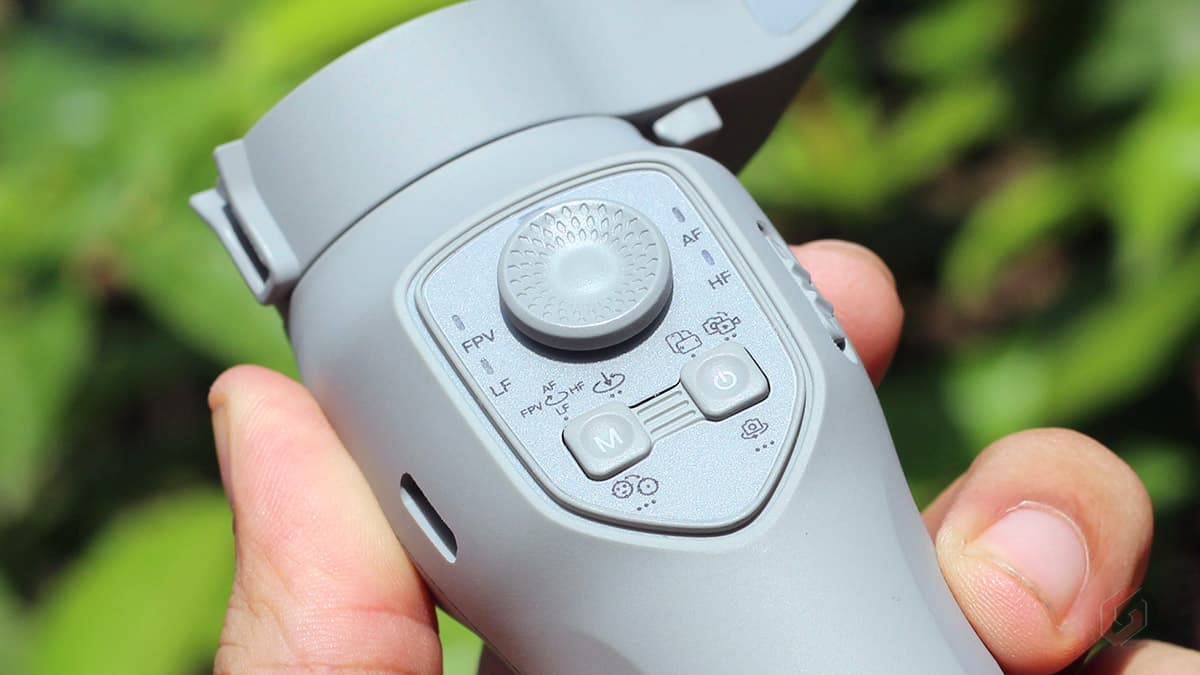
| Button | Location | Work / Operation |
|---|---|---|
| Joystick | Front | Left, Right, Up, Down movement of the phones holder (Roll axis) |
| Mode switch button | Below Joystick (Left) | Single press – Switch Gimbal modes Double press – Bring the phone back to center |
| Power button | Below Joystick (Right) | Single press – Switch horizontal & vertical modes Single press – Restart Gimbal when it is stuck Press one second – Power on/off Double press – Switch photo/video mode Triple press – Switch camera between front/rear |
| Mode indicator (LED) | Left and Right side of the Joystick | Shows the selected Gimbal mode FPV, HF, AF, and LF |
| Bluetooth indicator (LED) | Above the Joystick | Slow flash – BT is not connected Fast flash – BT is connecting Light On – BT is connected |
| USB-C port | Left side of the Handlebar | Charging the Gimbal |
| Zoom slider | Right side of the Handlebar | Push the slider up/down to zoom in and zoom out |
| Charging LED | On the Handlebar (Bottom) | Four lights On – 100% Fourth light flashing – 76%-99% Three lights are On – 50%-75% Two lights are On – 26%-49% One light is On – 0%-25% |
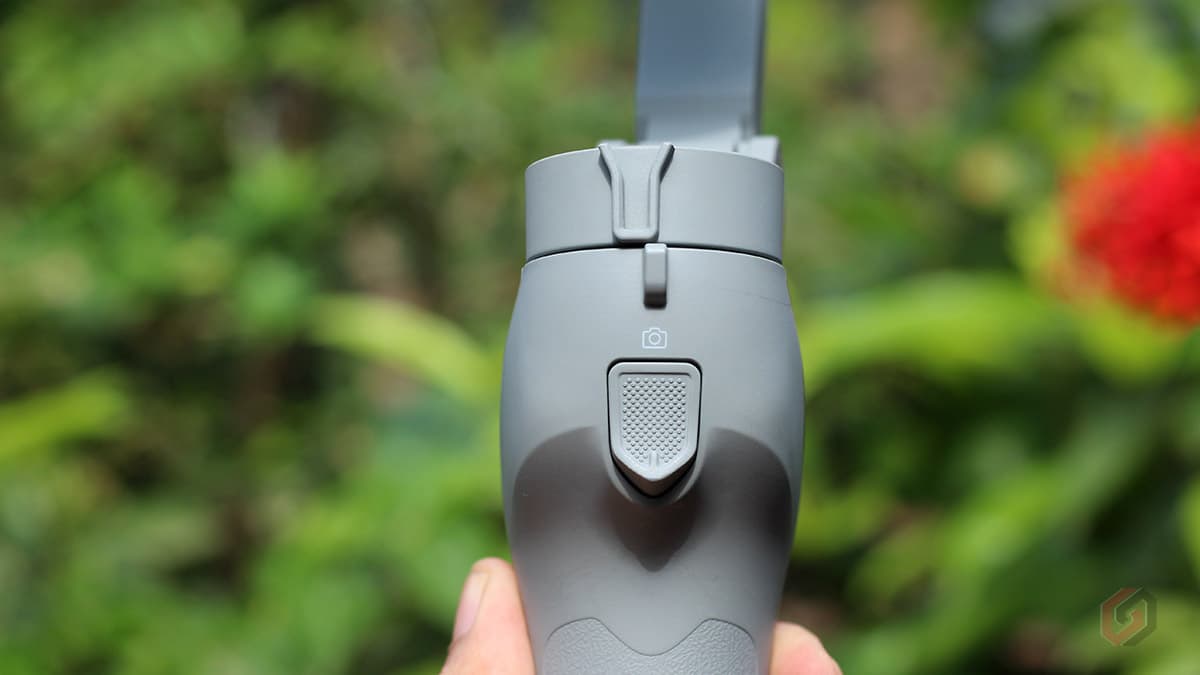
| Shutter button | Rear Side of the Handlebar (Top) | Take photos, Start/stop video recording |
| Lanyard hole | Rear Side of the Handlebar (Bottom) | Attach the wrist strap or loop |
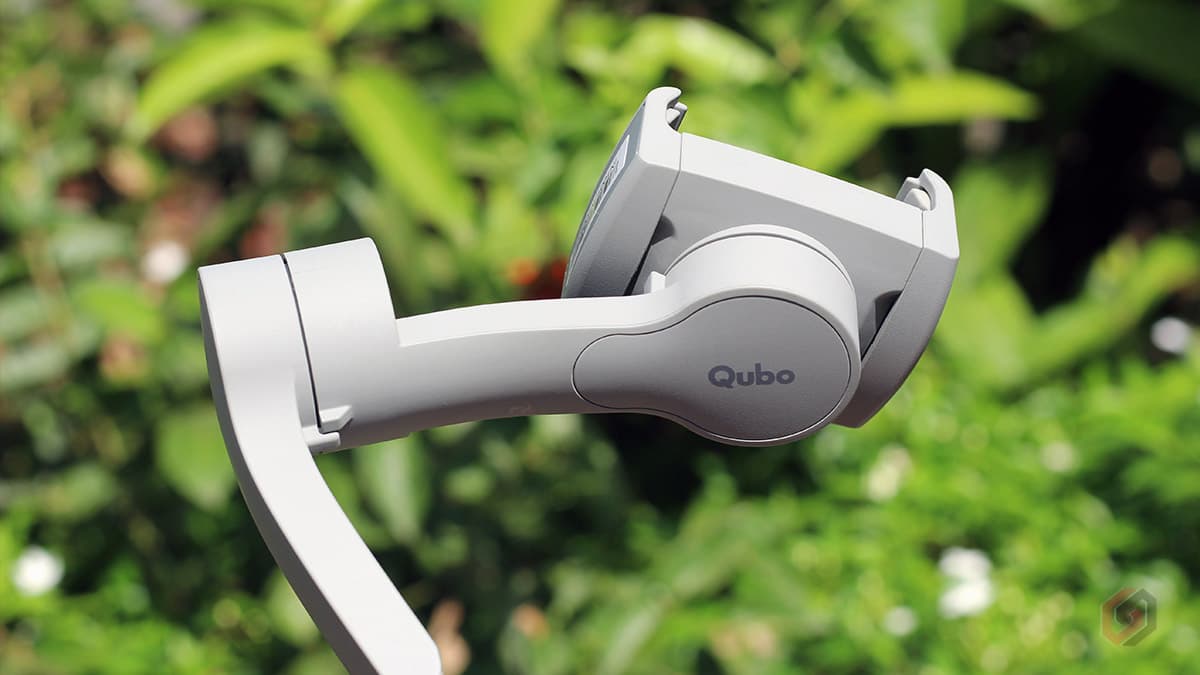
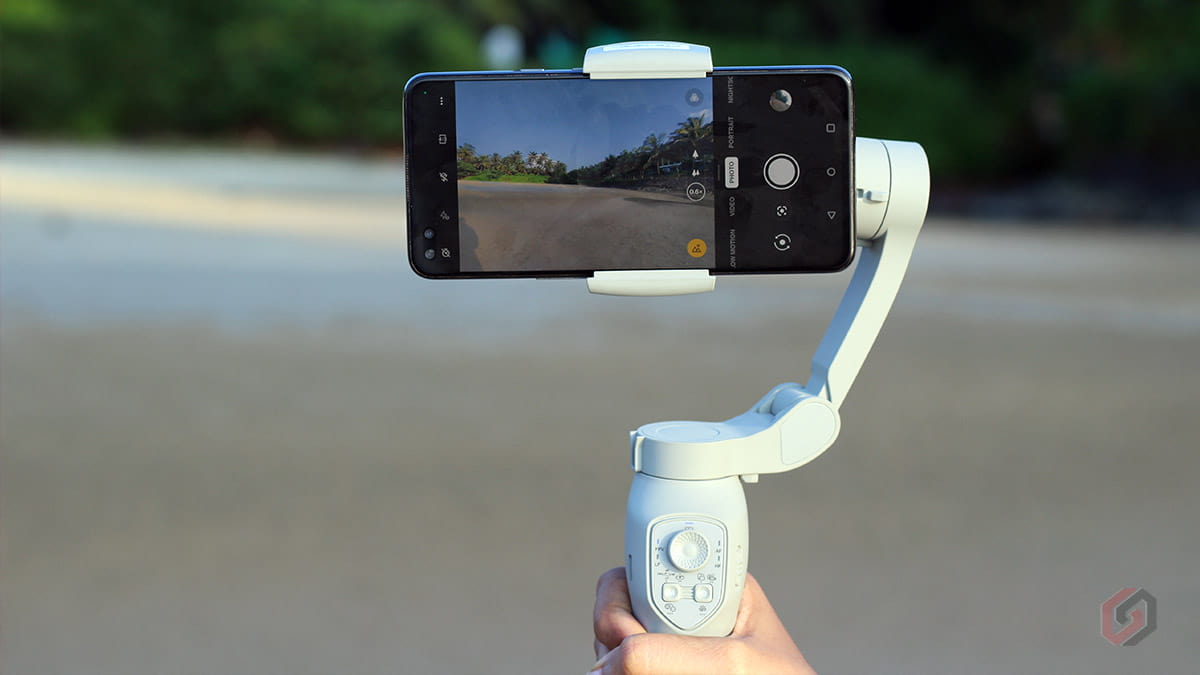
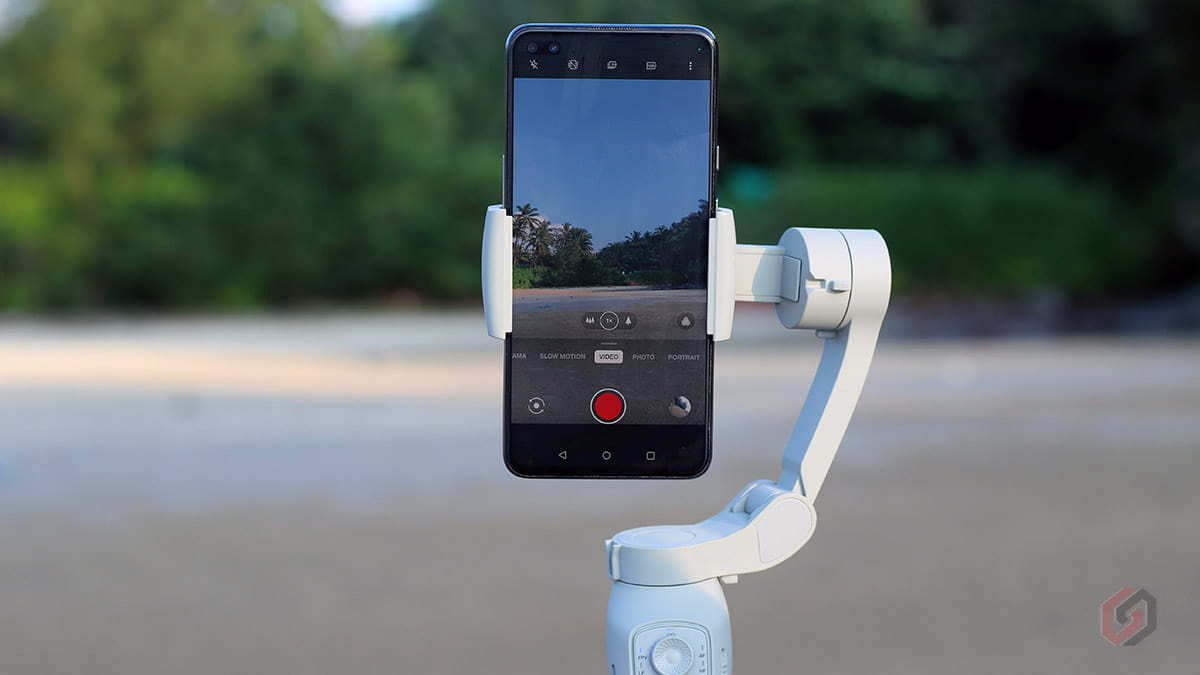
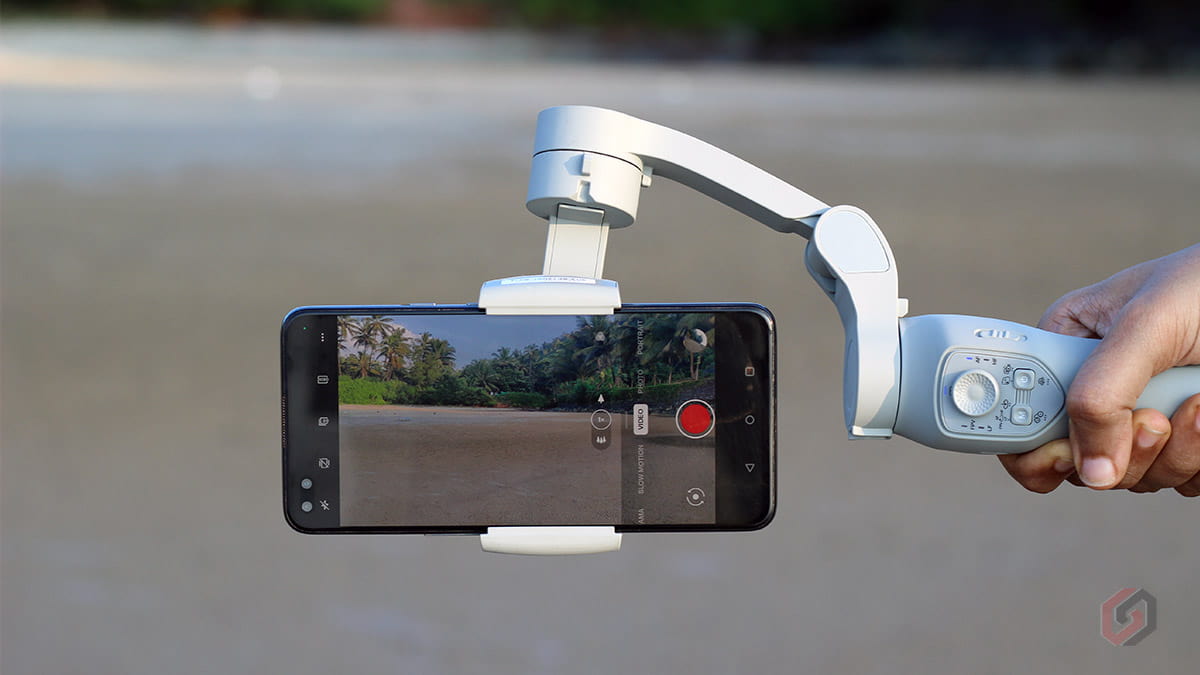
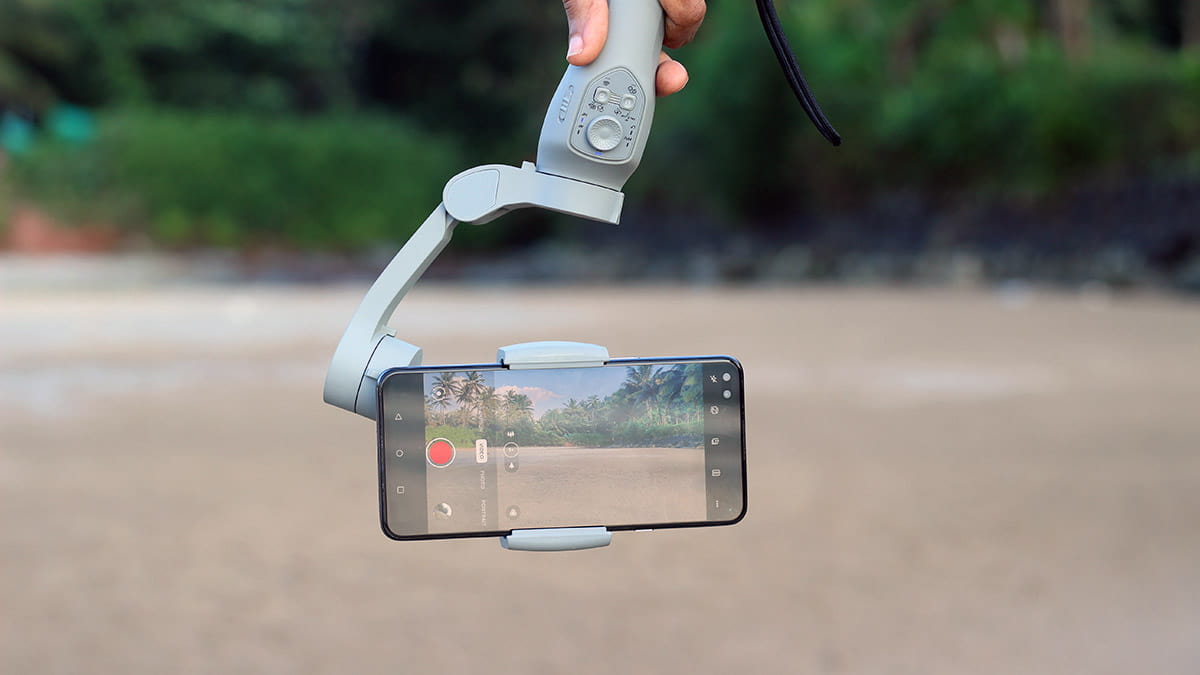
There are four ways to handle the Qubo Gimbal – Landscape, Portrait, Underslung, and Side Grip.
- Portrait: Set the device to portrait mode
- Landscape: Set the device in landscaper orientation
- Underslung: Hold the Gimbal upside down to enter underslung mode to capture images from a low position.
- Side Grip: Rotate Gimbal to the right or left by 90° to go from upright to side grip mode. It works with both landscape and portrait modes.
Tripod Mode
One of the best parts of the Qubo Gimabl is the tripod mode. Qubo has bundled Mini Tripod Stand inside the box, which is portable, detachable, and foldable. You can easily fix this tripod mount to the end of the handlebar in less than 10 seconds with the help of a thread arrangement.
In case you missed it: Qubo Dashcam Pro Review: An Excellent Made-in-India Dashcam
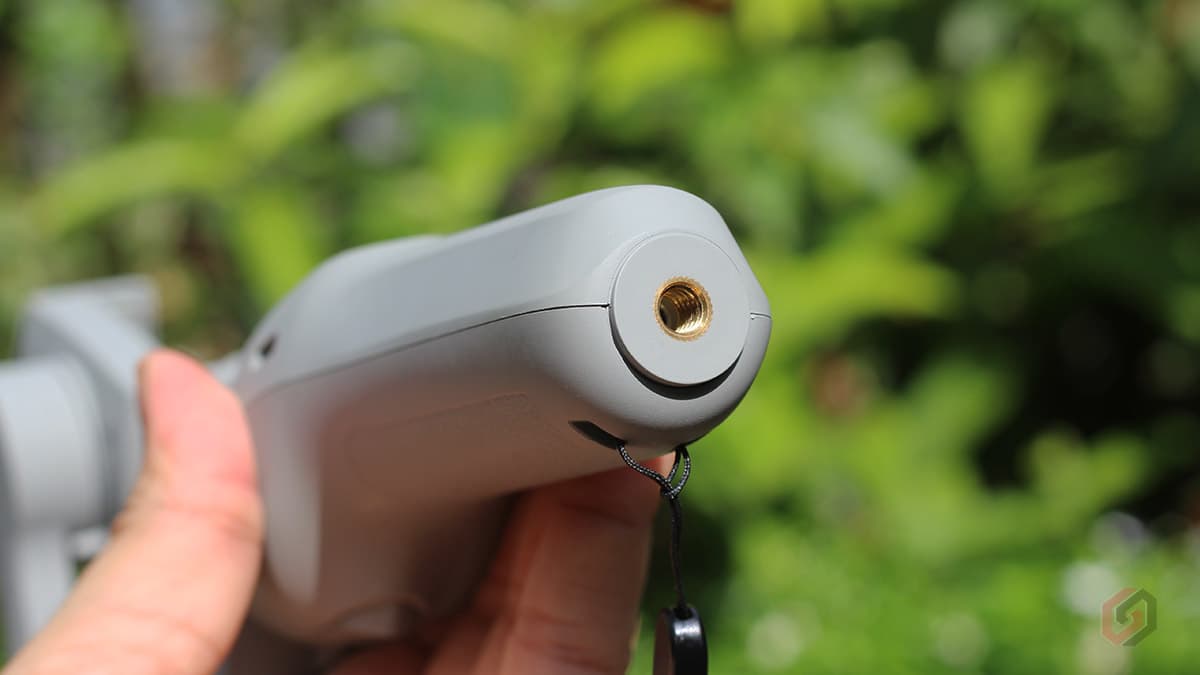
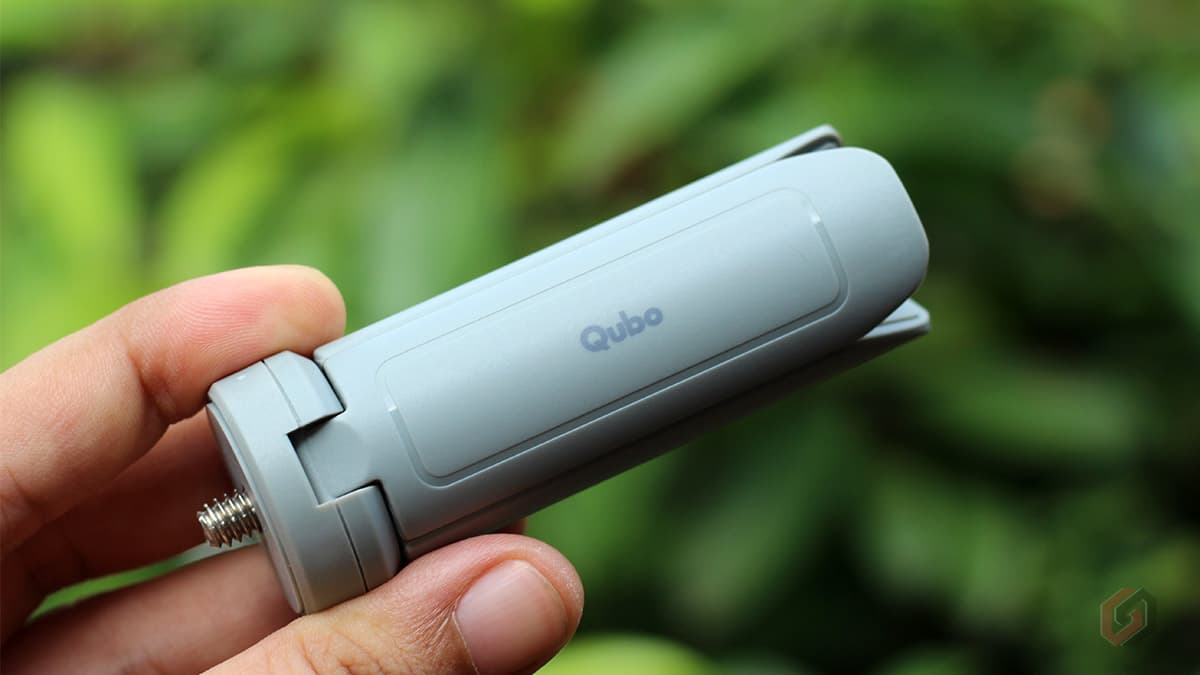
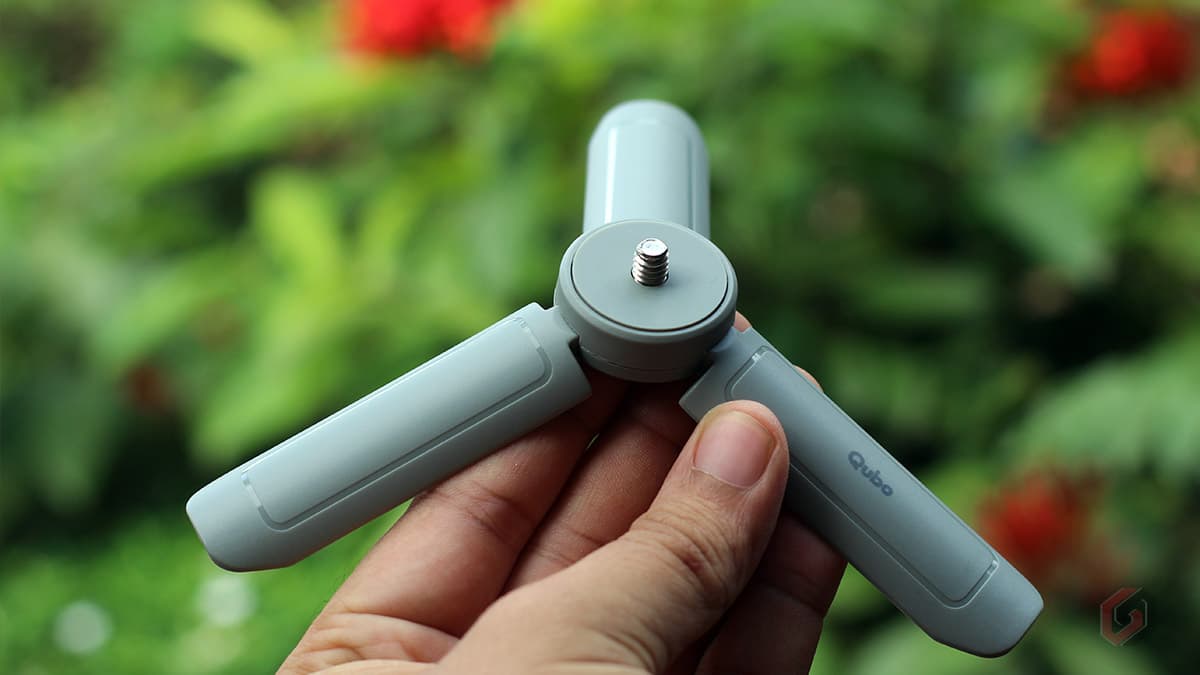
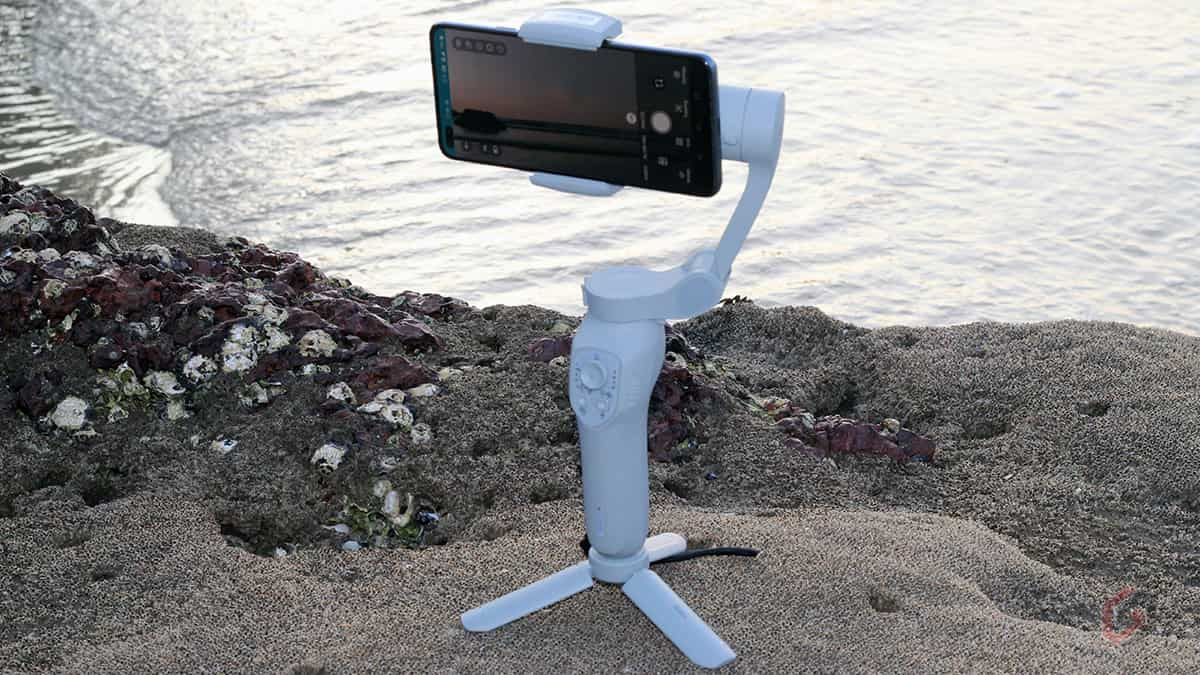
You can use the Gimbal as a tripod, which becomes handy while shooting a timelapse video, slow-motion video, live stream an event, and many more. You can even use your phone as a webcam (3rd party software support needed) with the help of a tripod stand.
Qubo Gimbal Setup and App Configuration
Connecting the Qubo Gimbal to your Android or iPhone is very simple. First, you need to download the QuboPro app from Google Play Store or Apple AppStore to get started. Once you download, you need to create a Qubo account. You can check out this link for more information on creating a Qubo account. If you already have a Qubo account, log in using the username and password. Once you log in:
- Turn on the Gimbal by pressing the Power button for a second
- Turn on Bluetooth on your phone
- Tao on the Menu icon on the left side and select ‘Add device‘
- Select the ‘Qubo Gimbal‘ option from the list of options
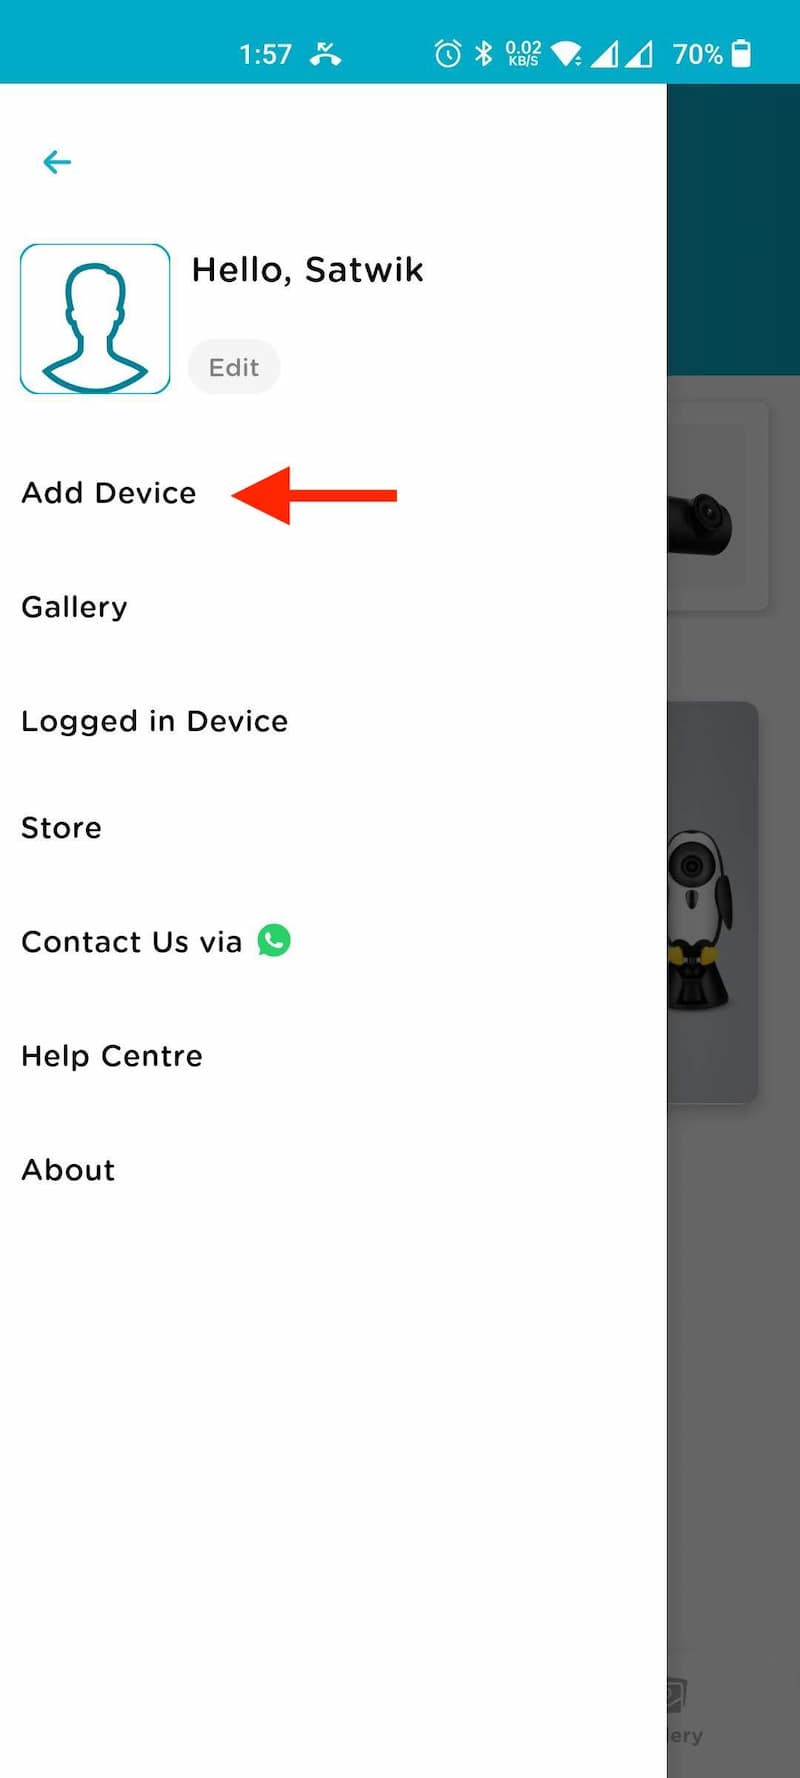
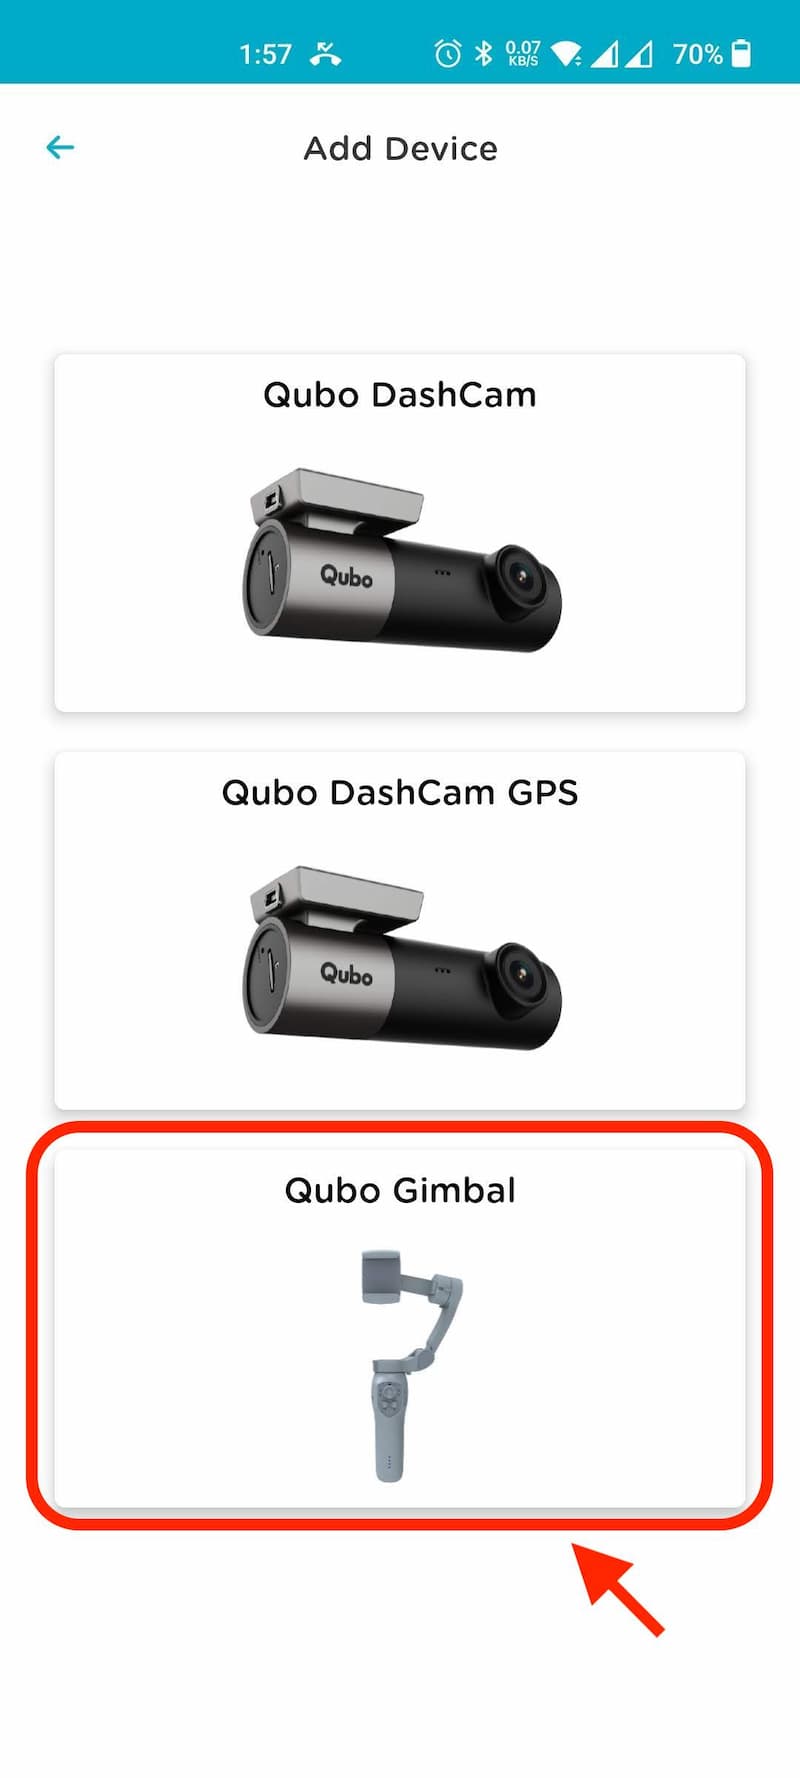
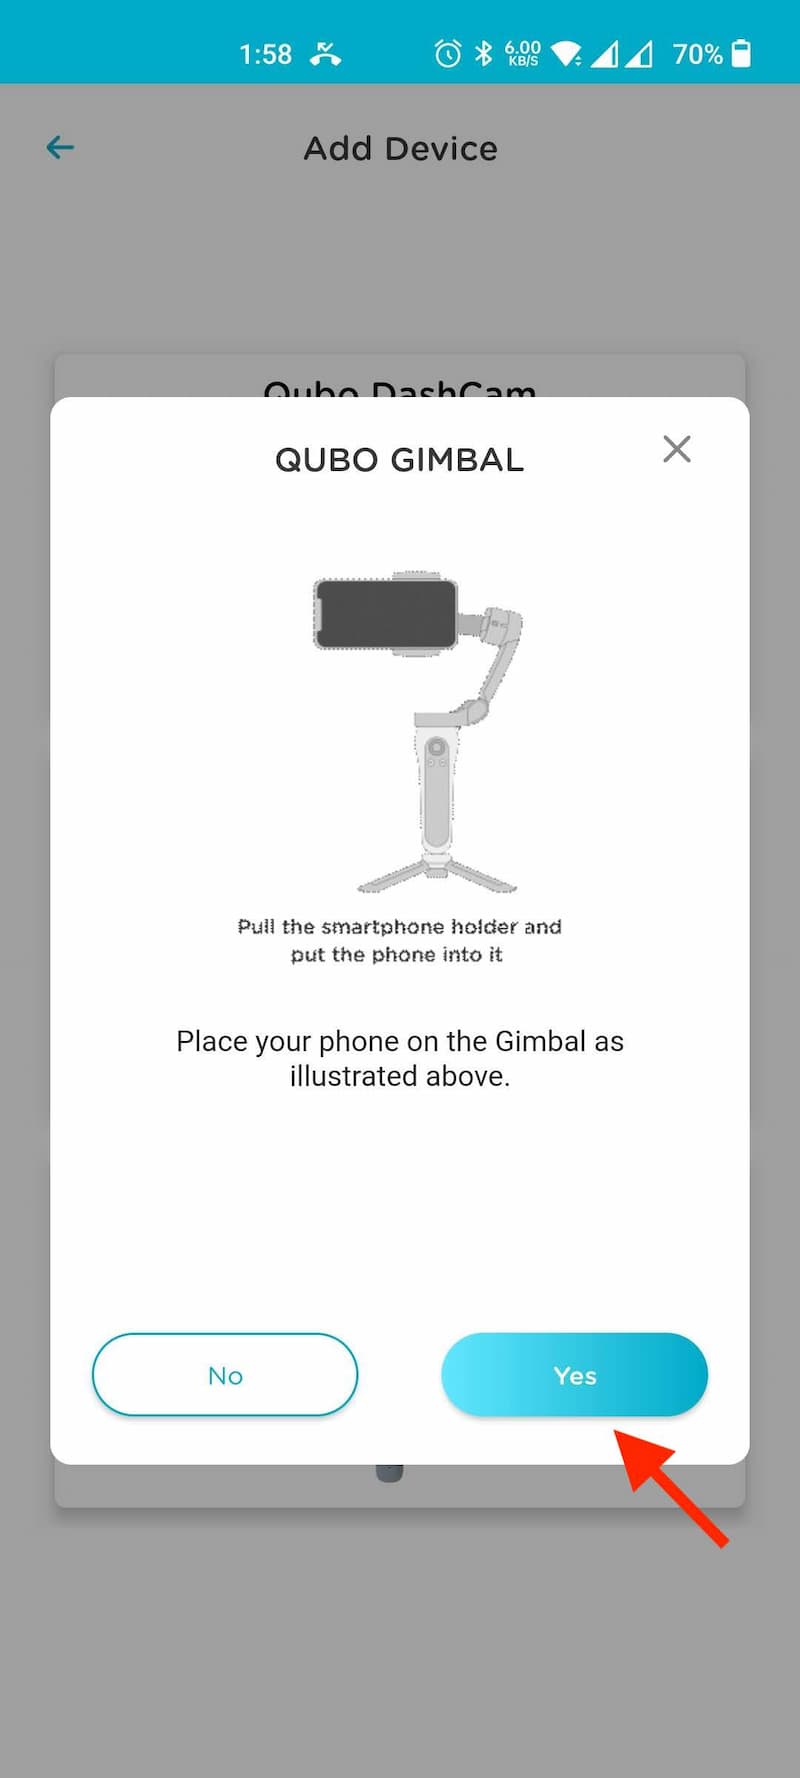
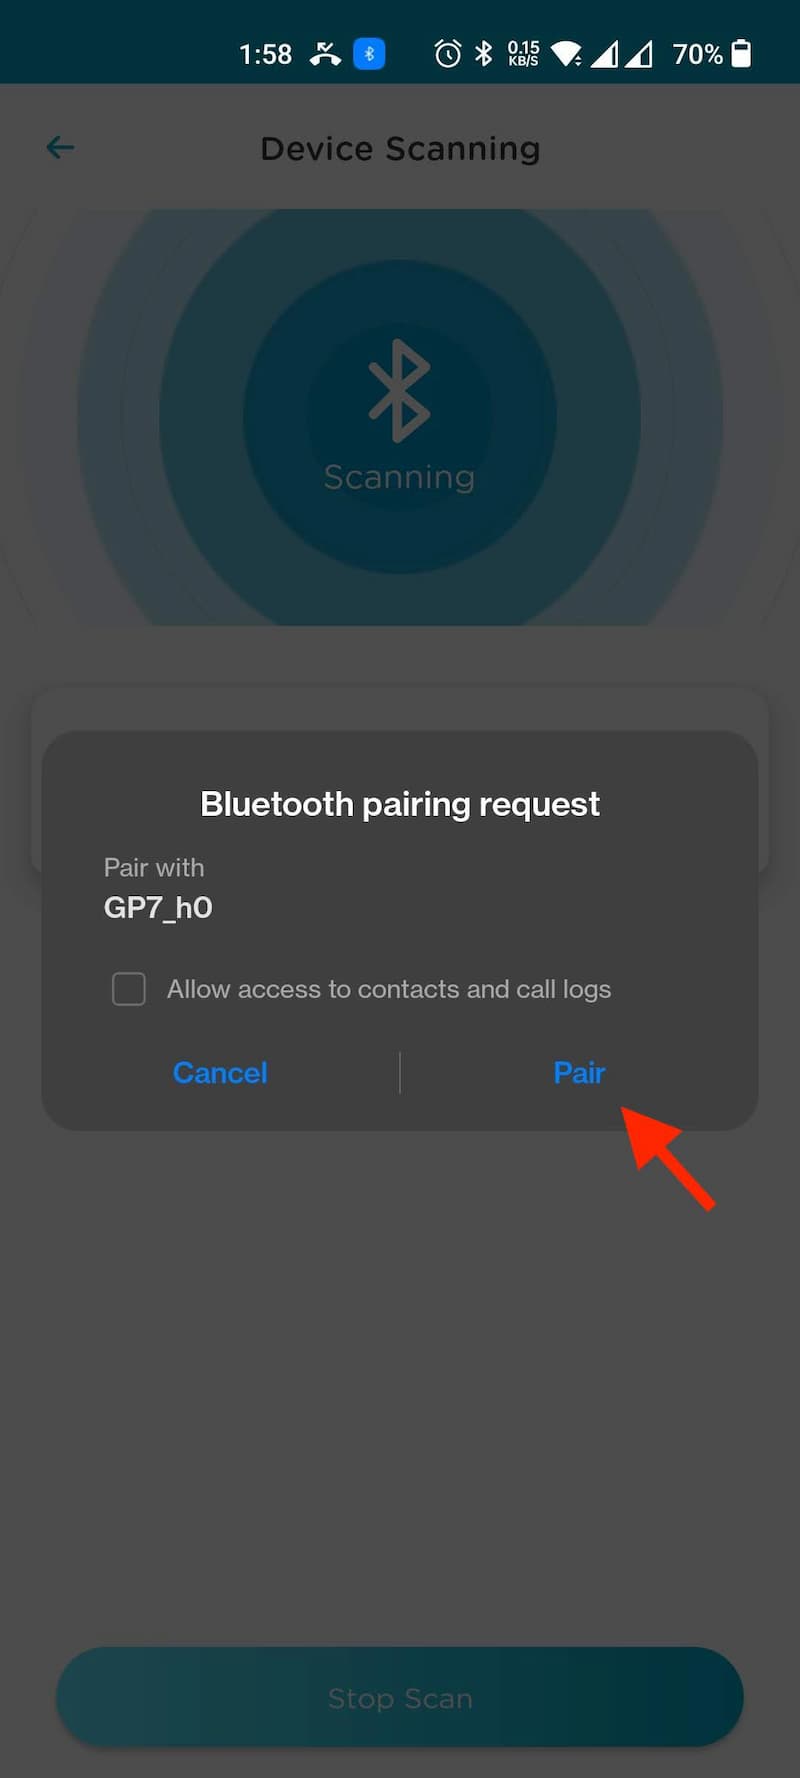
Pull out the clips of the phone holder and set the phone between the clips. Keep the phone screen horizontal and the phone camera on the left-hand side. Make sure the phone is fixed at the center of the holder, and also remove the phone case before attaching it to the Gimbal for better stability. Once you fix the phone to the holder, select Yes. Now, the app will start scanning for the Gimbal. Select your Gimbal by tapping on the Gimbal name (GP7_h0).
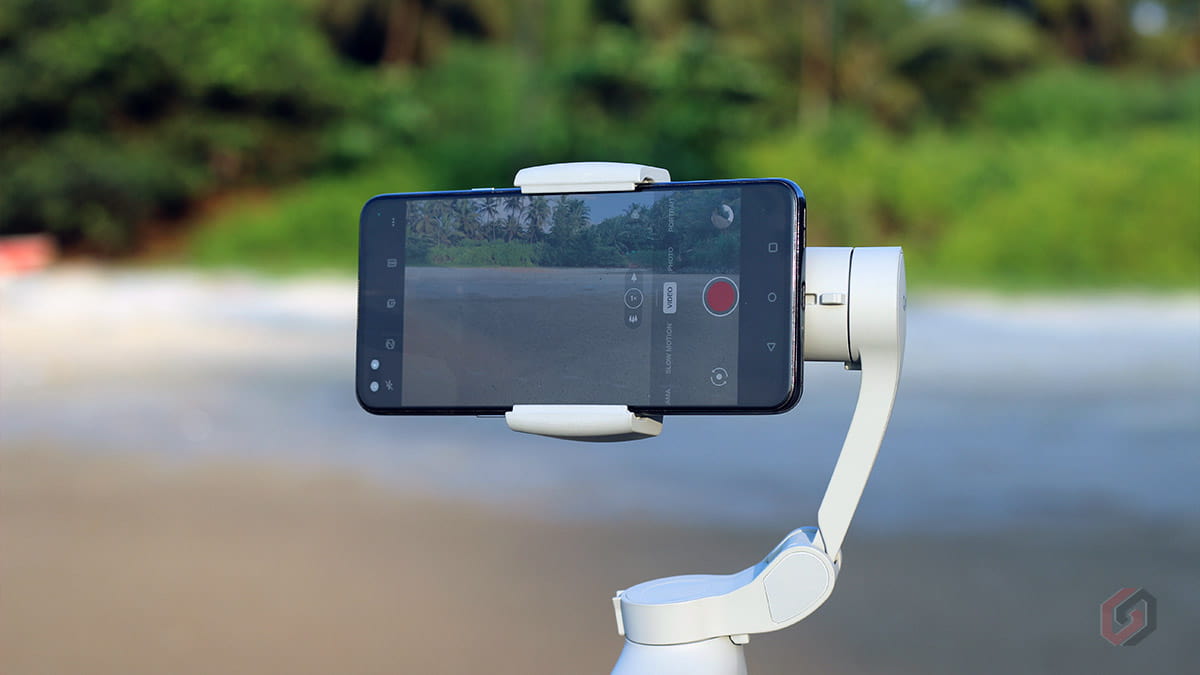
Note: This Qubo Gimbal supports power on without a smartphone and allows you to remove the phone while using it, like when taking a phone call.
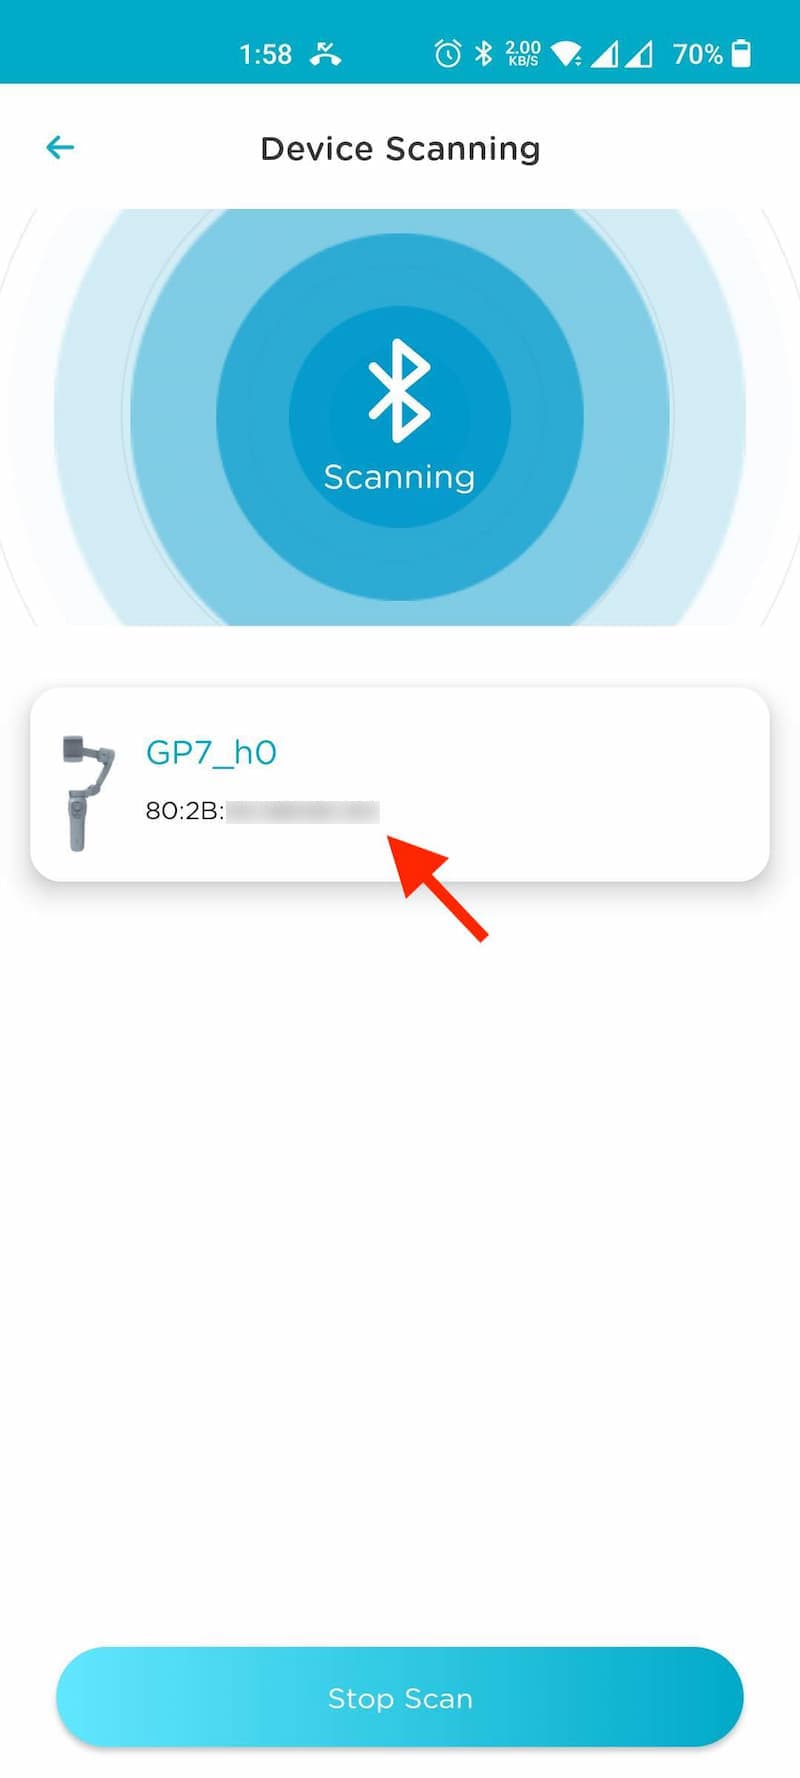
- Tap on ‘Pair‘ from the pop-up to accept the pairing request.
- Give a name to your Gimbal, or leave it as is. The default name will be set as ‘Gimbal’
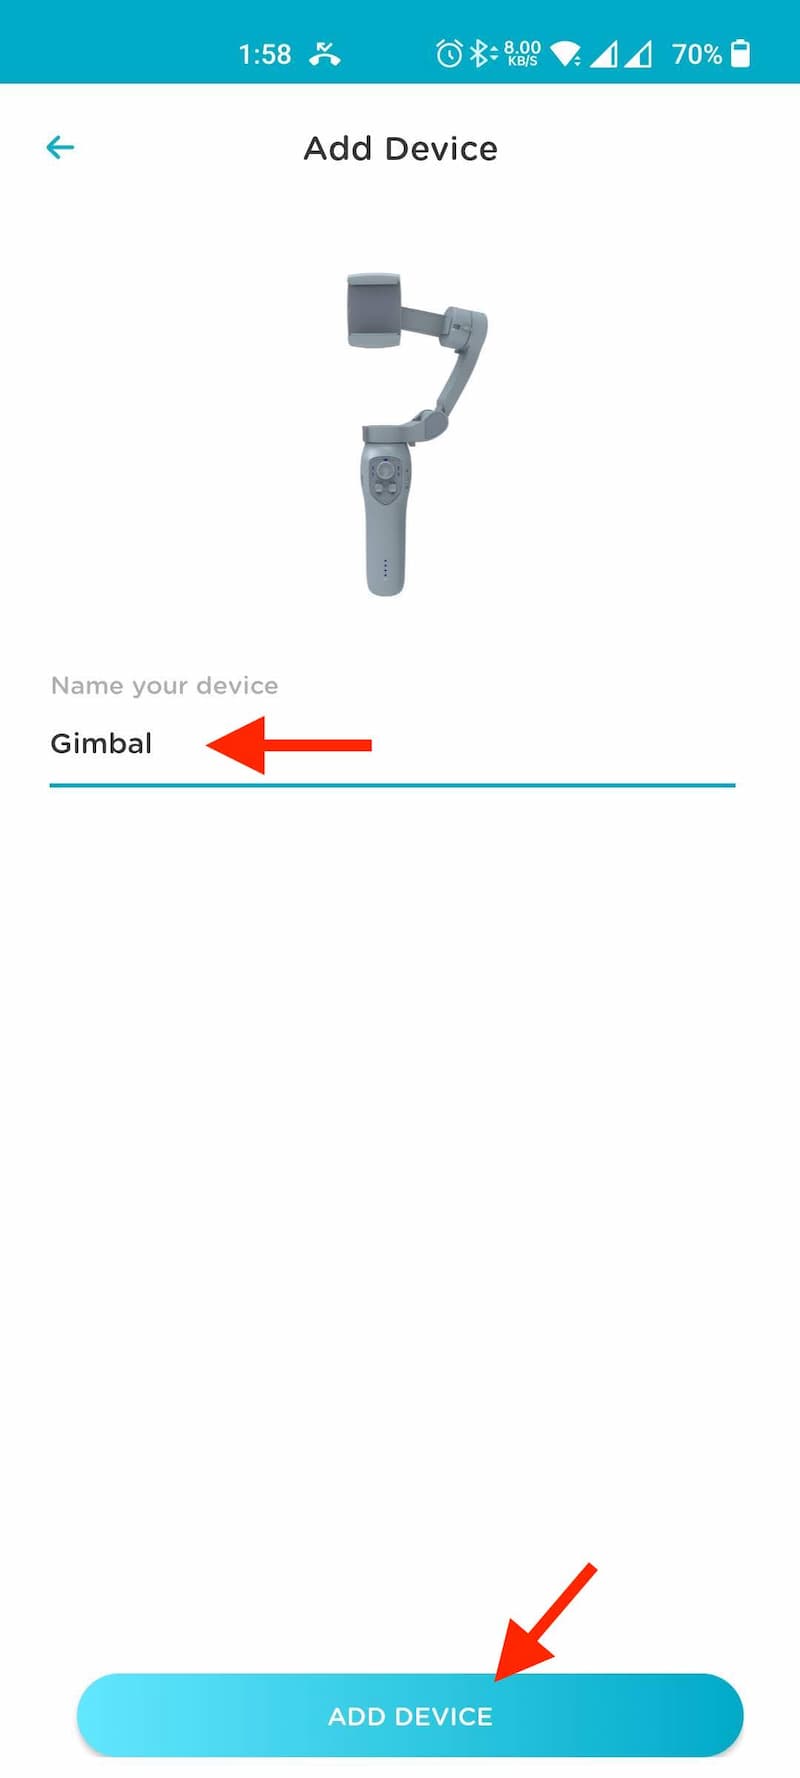
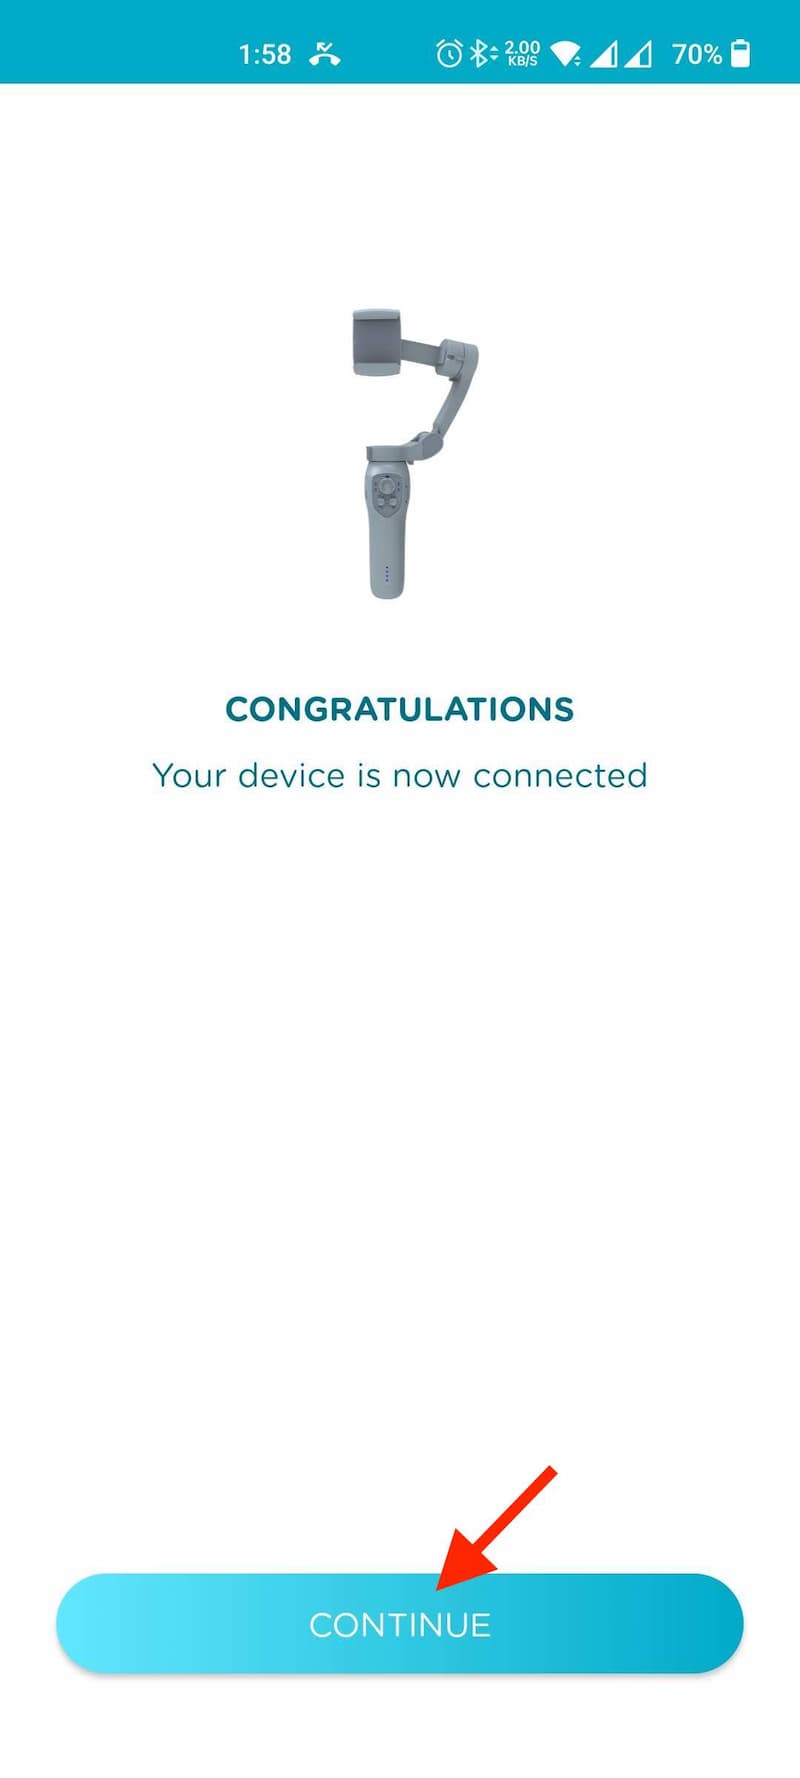
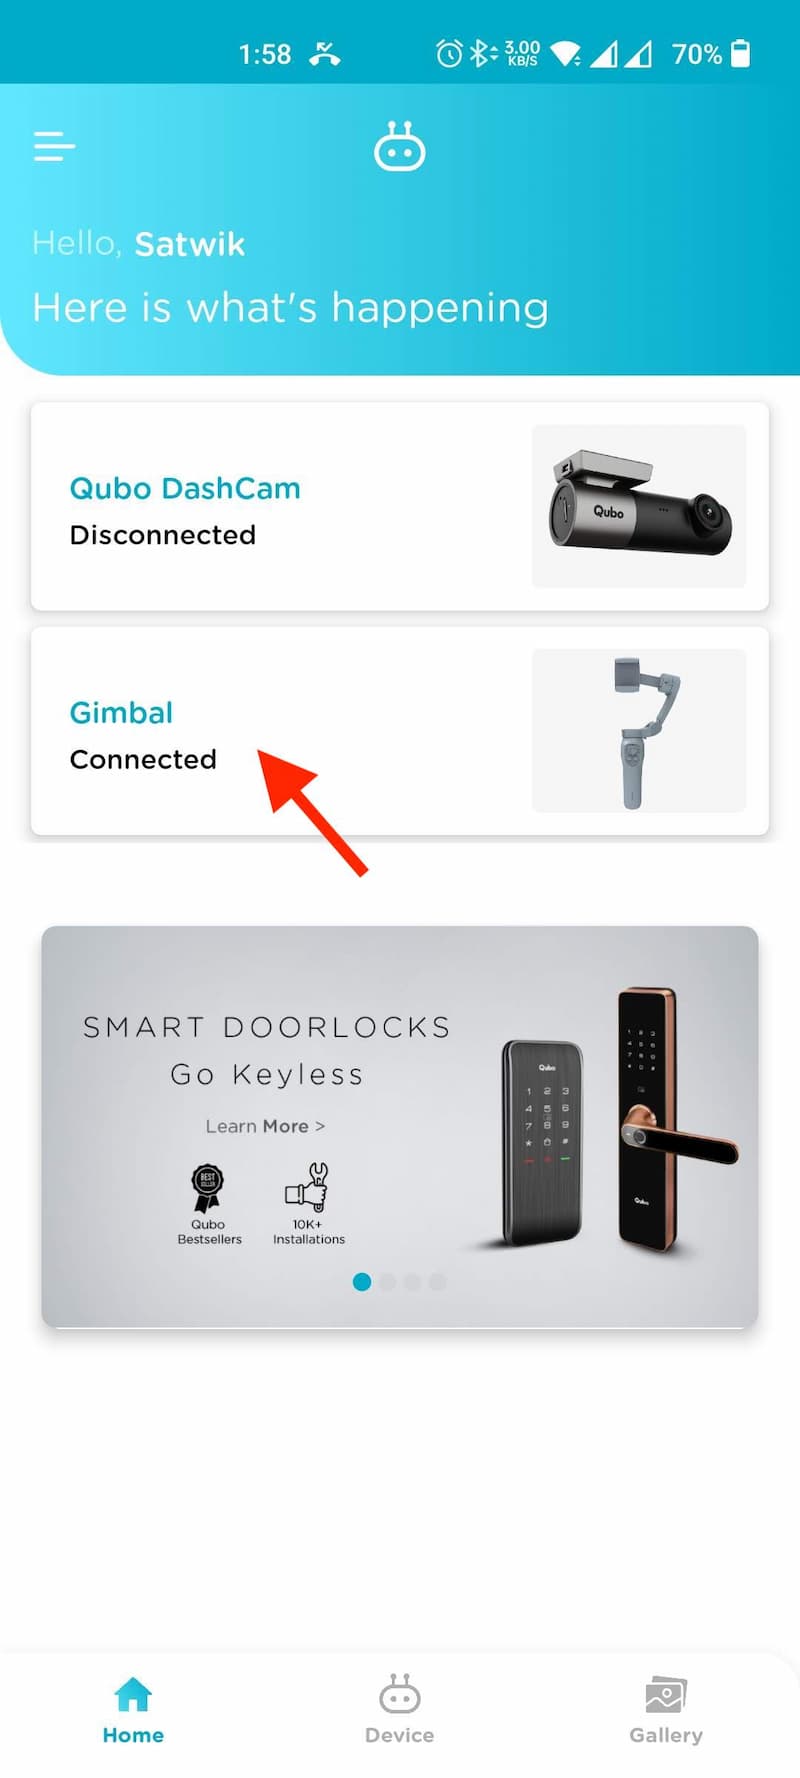
That’s it. The Qubo Gimbal is now successfully connected to your phone and is ready to use. Once you click on ‘Continue‘, you’ll be redirected to the home screen, and you can see the list of devices attached to your Qubo account. You’ll see the Gimbal status as ‘Connected‘.
Qubo Gimbal Settings
Once you pair the Gimbal to the App/Phone, it works without additional settings. Post pairing, you need to tap on the ‘Gimbal‘ option from the QuboPro app. Once you open it, you’ll access the Qubo camera app. This Qubo camera app is dedicated to the Gimbal and differs from your phone’s default camera app. The Qubo camera app has many features and allows you to control the Gimbal and change modes from the app itself.
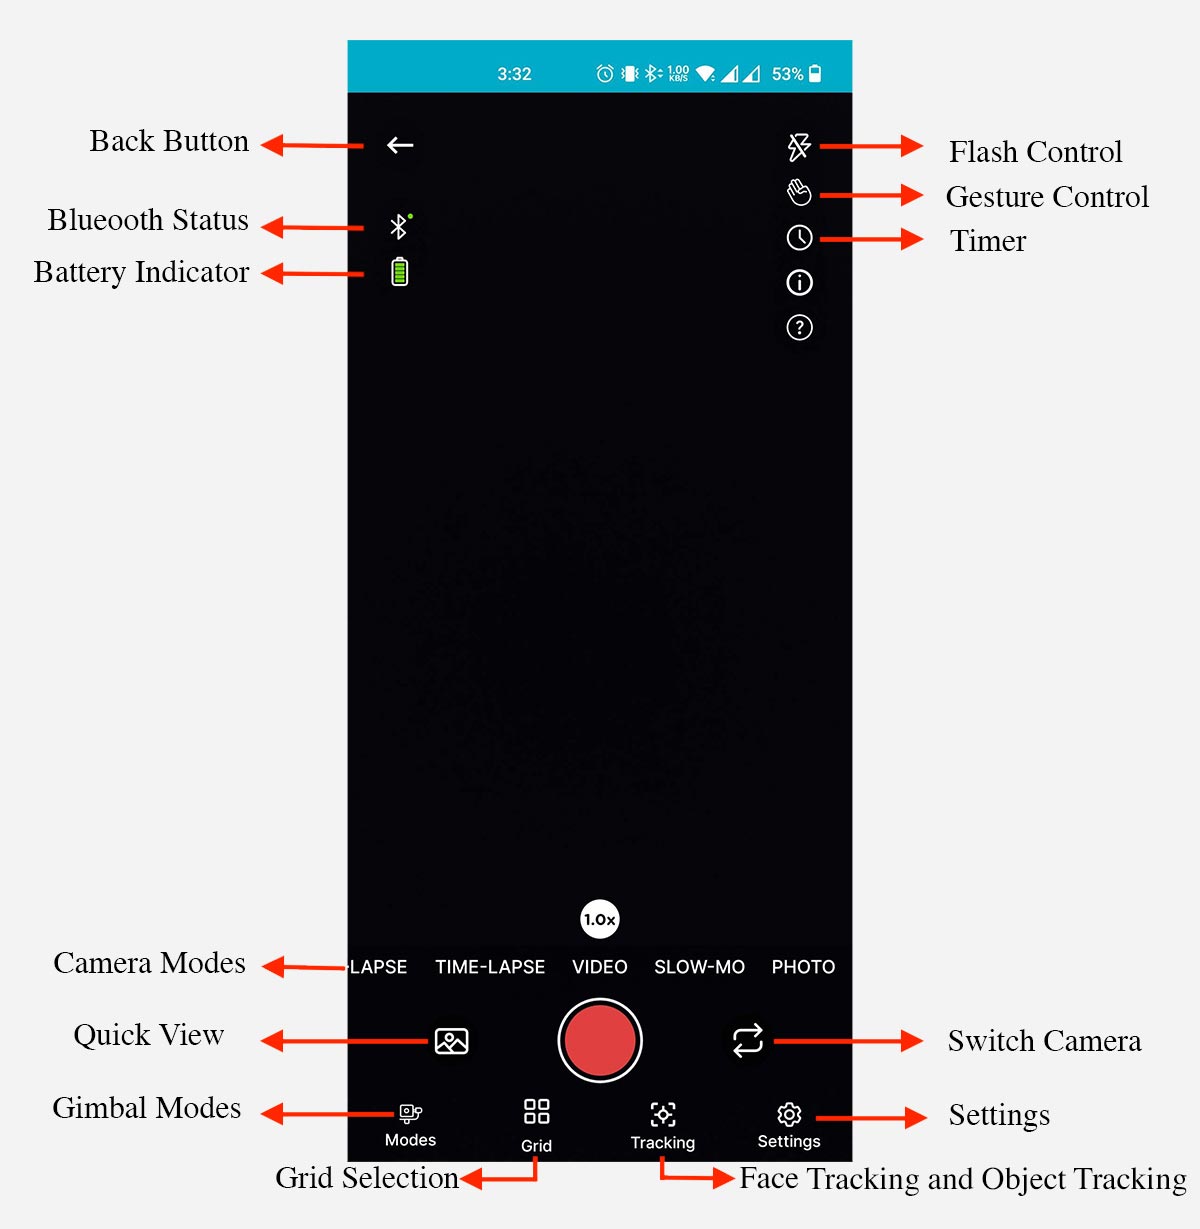
The Qubo Gimbal Pro supports many functions that can be controlled through the companion app. To change the settings, open the QuboPro App -> Settings:
- Flash control: Always On, Automatic, Always off
- Gesture control: Quickly take selfies and photos, and even record videos with just one thumbs-up gesture
- Timer: Enable timer
- Camera modes: Hyperlapse, Time-lapse, Video, Slow-motion, and Photo
- Quick view: Quickly check the image or video recording
- Switch camera: Quickly switch between front and rear cameras
- Gimbal modes: All Follow, Half Follow, Lock Full, First-Person View, Sports, and Walking
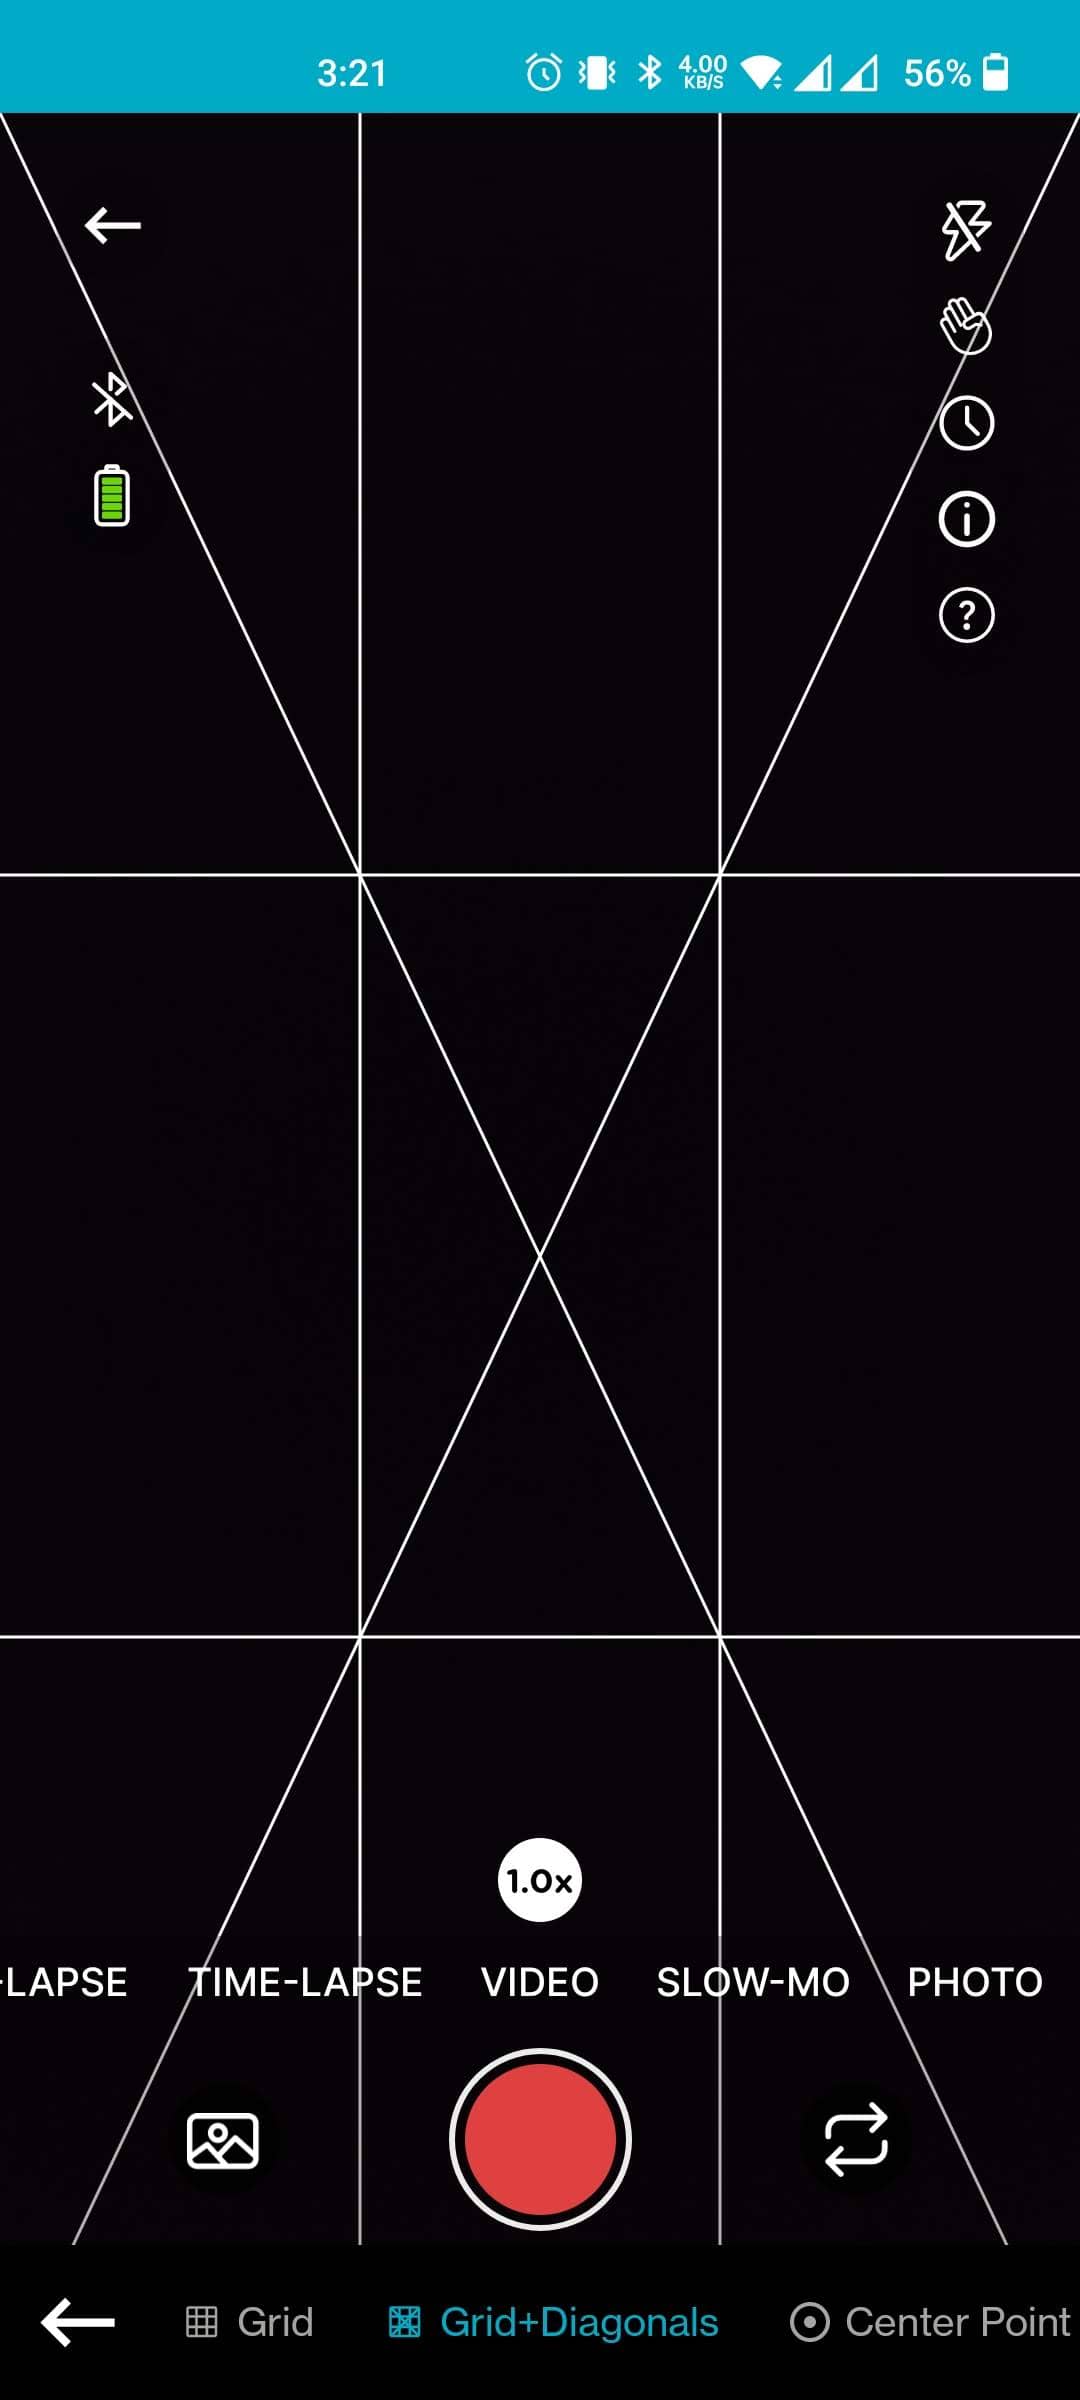
- Grid: Normal Grid, Grid+Diagnols, Center Point
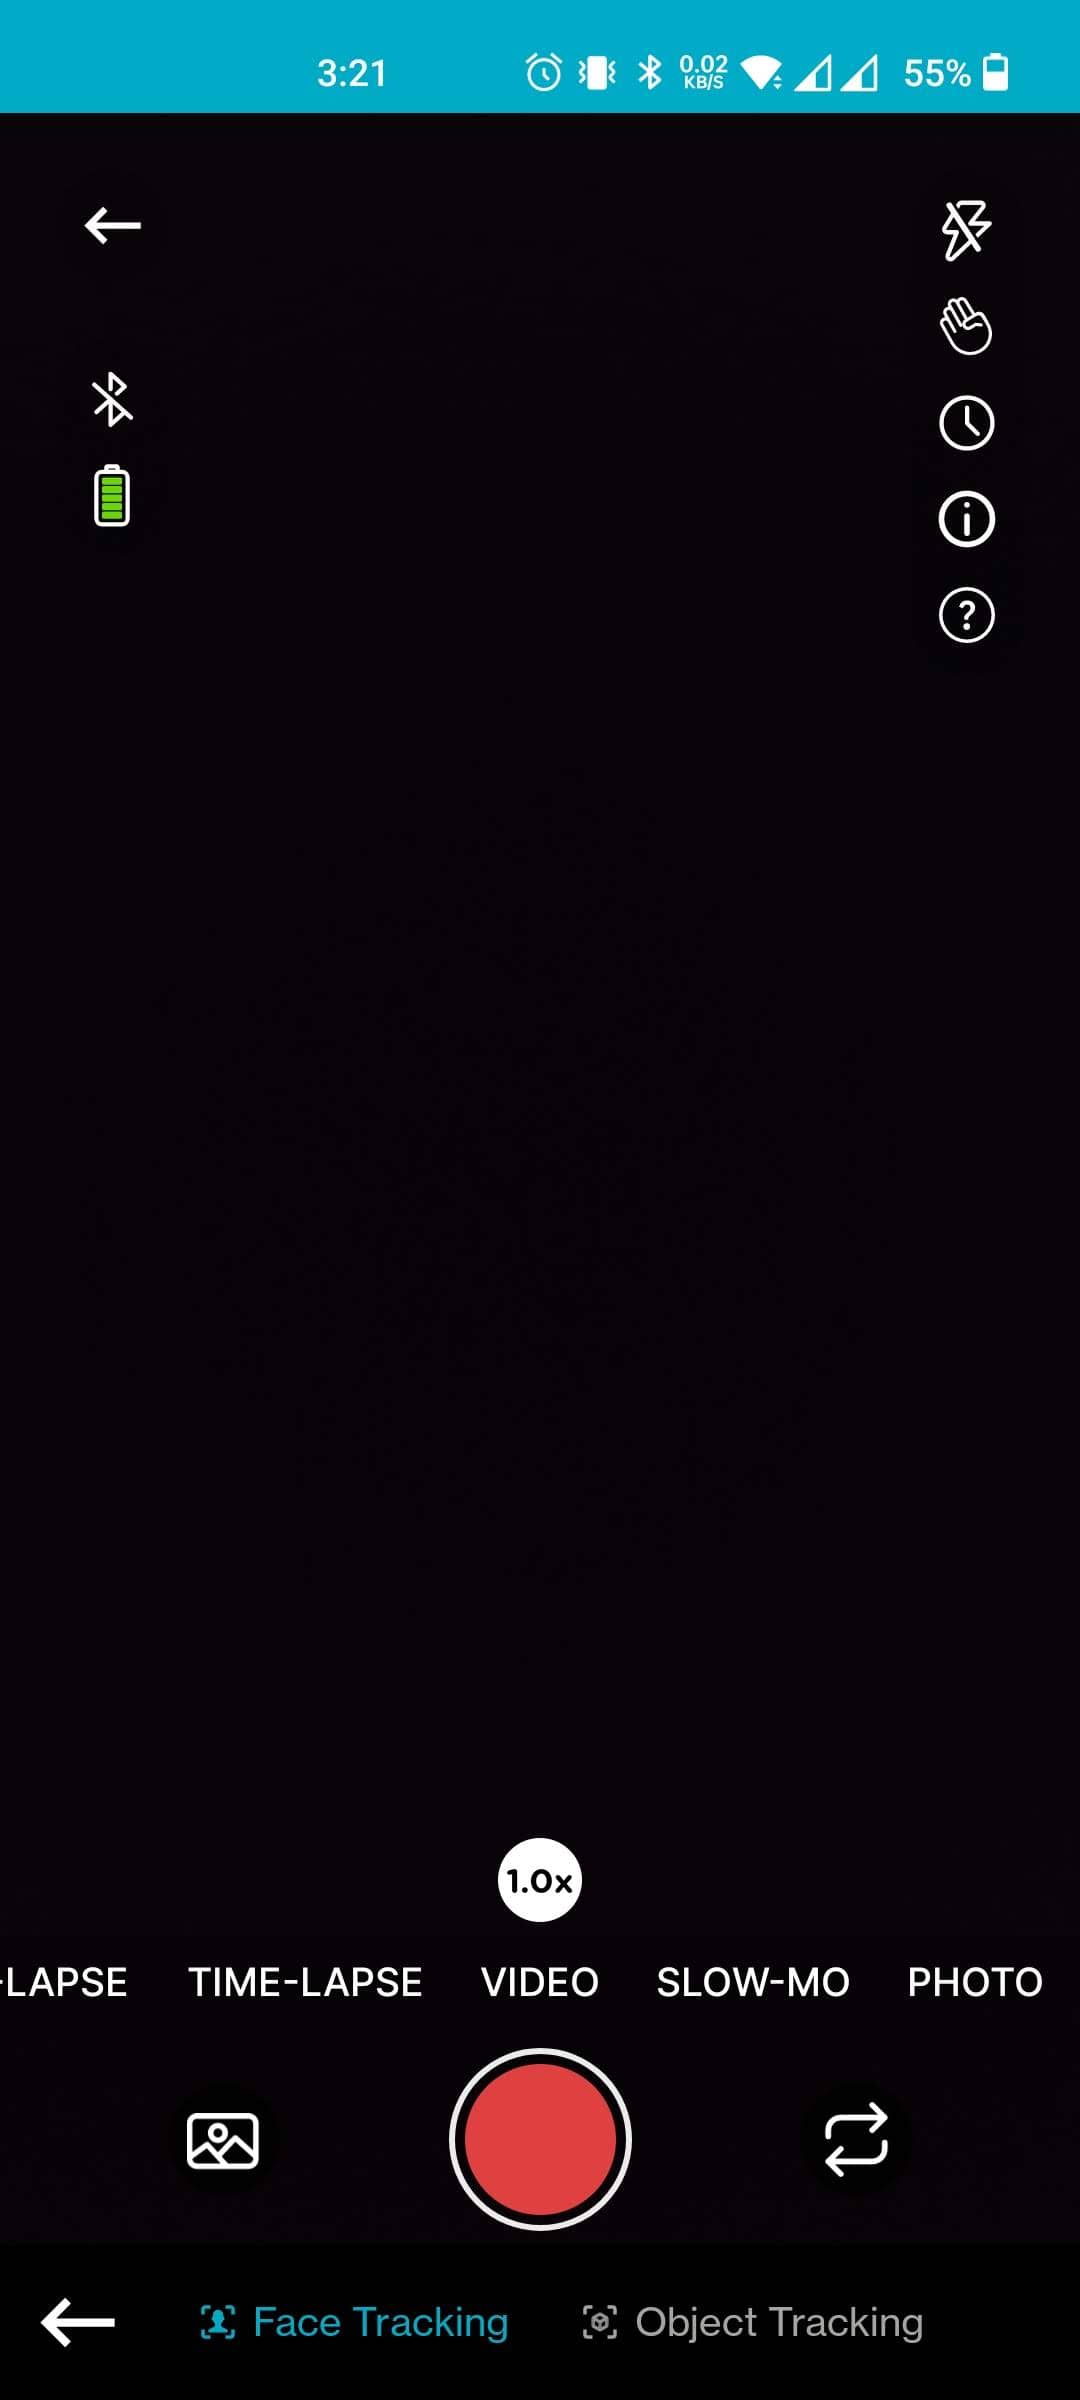
- Tracking: Enable/Disable Object Tracking and Face Tracking
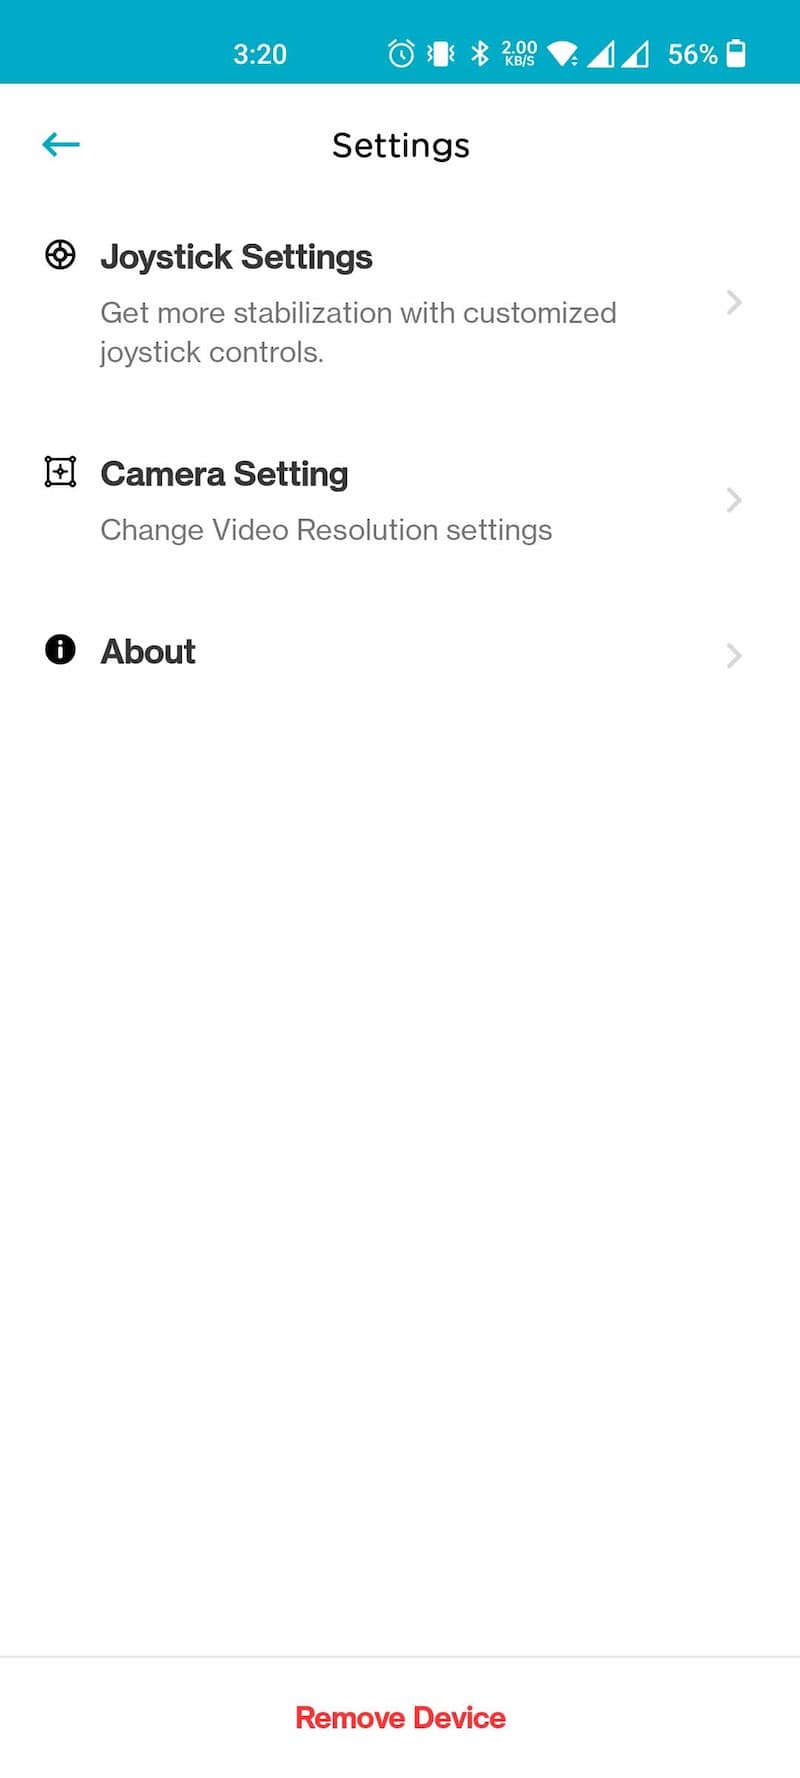
- Settings
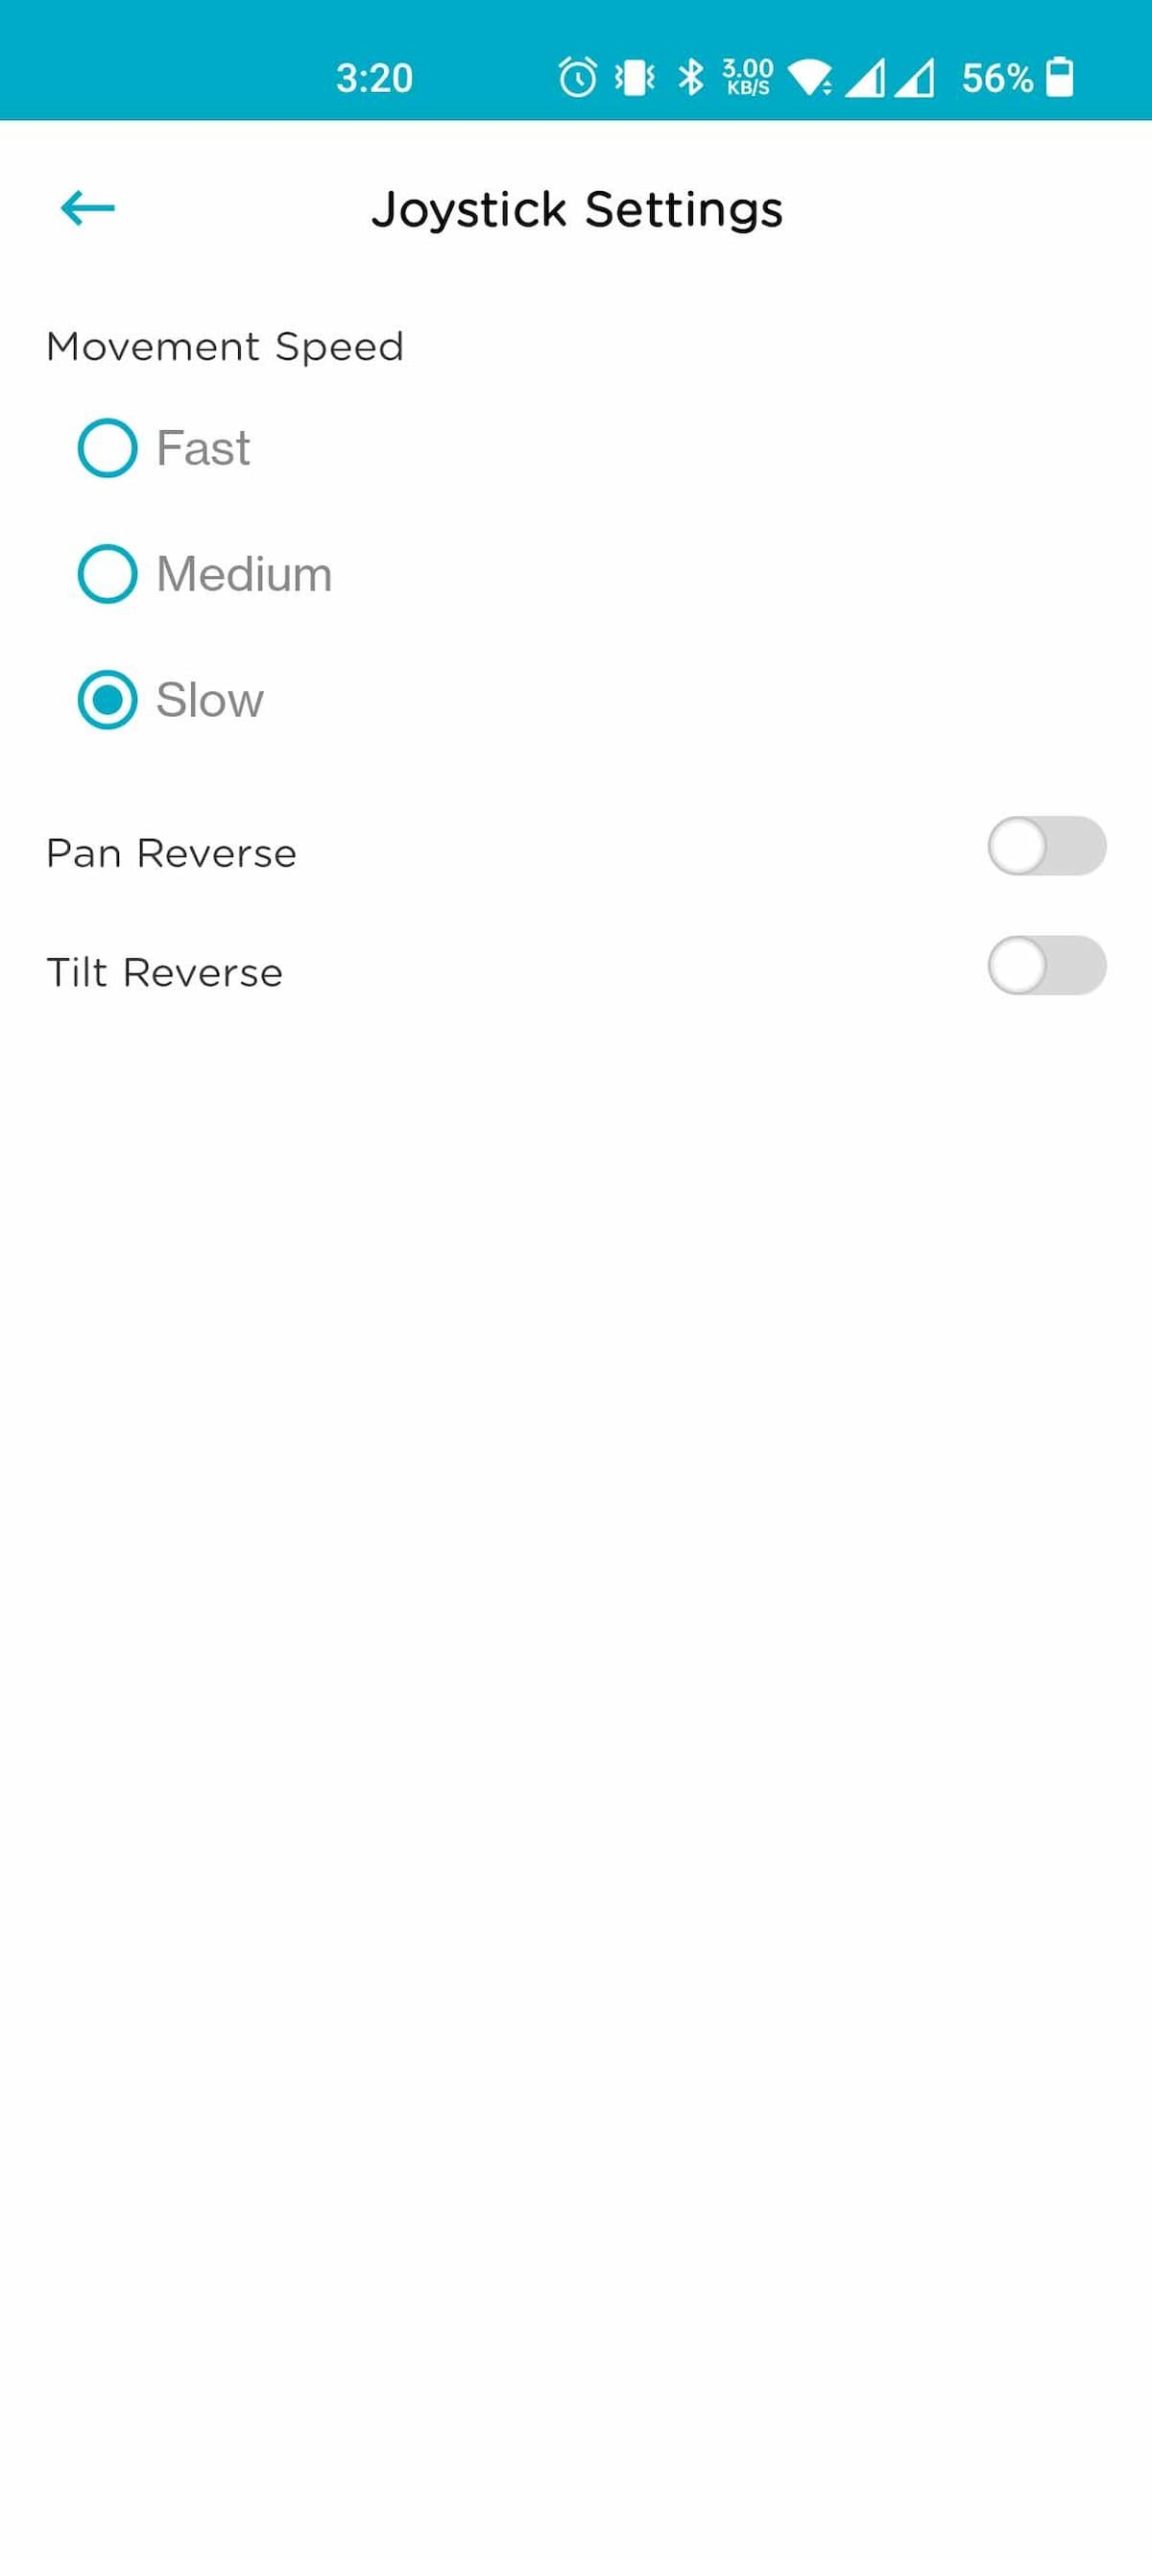
- Joystick Settings
- Movement Speed: Fast/Medium/Slow
- Pan Reverse: On/Off
- Tilt Reverse: On/Off
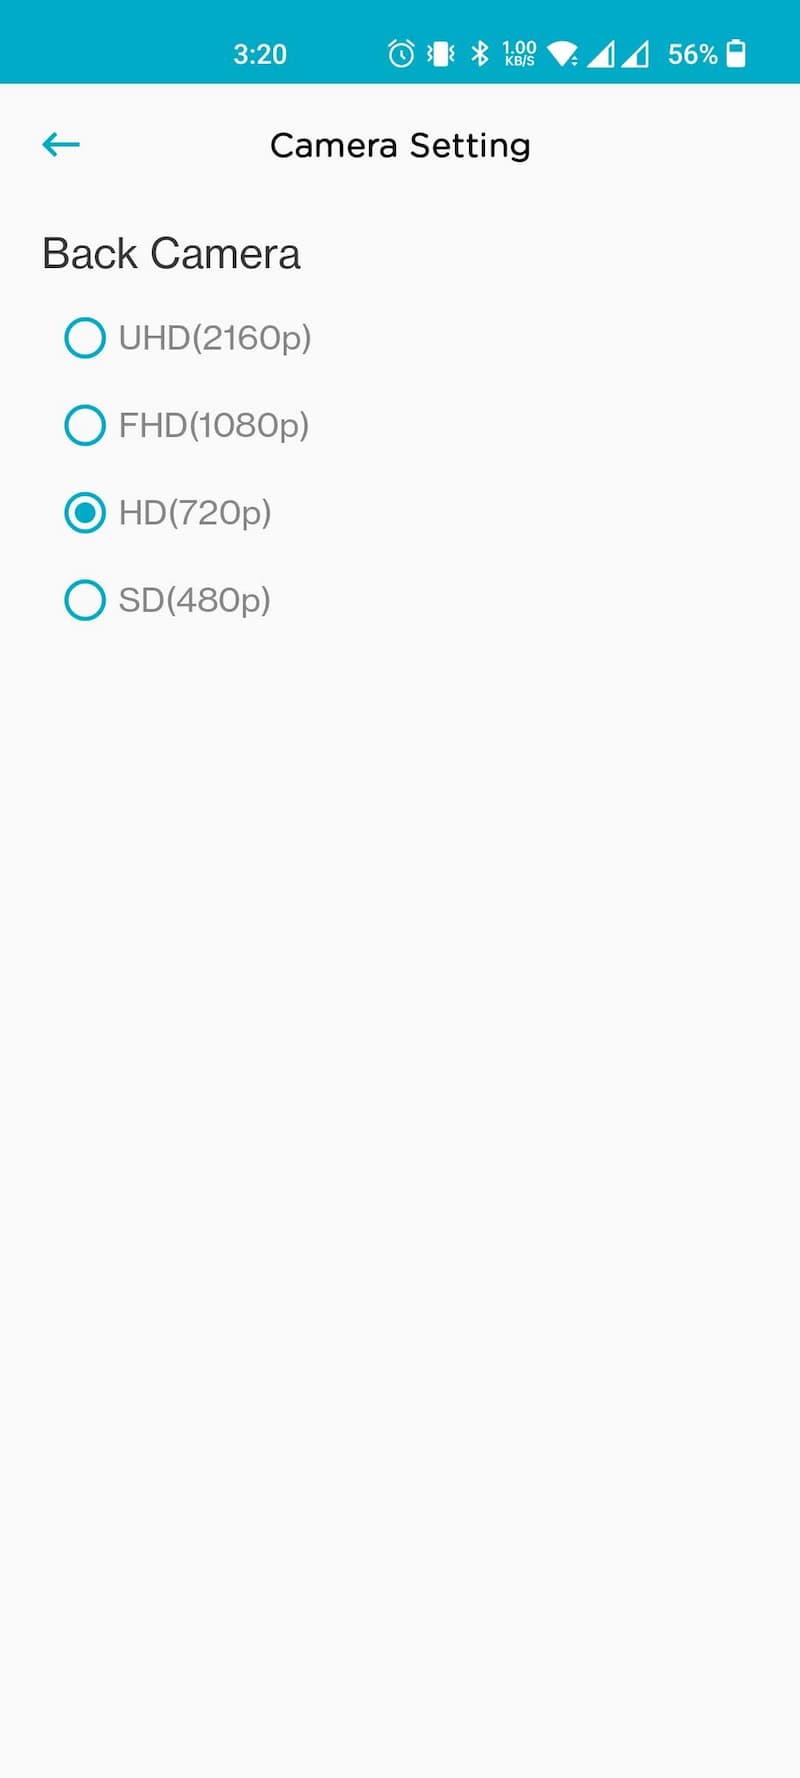
- Camera Settings: Select the rear camera video resolution (Depends on the phone model)
- UHD (2160p), FHD (1080p), HD (720p), SD (480P)
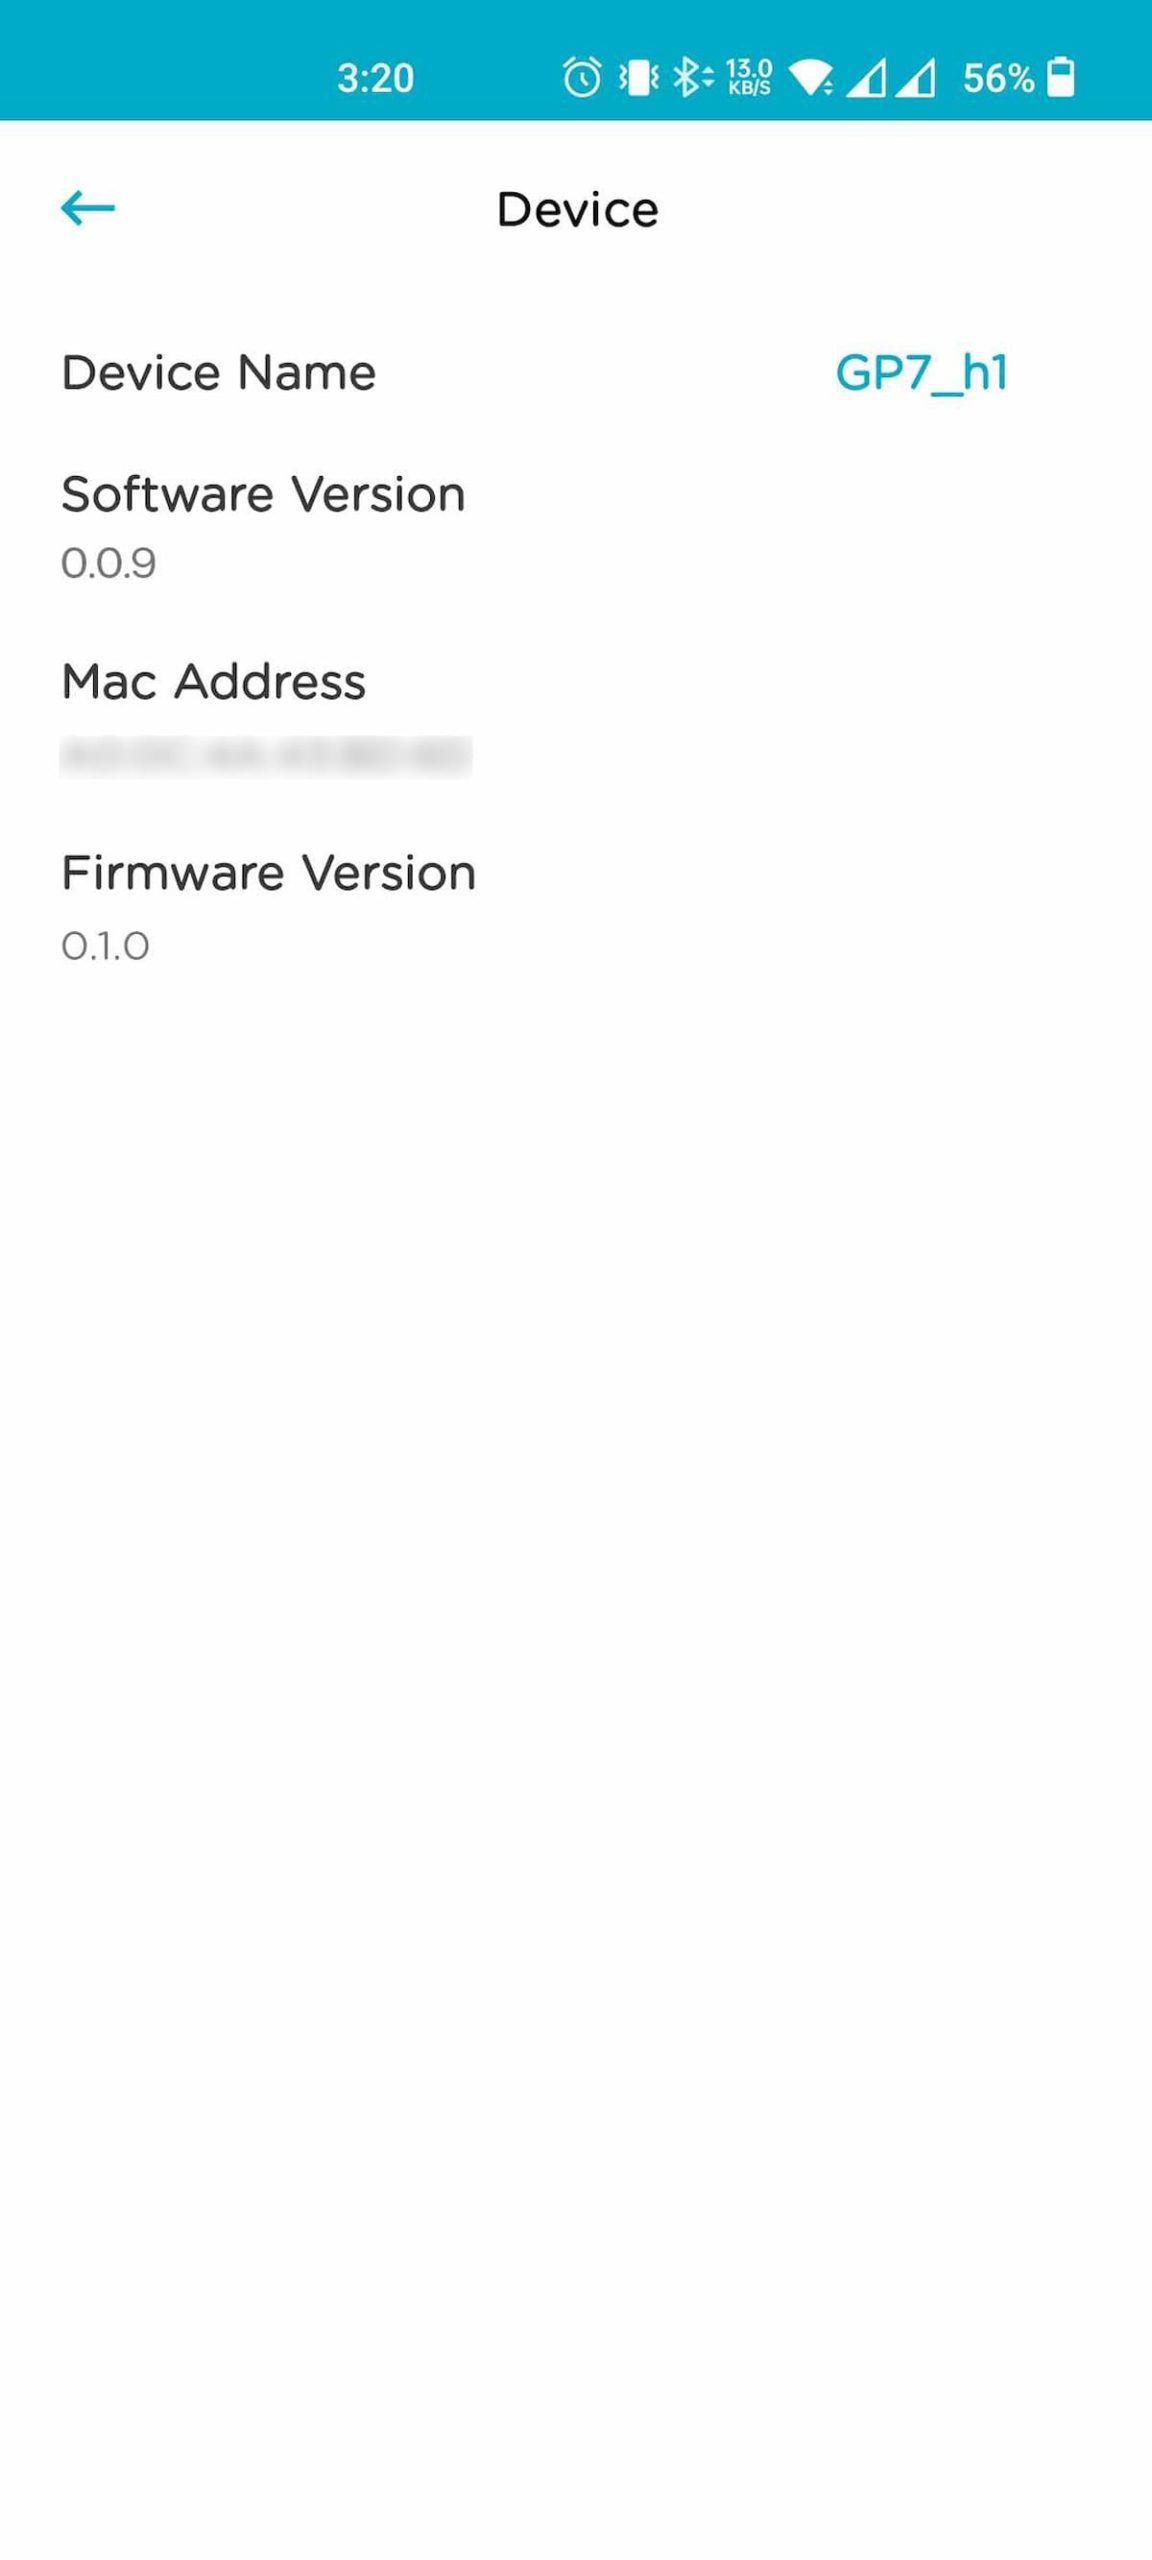
- About: Change device name, Software version, Mac address, Firmware version
- Joystick Settings
Note: The maximum resolution supported by the Qubo camera pp is 4K UHD (2160p). If your phone supports 4K video recording, you can shoot 4K videos using the Qubo app.
Note: The Gimbal only works with the Qubo camera app with full functionalities. This means most features, such as Face tracking, Object tracking, Walking mode, Sports mode, Gesture support, Timer, etc., work only when you use the Qubo camera app. Most importantly, the Gimbal shutter button works only when you pair the Gimbal with your phone. If you want to use some additional features of your phone camera, such as HDR, Filters, or other photo modes, you can use your phone’s built-in camera app, but you need to use the shutter button on the Viewfinder.
Qubo Gimbal Performance
The most important part of every Gimbal is the stabilization. Regarding Qubo Gimbal, the stabilization is excellent, and I haven’t experienced any issues with stabilization. I tried with multiple Android and iPhones, and the video output is impressive. You just need to make sure you’ve selected the right Gimbal mode. It might take a few days to get used to it if you’re a first-time user, as the Gimbal modes are slightly confusing for new users. Check out some video samples shot using Qubo Gimbal below.
There are some limitations too. You cannot use the Gimbal with your phone’s default camera app with full functionalities. Key features like Face Tracking and Object Tracking don’t work with the phone’s default camera app. Moreover, the Shutter button and zoom slider on the Gimbal don’t work with the phone’s default camera app.
Even though you can switch between various video resolutions, you cannot change the video frame rate of the default camera app. All the videos taken using the Qubo camera app are capped at 30 frames per second. If you want to adjust the frame rate, you’ll have to use your phone’s default camera app.
In case you missed it: Qubo Smart Tyre Inflator and Smart Tyre Inflator Pro Review
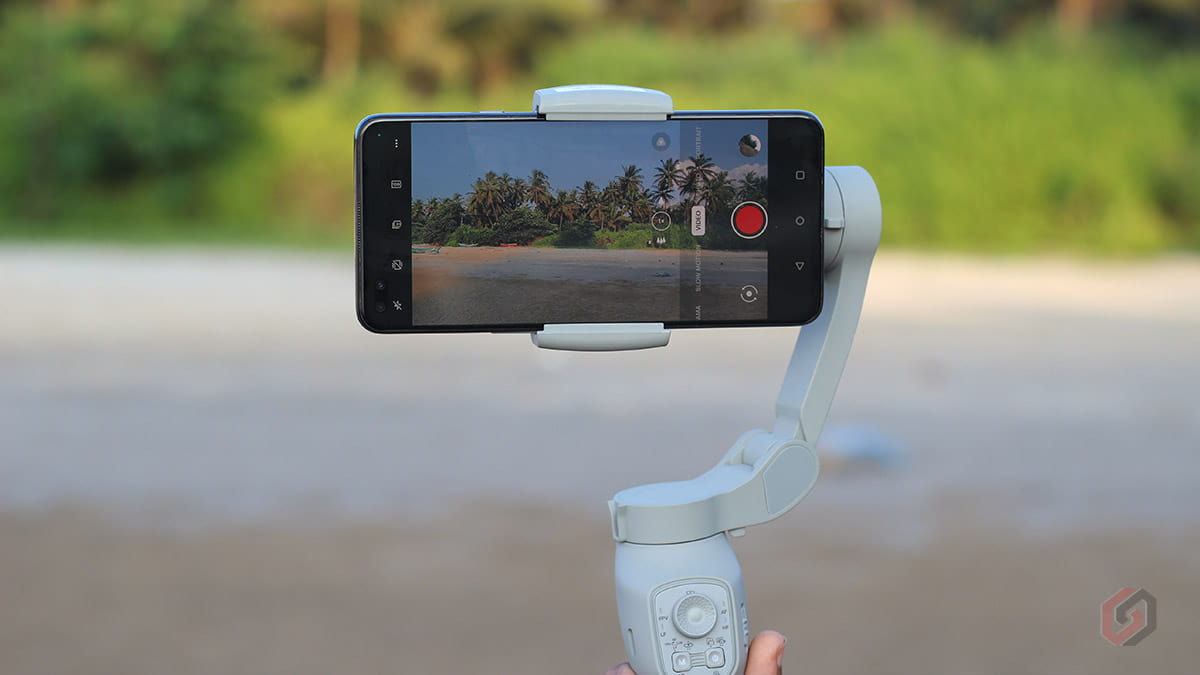
When you are in the Photo mode, you can take photos using the Gimbal with the help of the shutter button, or you can even take photos while shooting a video by pressing the same button. Here the biggest disadvantage is the camera quality. Even though your phone camera can take high-resolution photos (Ex: 12 Megapixels), the maximum resolution supported by the Qubo camera app is 0.9 Megapixels which is too low. The low-resolution issue is specific to photos, not to video recording.
Coming to the battery, the Qubo Gimbal is backed by a 2,000mAh non-removable battery. According to Qubo, the Gimbal can work up to five hours on a single charge. During my review, I got around 4 hours of battery life which is impressive. However, even though 4 hours of battery backup is enough for an entry-level creator, you can still connect a power bank to the Gimbal for extended use.
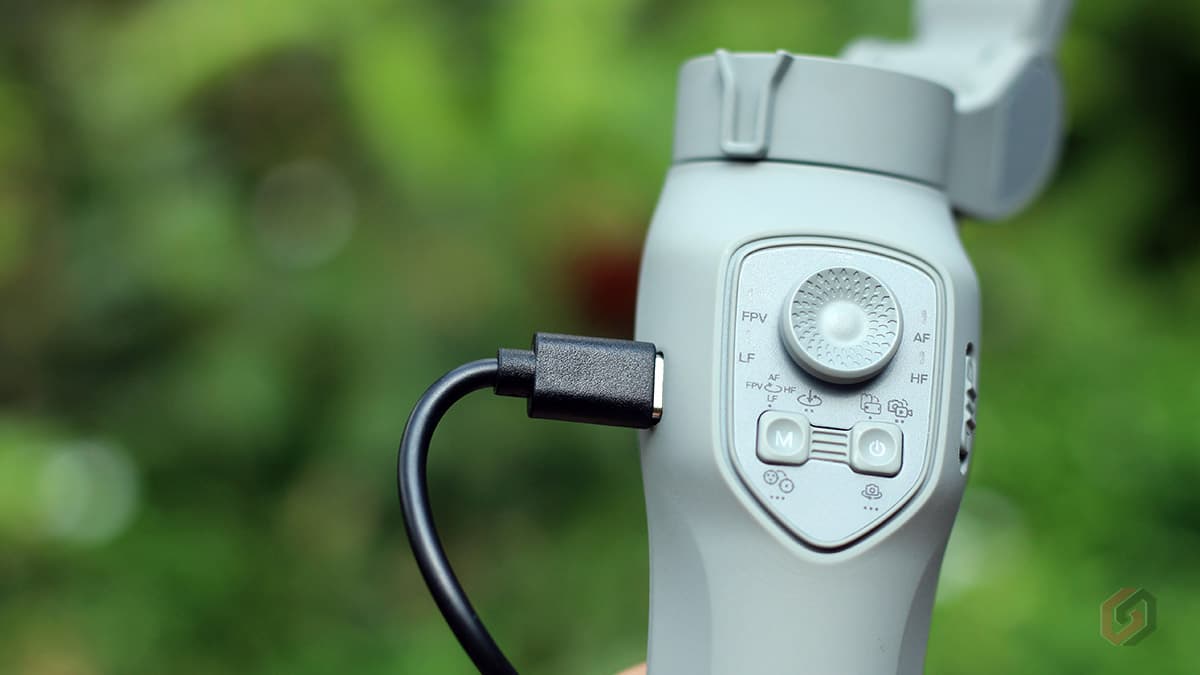
You need approximately 80 minutes to fully charge the Gimbal using a 5V/2A power adapter. Additionally, the Qubo Gimbal supports fast charging, helping you further reduce the charging time. A 30W power adapter will reduce the charging time by about 20 minutes. Qubo recommends charging the Gimbal using a 5V/2A power adapter. You can check the battery levels using the LED indicators on the handlebar and also through the battery indicator on the Qubo Camera app.
What I like
- Superior build quality
- Light and compact design
- 4K video recording
- Excellent stabilization
- Fits almost all phones
- Well-placed control buttons
- Good battery life
- Charging during operation
- Responsive QuboPro app
What I don’t like
- No filters in the camera app
- Poor photo quality
- Can’t change the video frame rate
- No camera shutter sound
Qubo Gimbal Opinion
Nowadays, Gimbal has become a must-have accessory for almost every content creator. Even if your phone supports Optical Image Stabilization (OIS), handheld videos don’t always look good due to shaky footage. The best way to prevent shaky footage is to use a Gimbal. It prevents shaky video footage, especially while walking, and helps you take professional-looking footage even in challenging conditions. Even the multiple built-in modes help you shoot creative videos to entertain your audience or followers.
As stated above, Qubo Gimbal is an entry-level device with a premium build, excellent video stabilization, 4k video recording support, face/object tracking, a dedicated shutter, zoom-in/out buttons, and up to five hours of battery life. Apart from these, you can switch the camera modes and change the device orientation right from the Gimbal without touching the phone.

Furthermore, You can use the Qubo Gimabl as a Tripod that helps you a lot during live streams or while taking timelapse and slow-motion videos. You can even fold this Gimbal and keep it in trouser pockets. I have used this Gimbal for about 15 days and am pretty happy with the overall performance. If you know how to use it properly, even a video shot on an ordinary entry-level smartphone looks very good, and you’ll surely be surprised by the results.
The Qubo Gimbal could be useful for entry-level content creators looking to improve their video content quality. The Qubo Gimbal is priced aggressively at ₹6,999, and you can buy this for as low as ₹6,000 during the festive season with card discounts. If you are looking for a Gimbal between ₹6,000 to ₹7,000, you’ll not go wrong with Qubo Gimbal. Just go for it.
Can I use Qubo Gimbal with iPhones?
Yes. Qubo Gimbal is fully compatible with iPhones, and you can use the Gimbal with all iPhone models, including the newly introduced iPhone 14 Series.
Can I use the Qubo Gimbal without the QuboPro app?
Yes. You can use the Qubo Gimbal with your phone’s built-in camera app, Google camera app, or 3rd party camera apps, but with limited functionalities. A few features, such as Face tracking, Object tracking, physical shutter button, etc., will work only with the Qubo camera app.
Is the Qubo Gimbal waterproof or water-resistant?
No. Qubo Gimbal is not waterproof or water-resistant.
Can I use the Qubo Gimbal with my DSRL camera?
Qubo Gimbal is only compatible with smartphones that weigh less than 280 grams. You cannot use the Gimbal with your DSLR camera.
Is the battery in the Qubo Gimbal user replaceable?
No. Qubo Gimbal battery is not user-replaceable. However, it comes with a 6-month warranty.
Can I charge the Qubo Gimbal using the Powerbank?
Yes, You can charge the Qubo Gimbal using the Power bank.
Can I customize the Qubo Gimbal buttons?
No, you cannot. The buttons come with fixed functionalities, and you cannot change them.
Can I toggle between the front and rear cameras from the Gimbal?
Yes. You can switch to the front and rear cameras seamlessly by pressing the power button once.
Does Qubo Gimbal support 4K video recording?
Yes. The Qubo Gimbal supports 4K video recording. Make sure your phone supports 4K video recording.
Qubo Gimbal Price & Availability
Qubo Handheld Gimbal comes only in Grey and is priced at ₹6,990. It will be available to buy online via Amazon India, Quboworld.com, and also through select Qubo dealers across India. The Gimbal comes with a 1-year standard limited warranty, while the non-removable battery has a 6-months warranty. If you have any queries, do let me know in the comments.