If you already use a different password manager like Google Password Manager, 1Password, Microsoft Edge Password Manager, etc., you can easily import those passwords to your Synology C2 Password account. Check out the below tutorial on How to import Google Passwords to a Synology C2 Password account.
The process of importing passwords is simple and it hardly takes 10 minutes. You only need to make sure that the CSV file is properly formatted as per the C2 Password requirements.
Exporting Passwords from Google Password Manager
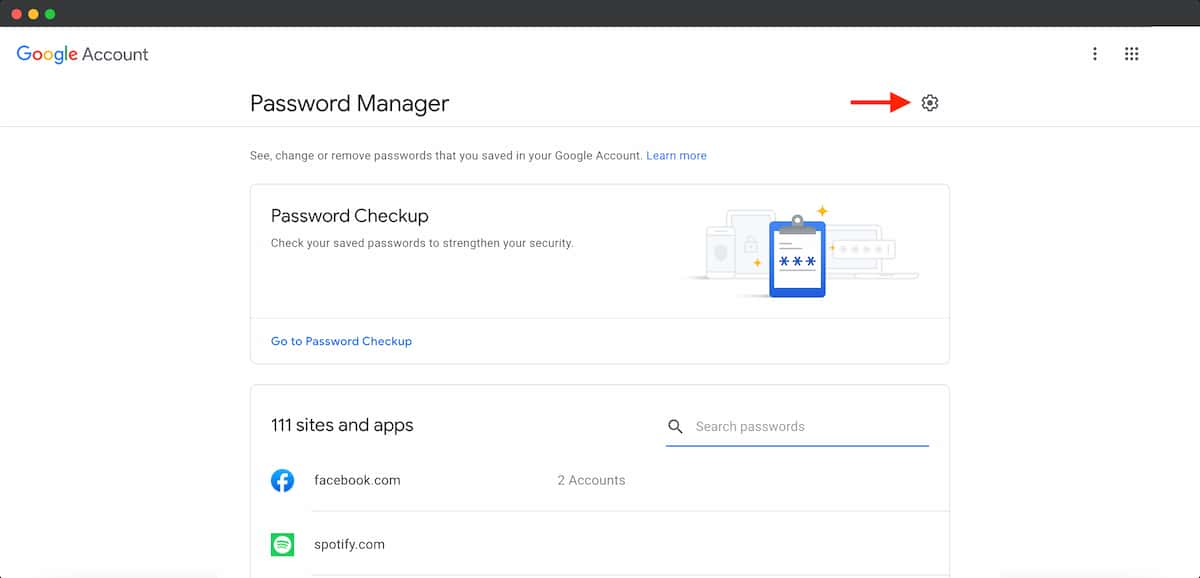
In the first step, you need to log in to your Google Password Manager. Go to password.google.com and enter your Google account credentials. Once you log in, you’ll get a list of all usernames and passwords stored in your Google account. Now, click on the Settings icon as shown in the image below.
Once you open the settings, click on the Export button and click on Export again from the pop-up. Once you click on Export, you’ll be asked to enter the password of your Google account. Enter the password and click on Next. Once you click on Next, a file named Google Passwords.csv will be downloaded to your computer.
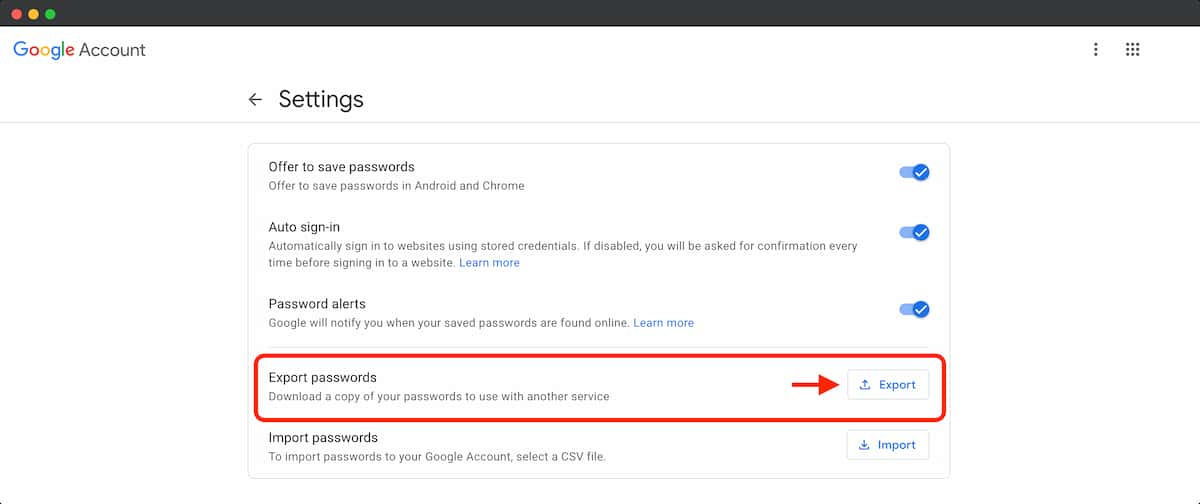
Note: The downloaded file ‘Google Passwords.csv’ includes all your usernames and passwords in an unencrypted or plaintext format. Your passwords will be visible to anyone who can access the file. Keep the file safe or delete it once the import is done.
Modifying Downloaded CSV File
You need a compatible application such as Apple Numbers, Microsoft Excel, etc. to open a CSV file on your computer. If you don’t use Microsoft Excel, open the CSV file in any compatible application or you can also use Google Sheets (online). Type sheets.new in your web browser and log in using your Google account credentials. Go to File -> Open -> click on Upload and select the downloaded Google Passwords.csv file from your computer. The below tutorial is done on Numbers on MacOS. The process is almost the same for other applications.
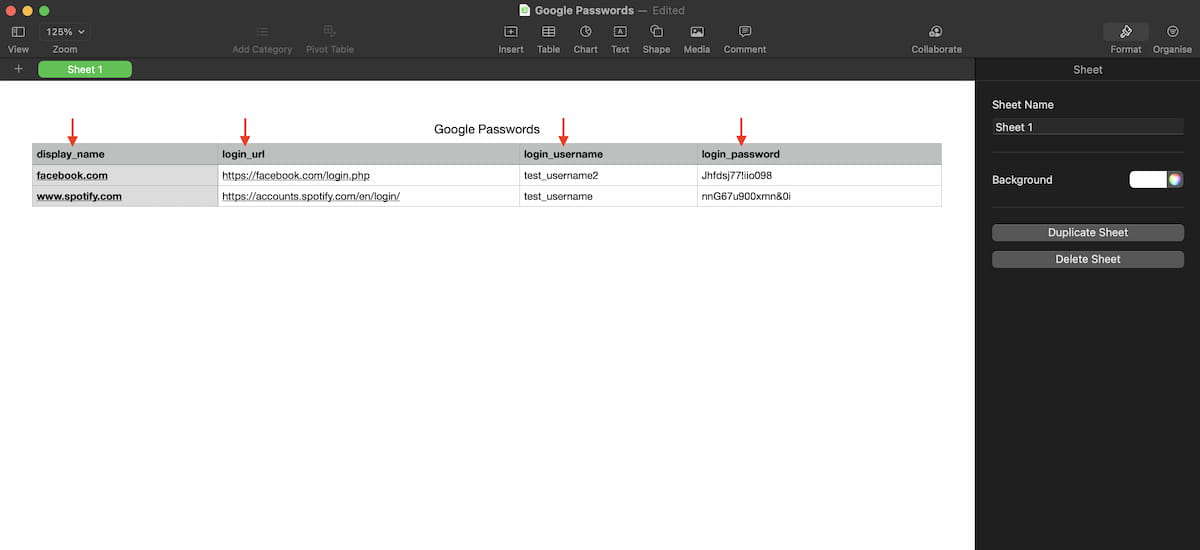
Once you open the file, you can see all your usernames, passwords along with the name of the service and login URL. Even though the downloaded file is CSV, you cannot directly use the file to import the data to your Synology C2 account. First, you need to prepare the CSV file readable by the Synology C2 Password service. For that, you need to rename the headers – name, url, username, and password.
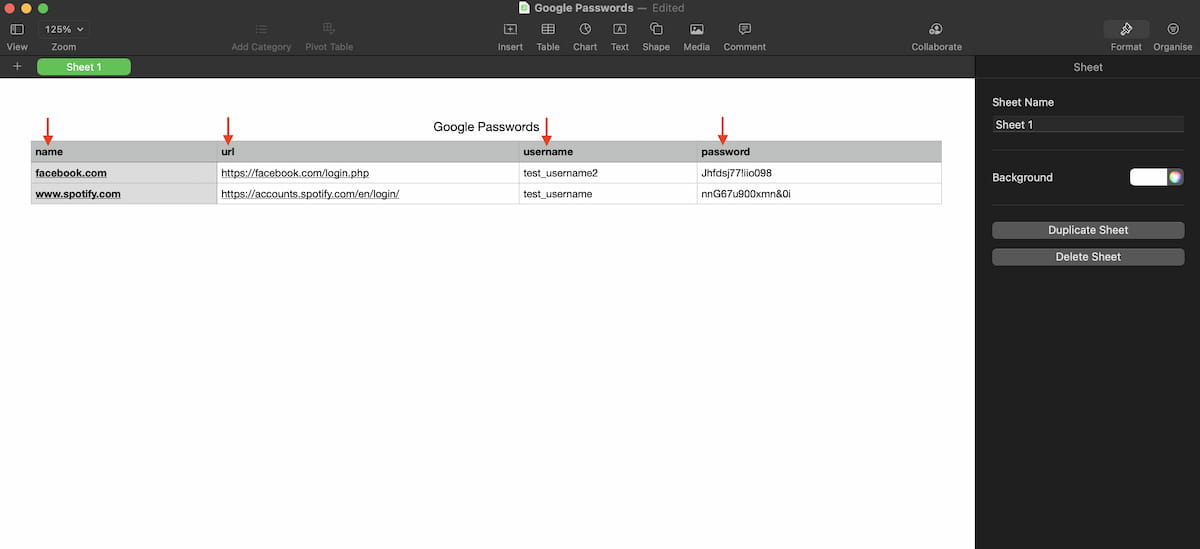
- Change the name to display_name
- Change the url to login_url
- Change the username to login_username
- Change the password to login_password
Exporting a Modified File to CSV Format
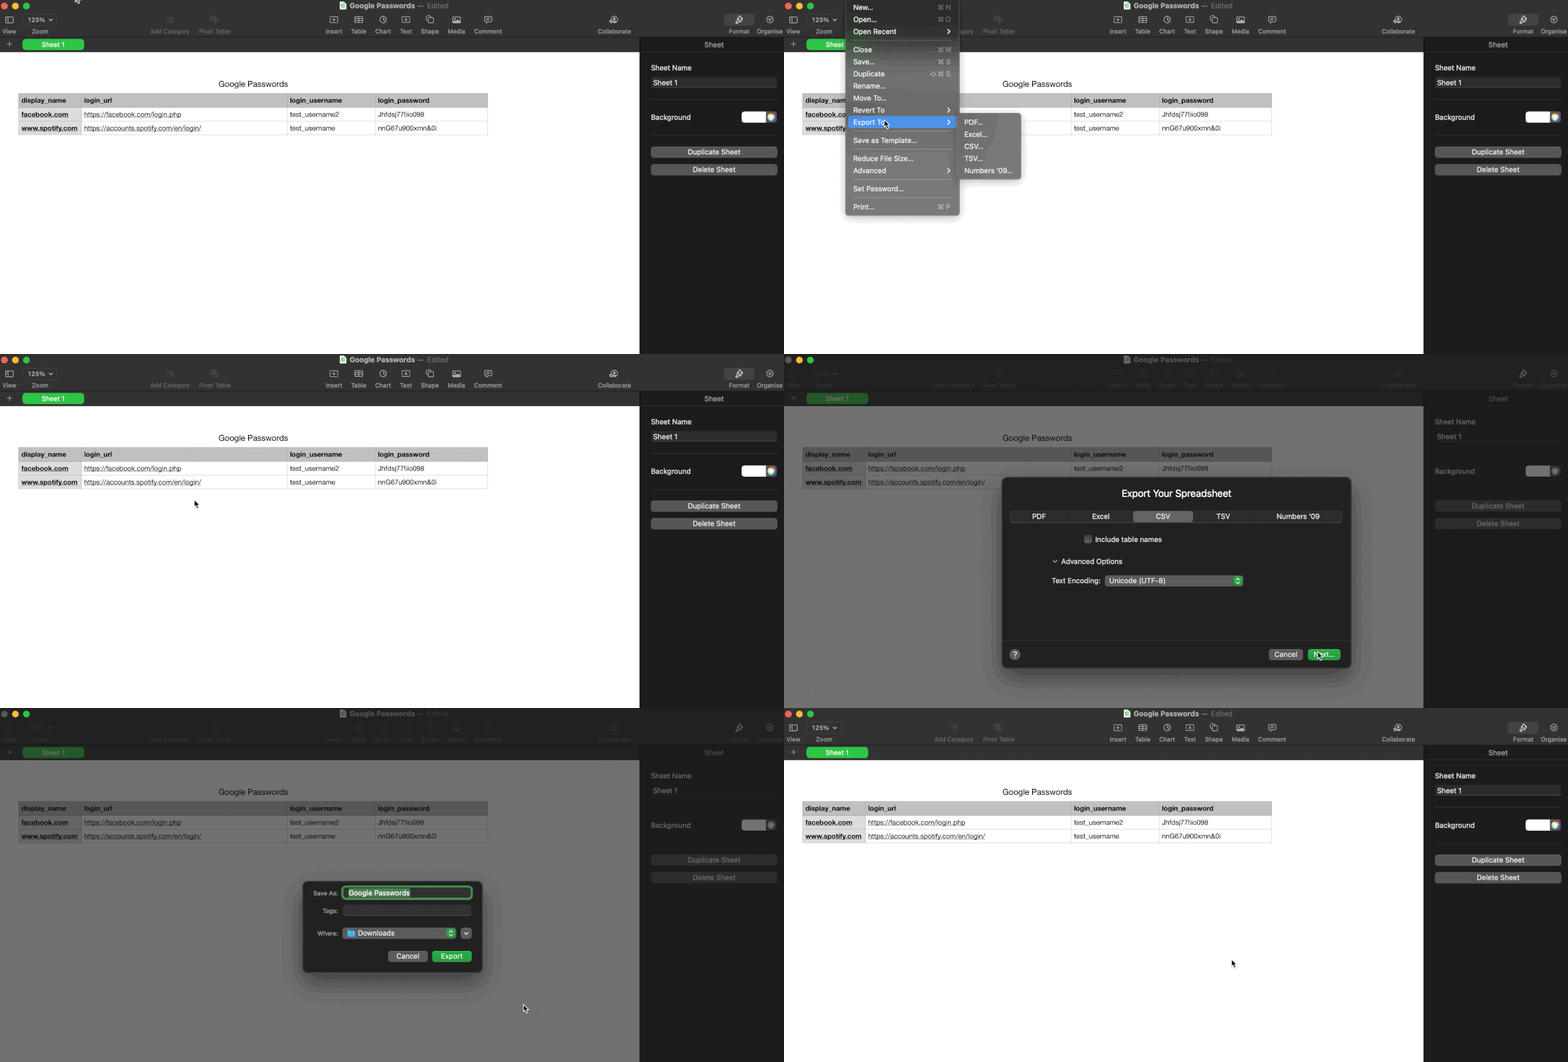
Rename only the header text and keep other things as is. You can also delete the passwords if you don’t use them or don’t want to import those to the Synology C2 Password account. Make sure you’ve deleted the entire row (not only the password) to prevent any conflict during the import process. Once you make the above-said changes, export the file as CSV. If you are using Numbers, Go to File -> Export to -> CSV -> Click on Next and then, click on Export. Don’t change the Text Encoding. Keep it as Unicode (UTF-8).
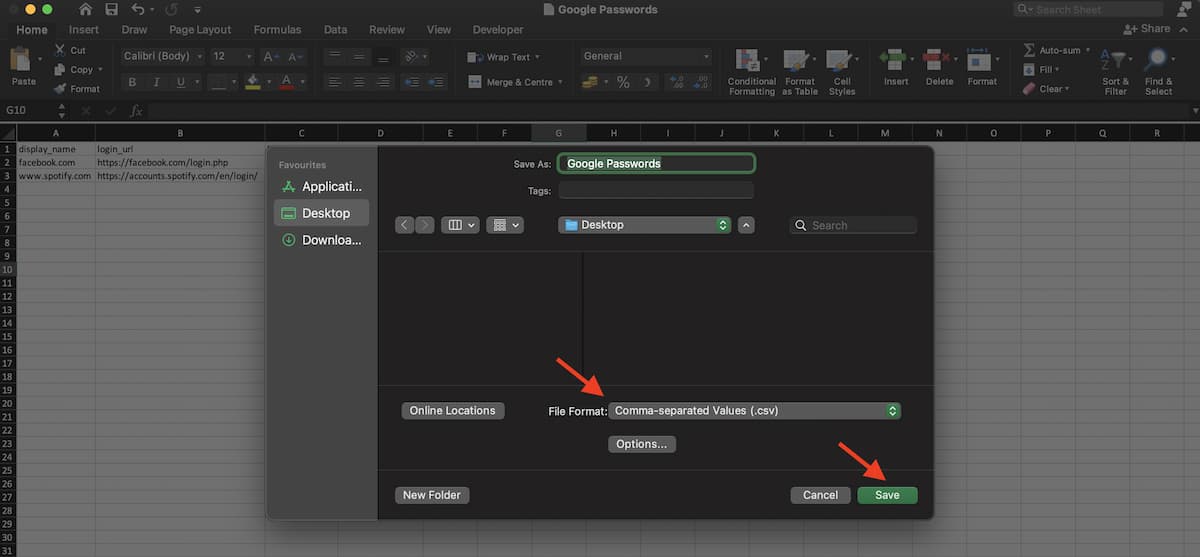
If you use Google Sheets, simply click on File -> Download and select Comma-separated Value (.csv). If you use Microsoft Excel then, Go to File and click on Save as. Make sure you select the file format as a Comma-separated Value (.csv). Click on the Save button.
Importing the CSV File in C2 Password
Once you modify and save the CSV file, now it’s time to import the data to the C2 Password Account. To import the data:
- Login to C2 Password account.
- Enter the C2 Encryption key.
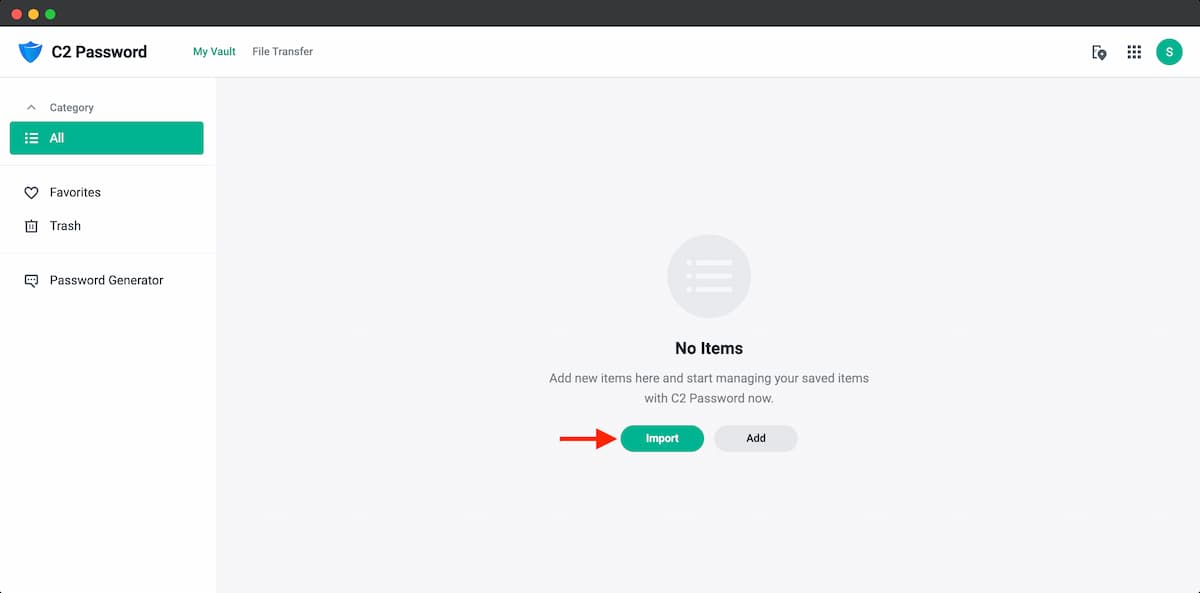
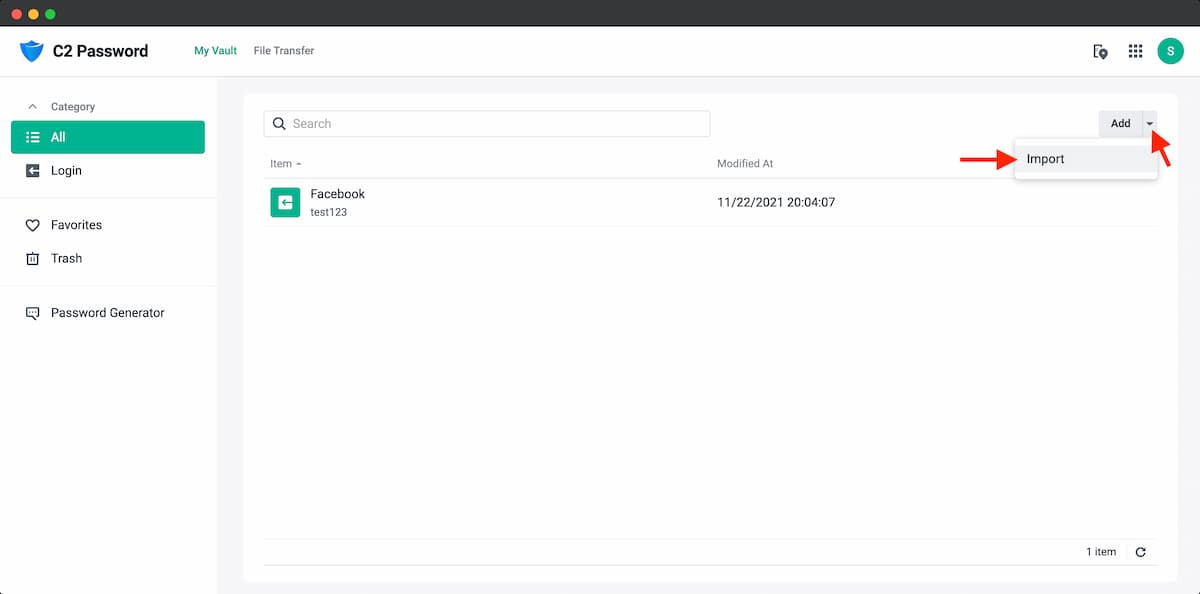
- Click on the Import button on the home screen.
- If you’ve manually added the password earlier, click on the down arrow icon on the Add button and select Export.
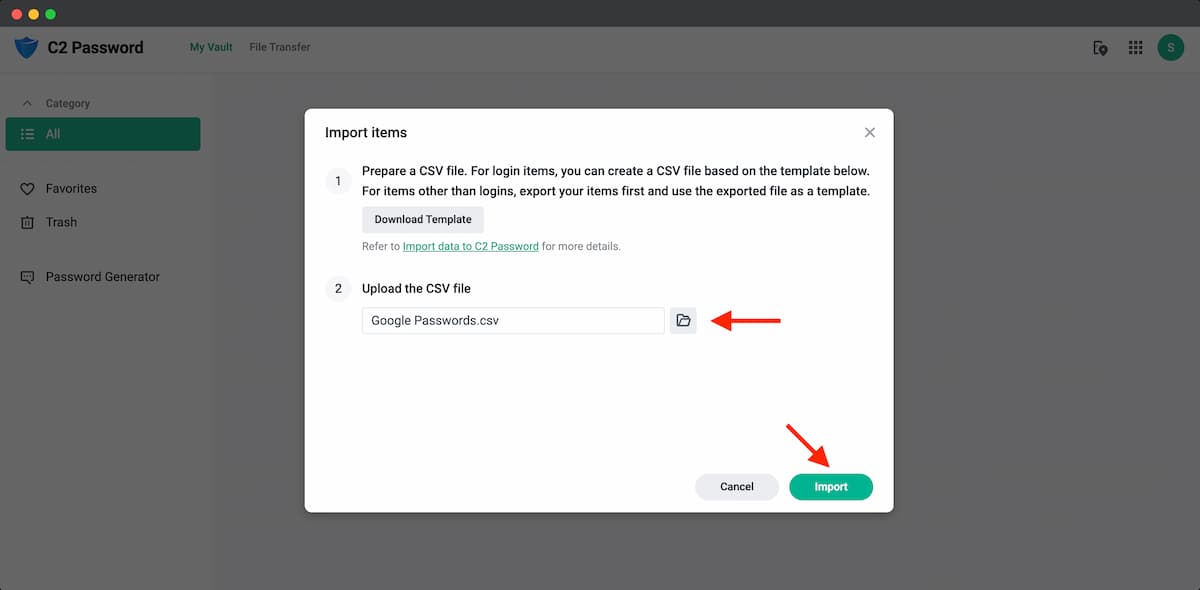
- Select the CSV file you exported in the earlier step by clicking the Folder icon.
- Select Import.
- Once you click on the Import button, all your data present in the CSV file gets imported to the C2 Password account.
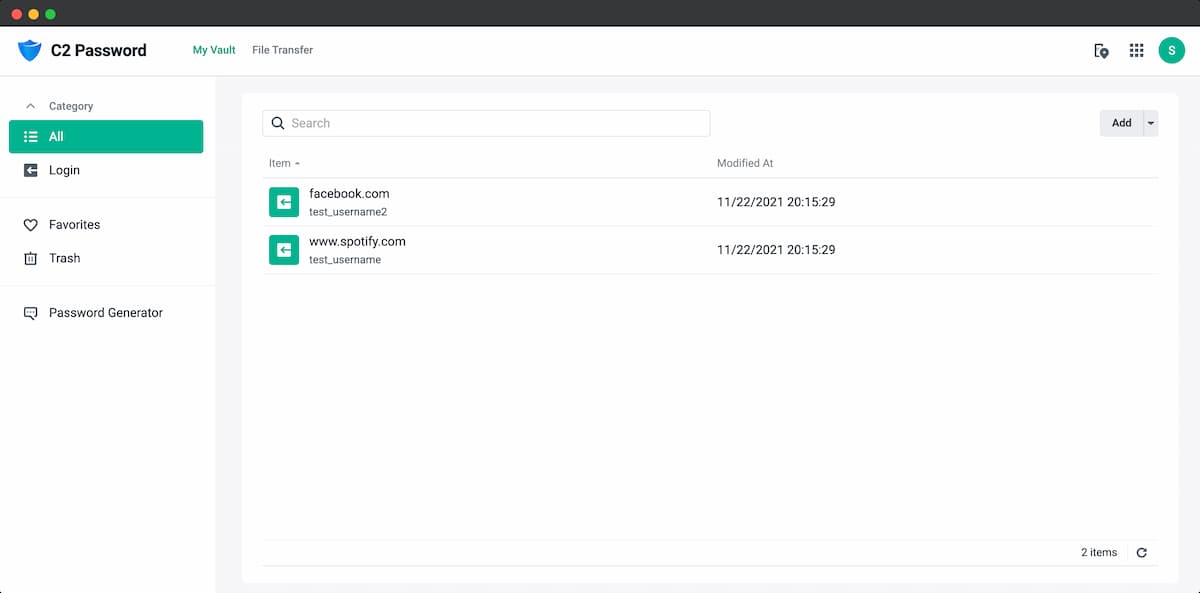
After the successful import, each CSV record will be displayed as an item in the My Vault section of your C2 Password account. Make a note that, C2 Password does not check if the items in the uploaded CSV file are duplicates. This means that if an item already exists in My Vault, importing the same item will create a duplicate Vault item. So, before importing, either you can edit your CSV file to include only the new Vault items or Clear the My Vault (Delete all manually entered data) prior to the import operation.
That’s it. You’ve successfully imported all your Google Passwords to the Synology C2 Password account. If you’ve any questions, do let me know in the comments. I’ll answer those as soon as I can. Follow GizArena on Facebook and Twitter for the latest tech updates.