Popular hosting providers such as Hostgator, Inmotion etc are using softaculous to install WordPress. The installation process is easy and won’t take more than 20mins. Below tutorial will guide you to install WordPress in cPanel.
Installing WordPress in cPanel using Softaculous.
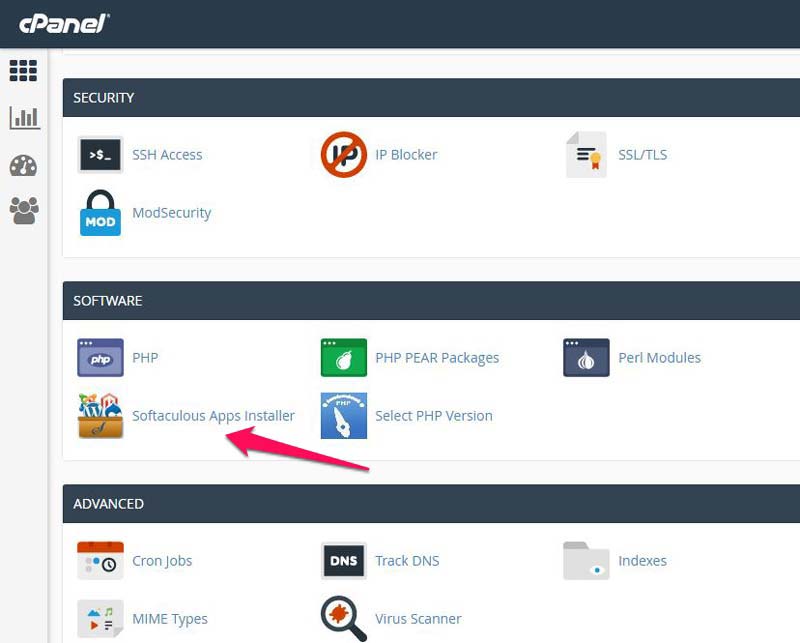
- Login to cPanel. Once you logged in, Click on ‘Softaculous Apps Installer’ which can be found under ‘Software’ category.
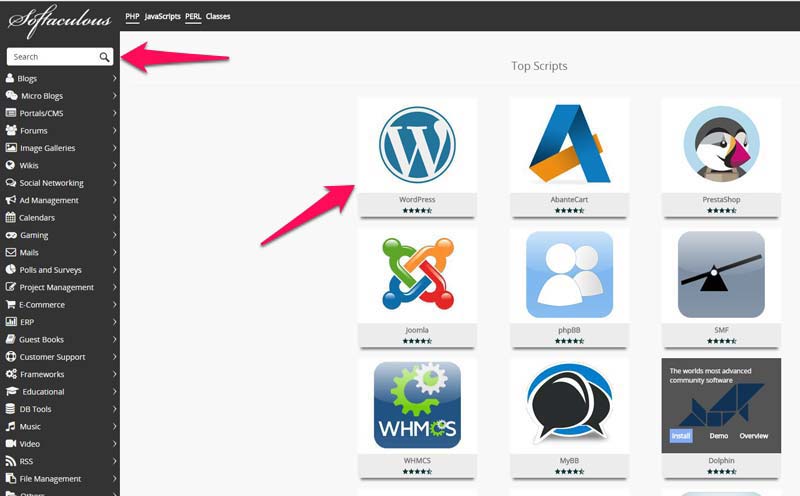
 2. You will find the number of apps under ‘Top Scripts’. Open WordPress by clicking on it.
3. Click on the “Install” which redirects you to the setup page.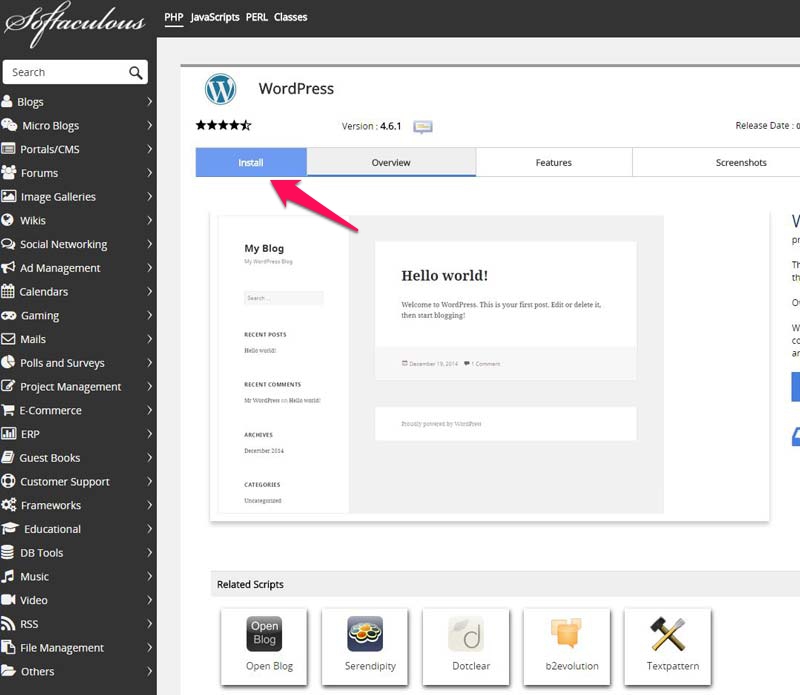
4. Now fill the required details to setup the WordPress.
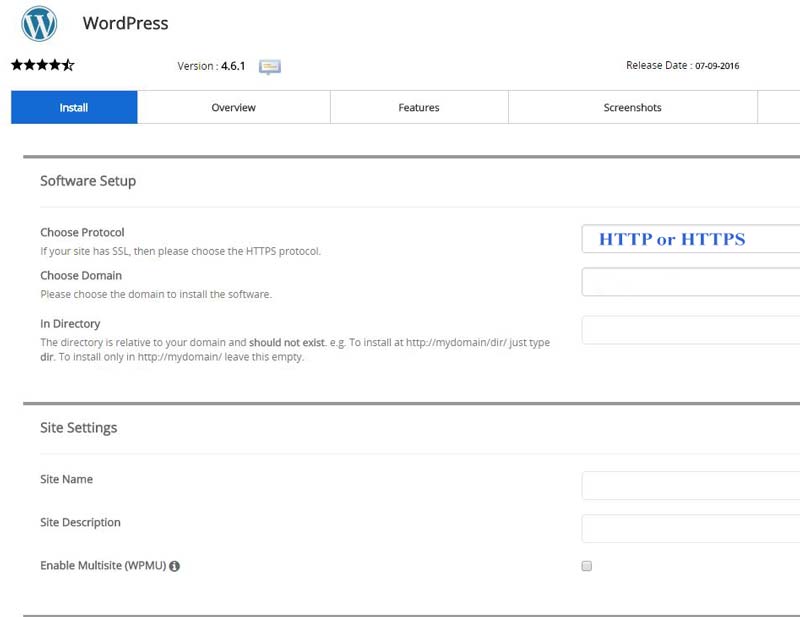
Software Setup
Choose Protocol : There are two protocols HTTP and HTTPS. If you bought SSL certificate then select HTTPS else just select HTTP. Select either www.yourdomian.com or yourdomain.com. You can find more info on HTTPS and SSL certificate here.
Choose Domain : Select your domain under which you want to install the WordPress.
In directory : If you want to install WordPress in the root directory (Ex: yourdomain.com) then keep the input field blank. If you want to install WordPress in a different directory (Ex: yourdomain.com/blog) then write BLOG in the input field.
Site Settings
Site Name : Enter your website name.
Site Description : Enter your website description. Anytime you can change the name and description.
Enable Multisite (WPMU) : This allows you to run multiples sites on a single WordPress installation. Enable this only if you want to run multiple sites.
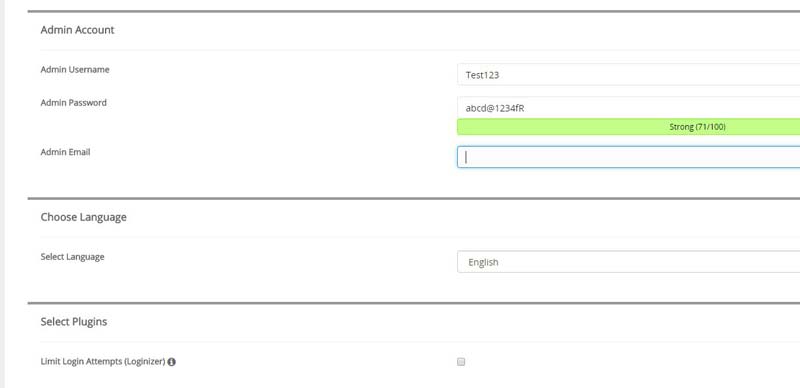 Admin Account
Admin Username : Enter the admin username.
Admin Password : Enter the password. Make sure your password is strong. For better protection password score should be above 90.
Admin E-mail : Enter a valid email address. You will receive the important notifications, password reset information etc to the entered email id.
Language : Select the language.
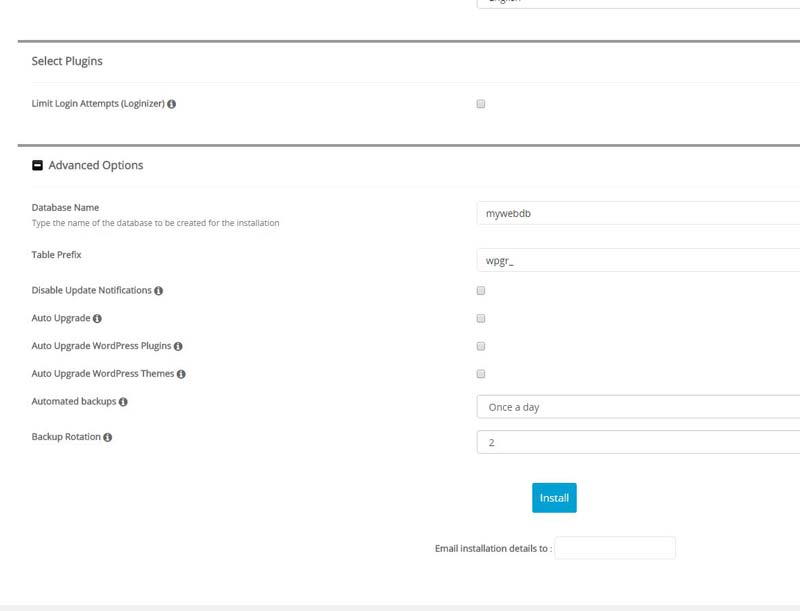
Select Plugins
Advanced Options
Database Name : Enter database name.
Table Prefix : Leave it as is or change if needed.
Auto Upgrade : This will update the WordPress to newer version automatically when the new update is available. You can also update the WordPress manually using the control panel. You will receive the notification once the new update is available.
Auto Upgrade WordPress Plugins : This will automatically update the plugins to the newer version when a new update is available. Sometimes updated plugins may not be compatible with your customized theme. Therefore we suggest you keep this option disabled. Anytime you can manually update the plug-ins.
Auto Upgrade WordPress Themes : We recommend you to test the updated theme before updating it on the live host. So keep this option disabled.
Automated Backups : To be on a safer side, Select “Once in a day”. You can also copy the backups to your PC using cPanel file manager. Previous backups also can be deleted to save the space.
Backup Rotation : This is the maximum number of automated backups for this installation. If the maximum limit is reached Softaculous will delete the oldest backup of this installation. Select backup rotation as 4.
Email installation details to : Enter the email address to receive the installation confirmation email.
Now click on the “Install” button at the bottom. Installation time depends on the size of the script and also some other factors. So please be patient. You will receive the confirmation message along with the administrative URL once the installation is done.
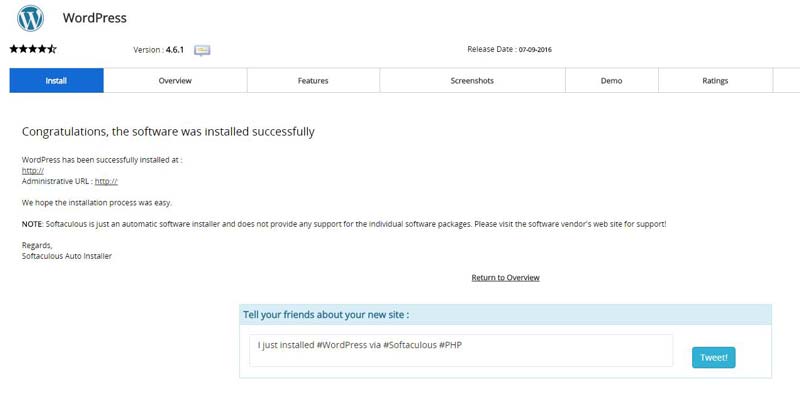
This completes the installation process. The above tutorial is conducted on Hostgator. If you have any questions let us know in the comments.